
- What is a prototype?
- How to Create an Interactive Prototype
- Your Interactive Prototype is ready. What’s Next?
- How can a Interactive prototype be helpful in developing a Website or App?
- FAQs: Create an Interactive Prototype with Uizard and Deploy it with TiinyHost
Prototypes are important when it comes to development. They help you in understanding your app at early stage and spares you from hustling for last minute changes. Interactive prototypes are a step above and help simulate the user behavior on the app too.
Whether you are a pro designer, just getting started with your designing journey or you are a developer with an amazing idea, prototyping will become important step in your journey. In this article, I’ll walk you through how you can create an interactive prototype easily with Uizard and share it for review.
What is a prototype?
A prototype is a visual representation of a product, in this case, a website or an app, in its pre-development state. It resembles closely the functionality and interactivity of the final website or app.
Prototypes allow you to test and iterate on various aspects of the final website, including the user experience, design elements, interactivity, redirection, and layouts on different screen sizes.
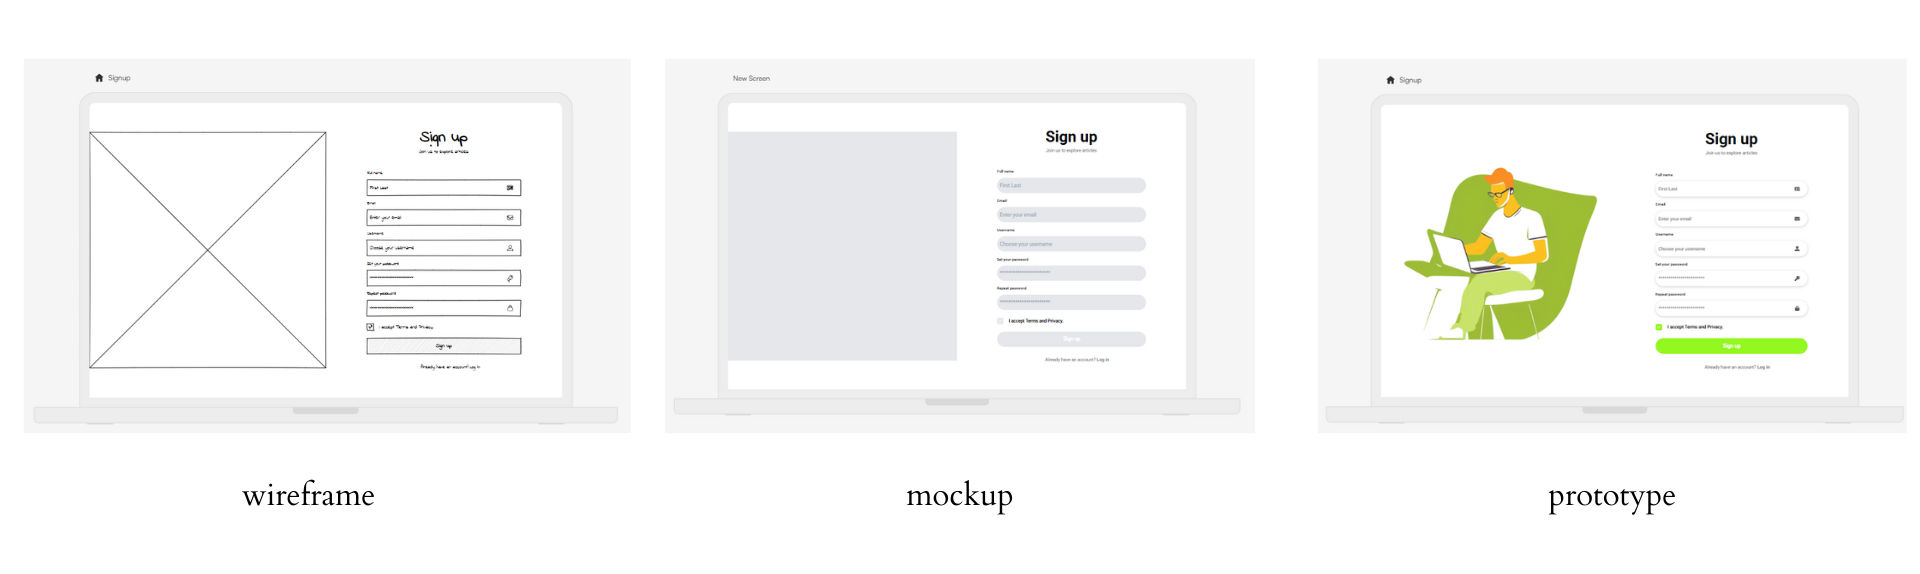
Low-fidelity and High-fidelity designs
Low-fidelity (lo-fi) designs are the simplest form of design. They do not take much time to create and have a very basic design overview of the final product, mainly focusing on the functionality and layout. These can be hand-drawn or made using digital software. A wireframe can be considered a low-fidelity design and can be an early stage for a prototype.
High-fidelity (hi-fi) designs focus more on details in all aspects, and resemble the final product that will be presented to the users or clients. They are detailed and interactive, and allow for getting feedback and iterating on the final functionality of the product. A mockup, a prototype and an interactive prototype can be forms of high-fidelity designs. While the former two do not have interactivity, they still give an idea of functionality in general.
What is an interactive prototype?
As we stated earlier, a prototype is a design that closely resembles the final product, and an interactive prototype is a high-fidelity design. An interactive prototype allows you to check the functionality of various buttons and objects on the screen and define their functionality before the design is handed off to the developer team.
This allows developers to provide early feedback, and iterations can be made. An interactive prototype can start as a wireframe drawn on paper and then move through the mockup, prototype, and interactive prototype stages.
How to Create an Interactive Prototype
There are many tools available out there that can help you create wireframes, mockups, and prototypes. Some require you to make things from scratch, and many new products allow you to iterate on some fundamental elements that have been created. For this tutorial, I will give you a walkthrough on how you can make an interactive prototype using Uizard.
Uizard allows you to create interactive prototypes in three different ways.
- From scratch: Uizard allows you to scan hand-drawn wireframes and make them digital. Then, you can iterate on them.
- Using their templates: They have a wide range of templates which can help build prototypes faster.
- Using AutoDesigner: Uizard has an AI-powered tool that allows you to create an interactive prototype by prompting or from sketches, and even screenshots.
Step 1: Define the Purpose
Before you begin drawing or jotting down your ideas to create the prototype, you need clarity about the aspects of your project. Always include the why, how, and who for your project. You need to know the types of users, types and kinds of layout and how it solves the problem. Understand the scope and determine your goals by asking some of these questions:
- Understand the target audience for the website or app
- What type of features would be needed according to web and app layouts
- What would be the underlying functionality that you would showcase in the prototype?
For my sample project, I built an app that gives me a new and random article daily. I needed an intuitive website design that would be accessible to all age groups and aesthetically pleasing.
Step 2: Work on the functionalities
Before you sit down to create the prototype, it is best to get clarity about the functionalities you want to include.
- Get an idea of what type of pages you need. For example, suppose it is a social media site. In that case, you know that you need Sign Up, Login, Social Feed and Personal Profile pages. You can have other pages too, as per your needs.
- Next, you will need to create and note down the user journeys. An app can have multiple flows, depending on how the users interact, they have to be directed through various pages. For example, after signing up, the user is redirected to the personal profile page to update their profile, and then they can click on a button to be redirected to the social feed.
Creating and fixing the functionalities and journeys will allow you to create designs more clearly, as you will now have a better idea of what screens will be needed and how they will be connected.
Step 3: Create the wireframes
Just thinking about the designs and how the layout will benefit no one. Pick a pen and paper, open your computer, and start sketching your layouts. Think about what kind of buttons and clickable items you need on each page and what layout you think will work best.
Sketching out your ideas allows you to create simple and complex concepts and understand what your prototype might look like. Once you are done sketching, you can upload photos of your hand-drawn designs or screenshots of your digitally drawn wireframes to Uizard to convert them into wireframes on the platform.
If you do not like sketching down your ideas on paper, you can use tools like Uizard and draw from scratch there. You can also use the basic templates available if you are a new designer (or belong to a non-designer background) and create wireframes from the templates setup, learn and experiment while you do that.

Step 4: Turn your wireframes into high-fidelity design
When you are done with your wireframes, it is time to turn them into prototypes. You can start styling your app. Ensure you follow the app’s brand guidelineswhen you do this.
Go to Magic > Wireframe> Turn Wireframe Mode Off.
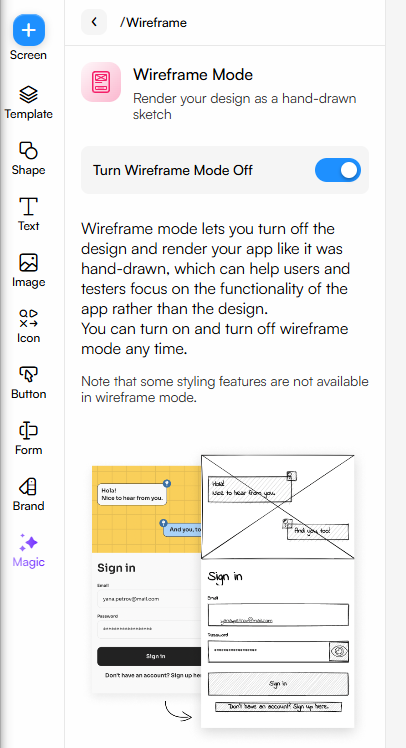
When you do this, your designs will be auto-updated with placeholder images and fields that can be styled according to your needs. You can also do this from scratch or using templates.
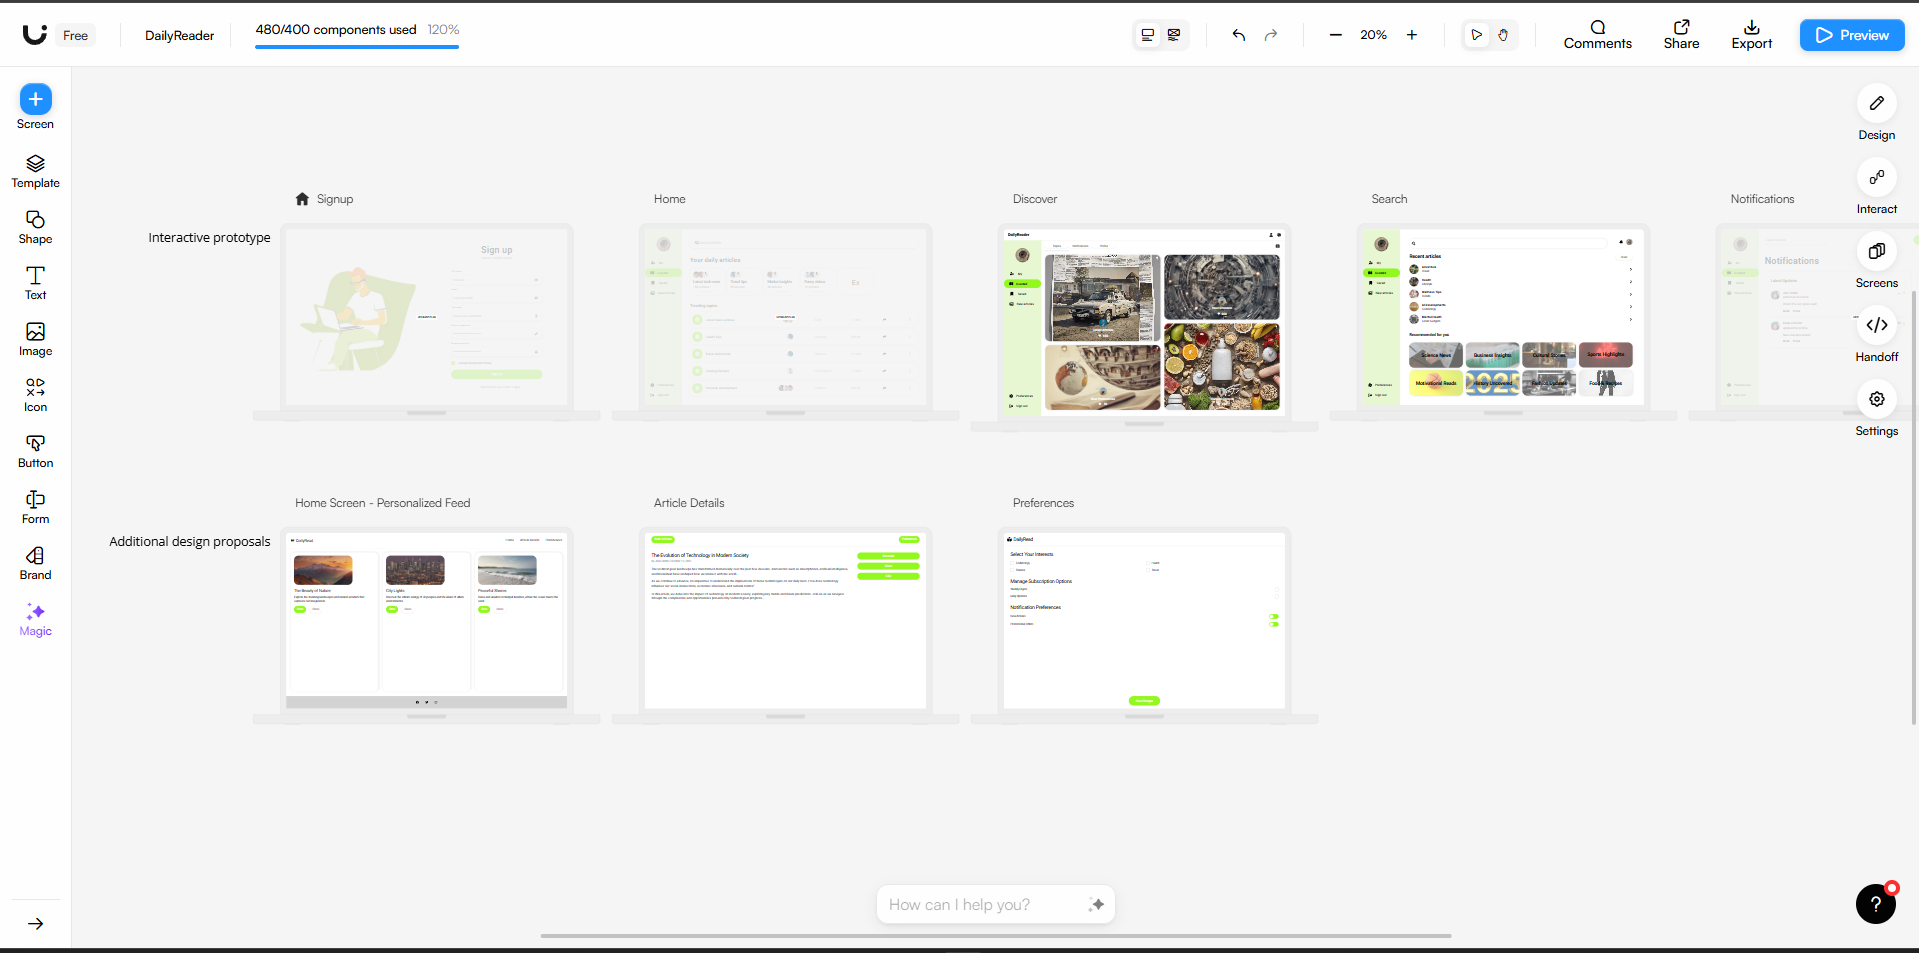
You can see the design of my sample app here:
Step 5: Create User Journeys for your Prototypes
It’s time to make the prototype interactive. All the functionalities and user journeys you noted in Step 2 will now be traced to your design. With Uizard, you can click on the elements and assets in the design and connect them to the screen where you want to take the user when they interact with the element.
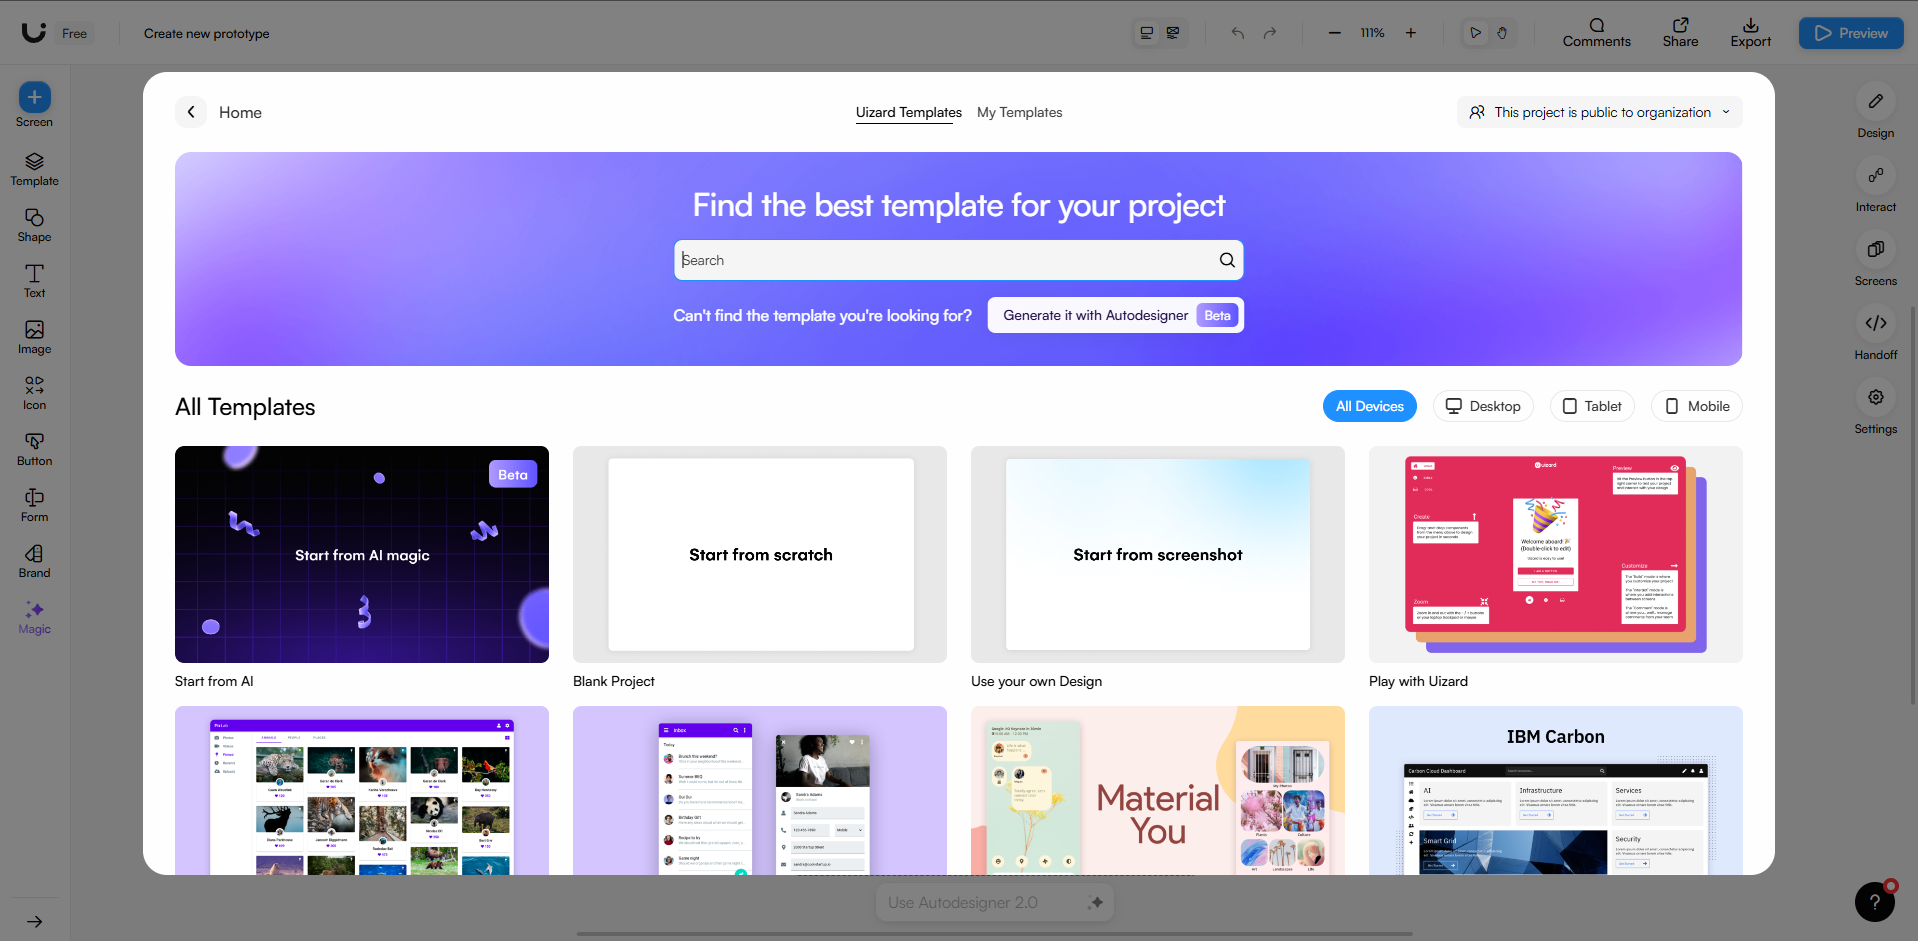
Alternatively: Create Your Interactive Prototype with Uizard AutoDesigner
Suppose you are building a project for yourself, have yet to hire someone on the design team, or want to pitch a product and create a prototype. In that case, you can use Uizard’s AutoDesigner to create interactive prototypes within seconds.
- Choose Create with AI
- Type in the type of app you want to build and select the devices for which you want to build the prototype
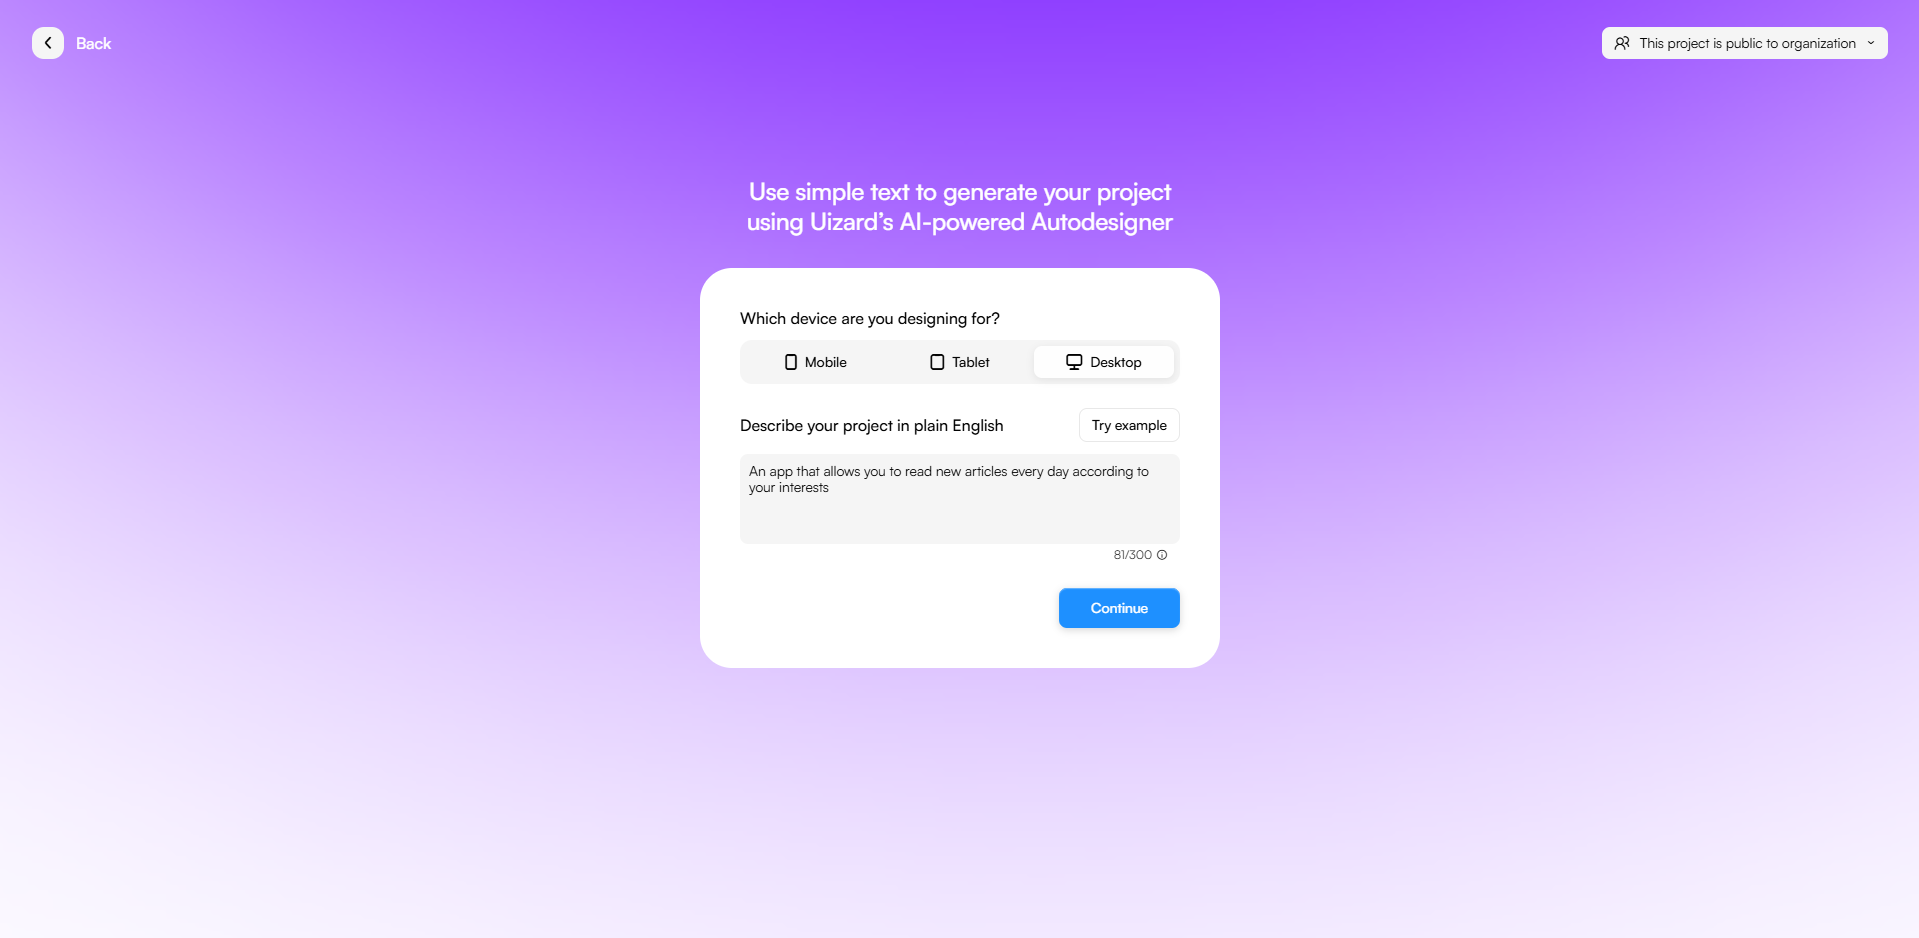
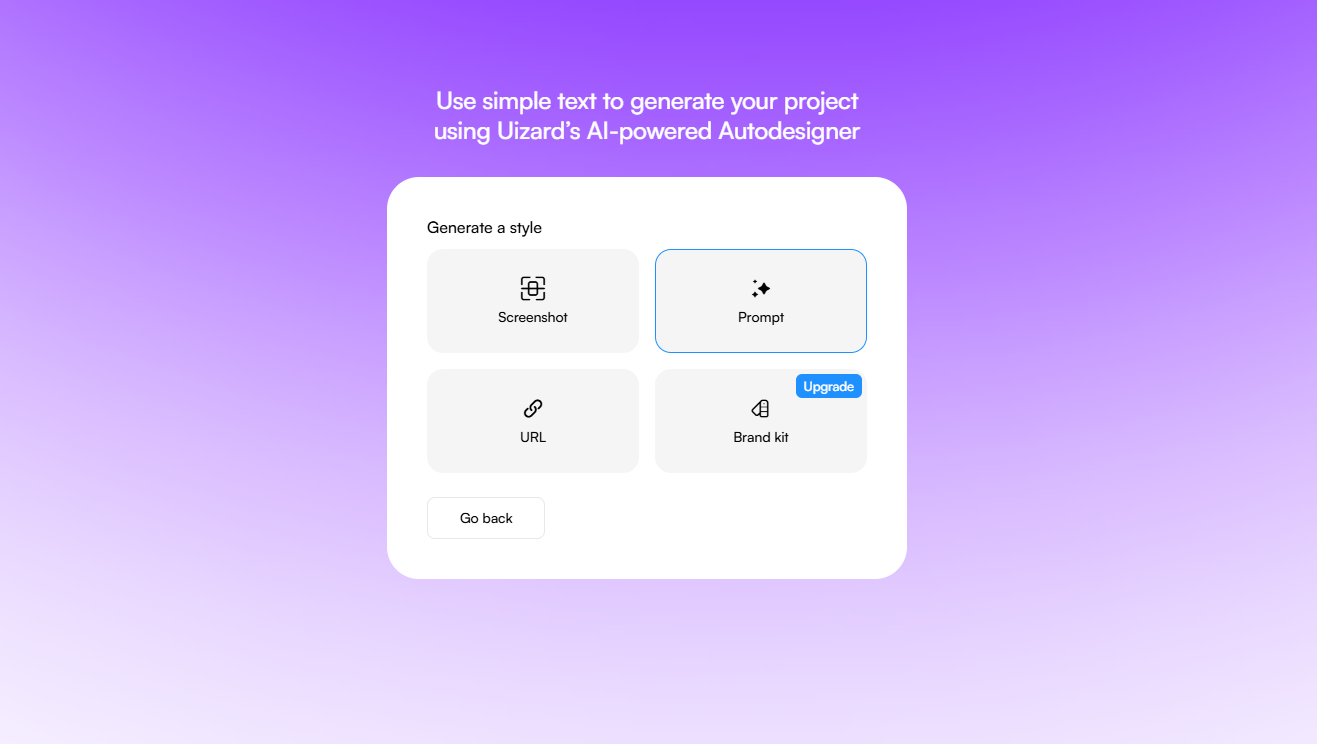
- Select how you want to build the app: It can be using a prompt, screenshots, any URL or by uploading the brandkit for references
- Select or randomise the themes
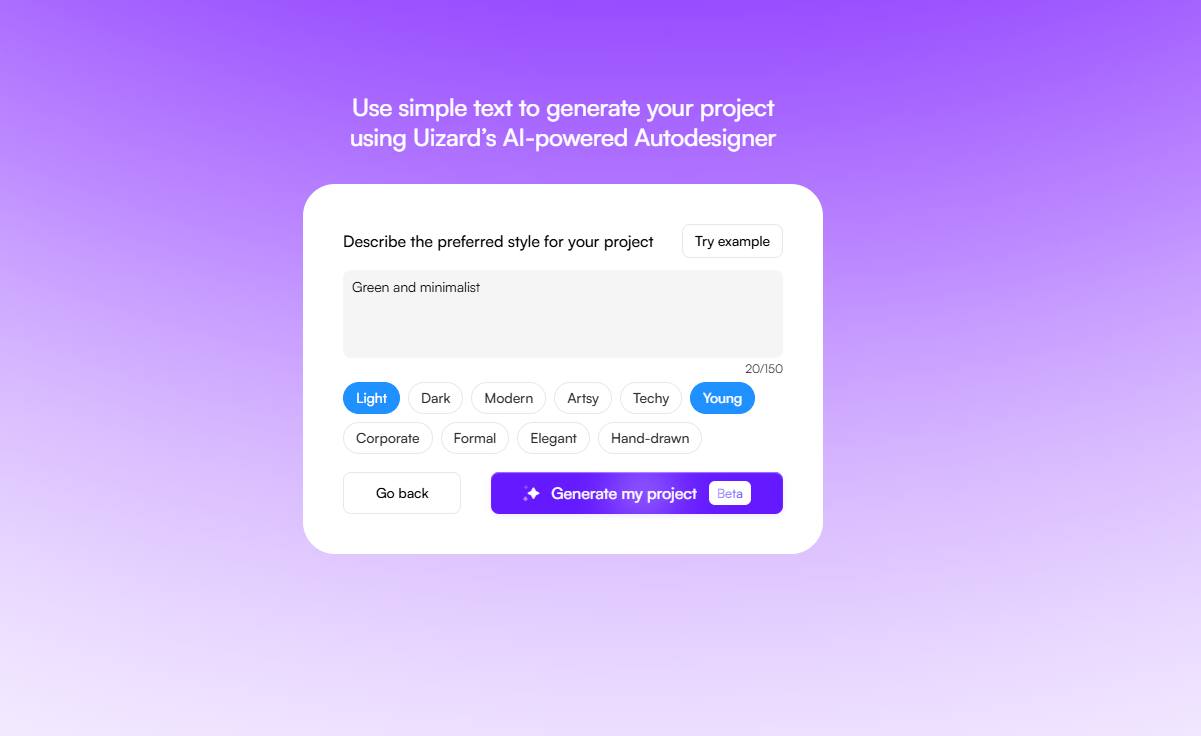
- Hit Generate
Your prototype is ready in seconds, with user journeys already created for you. With AutoDesigner, you can also add or remove screens and make changes in the design itself.

Your Interactive Prototype is ready. What’s Next?
Your interactive prototype is ready. It is time to share it with stakeholders and team members to get feedback and iterate upon the design. You can preview it in Uizard, but when sharing with stakeholders, it is a good practice to share a website with a custom domain. Here’s how you can share your design quickly. We will use Tiiny Host for this.
- Click on the Preview Icon
- Click on the Share button
- Navigate to “Embed”
- Click on the copy HTML Code
Share Your Interactive Prototype
Now we will host it on Tiiny Host. Tiiny Host allows you to share your prototypes with peers with just a link. It is easy to manage, share, get feedback and iterate.
- Visit Tiiny Host
- Log in or Sign Up, and click on the paste HTML code button
- Paste the code you copied from Uizard
- Here, you can connect your custom domain or write your desired link name to get a custom subdomain
- Hit publish, and your interactive prototype is ready to be shared
If you share the file with people and want to keep it private, you can set uppassword protection, too.
Gather Feedback and Iterate
When your prototype is live on Tiiny Host, you can share it with anyone with a link. Start gathering feedback from your peers, seniors, developers, and stakeholders and iterate upon your design to land a prototype that suits them best. Then, you can move to handing off the assets and designs to developers so they can easily build and publish the website.
How can a Interactive prototype be helpful in developing a Website or App?
- Helps in Getting Faster Feedback: A prototype lets the team understand the app’s functionality and workings early on. The team can gather feedback from peers before moving to the development stage, thus reducing labor.
- Minimises Errors Early: When giving feedback, the changes can be integrated early on. Errors in the user journey or any design or layout errors can be identified early on and notified to the team. This reduces the chances of error in the final product, reducing time to fix things at a later stage.
- Allows for better iteration and collaboration: With the interactive prototypes ready early on, they can be sent to stakeholders for feedback. The design and development team can work together to make changes in the assets early on so they won’t cause trouble in the development process.
- Speeds up and smooths the development process: With early feedback and the team collaborating early during the design phase, the handoff between the design and development teams becomes easier, and fewer design iterations are needed at a later stage.
FAQs: Create an Interactive Prototype with Uizard and Deploy it with TiinyHost
Do I need to know design tools to create an interactive prototype in Uizard?
Uizard is beginner-friendly. You can start with templates, hand-drawn sketches, or even use AutoDesigner to generate prototypes instantly.
Can I share my prototype with people who don’t have a Uizard account?
Yes. Export your prototype, embed the code, and share it via Tiiny Host. Anyone with the link can view it without needing Uizard.
Can I update my prototype after publishing it?
Yes. You can just publish the new edits in Uizard and it will reflect directly on your Tiiny Host link.

