
Knowing your audience is extremely valuable for a growing business. If you want to scale up your freelancing business, collecting analytics on your website is a must. Google Analytics combined with Google Tag Manager is the perfect solution.
Google Tag Manager collects data from your website visitors when they first land, navigate around the pages, click links, and sends it to Google Analytics where you can:
- Track who visits your page to see if you’re hitting the right target audience - Demographically and Geographically
- Track if visitors can navigate the website effectively
- To see what the conversion rate of people coming to the website and actually are interested in your services
- To see how organic and paid campaigns are performing
These insights will equip you with enough knowledge to better convert your website visitors and ultimately win more business.
In this tutorial, we will learn how to set up Google Tag Manager to collect visitor information on page views and link clicks and send it to Google Analytics for analysis.
Let’s get started.
Build a portfolio website
To add analytics, we of course need to have a freelancing business website.
If you have one already set up, feel free to skip this step.
If you’re looking to build one, I would recommend starting here. We put together a complete tutorial to walk you through creating an effective landing page or portfolio for your freelancing business. It also includes full source code.
Create a Google Tag Manager Account
Google Tag Manager allows you to quickly start collecting data from your website automatically and start sending it to any number of services. In this tutorial, we will specifically send the data to Google Analytics but you could send it to any number of services listed here.
With that, let’s create a new Google Tag Manager account:
- Navigate to Google Tag Manager here
- Select Web as the target platform
- Enter in your website URL and click Create

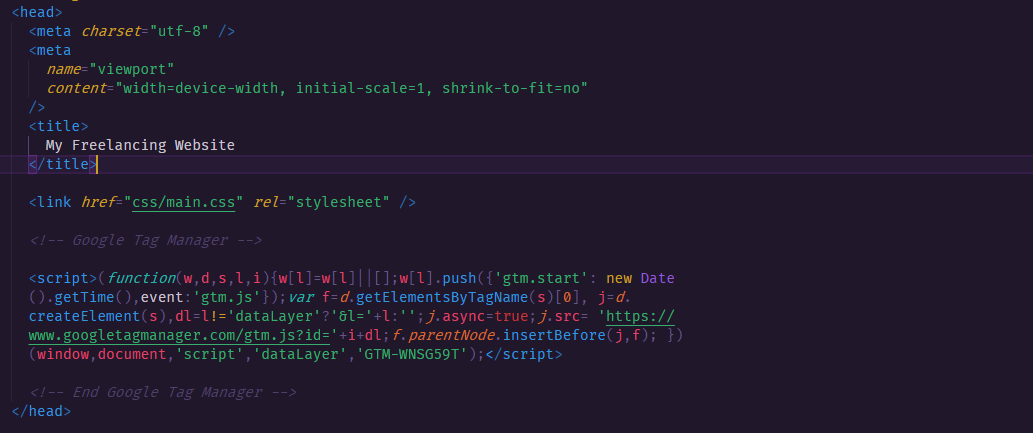
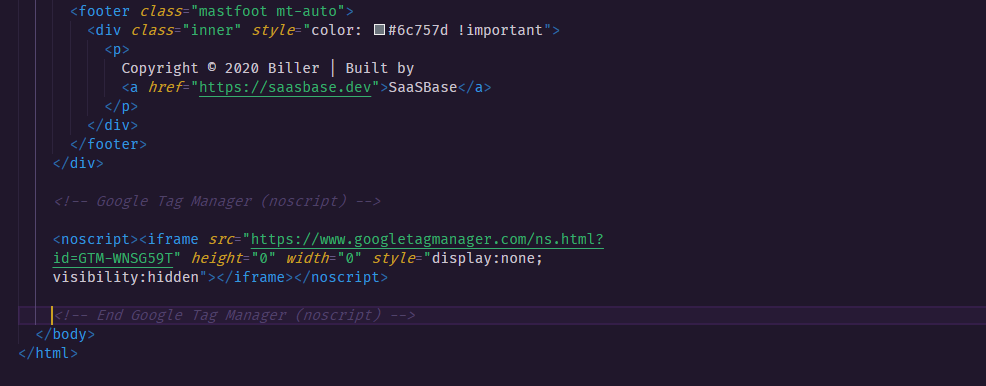
Google will set up your account and generate two code snippets for us to install into our webpage. This is how the Tag Manager collects information.
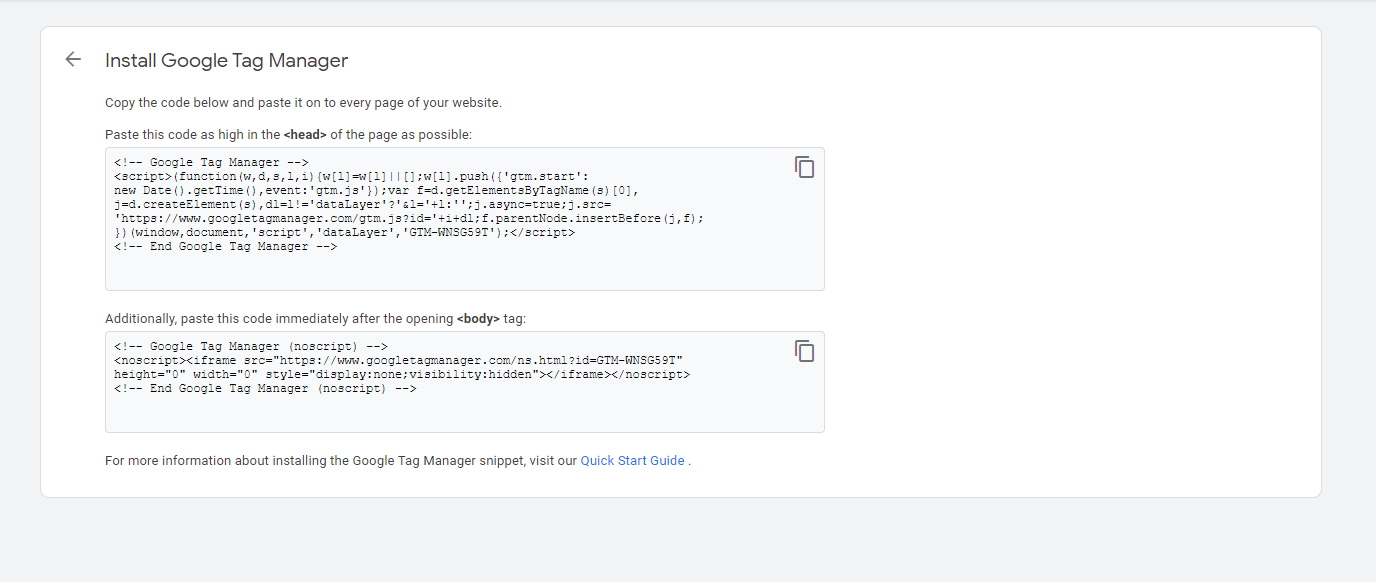
Open up website code, in the head tag, copy and paste the provided code snippet like so:
In the body tag, copy and paste the second code snippet like so:
Create a Google Analytics Account
Now that we have the Tag Manager set up, we can create a Google Analytics account and property. A Property is any product from where the information will be collected - a web app, a mobile app etc. An Account can hold multiple Properties. So, imagine having your product available on web, app store and being able to collect insights from all of those data sources under a single Account.
In this tutorial, we will create a Google Analytics account that will collect data from our web property.
- Go to https://analytics.google.com/analytics/web/
- Enter an Account Name
-
Enter a Property Name
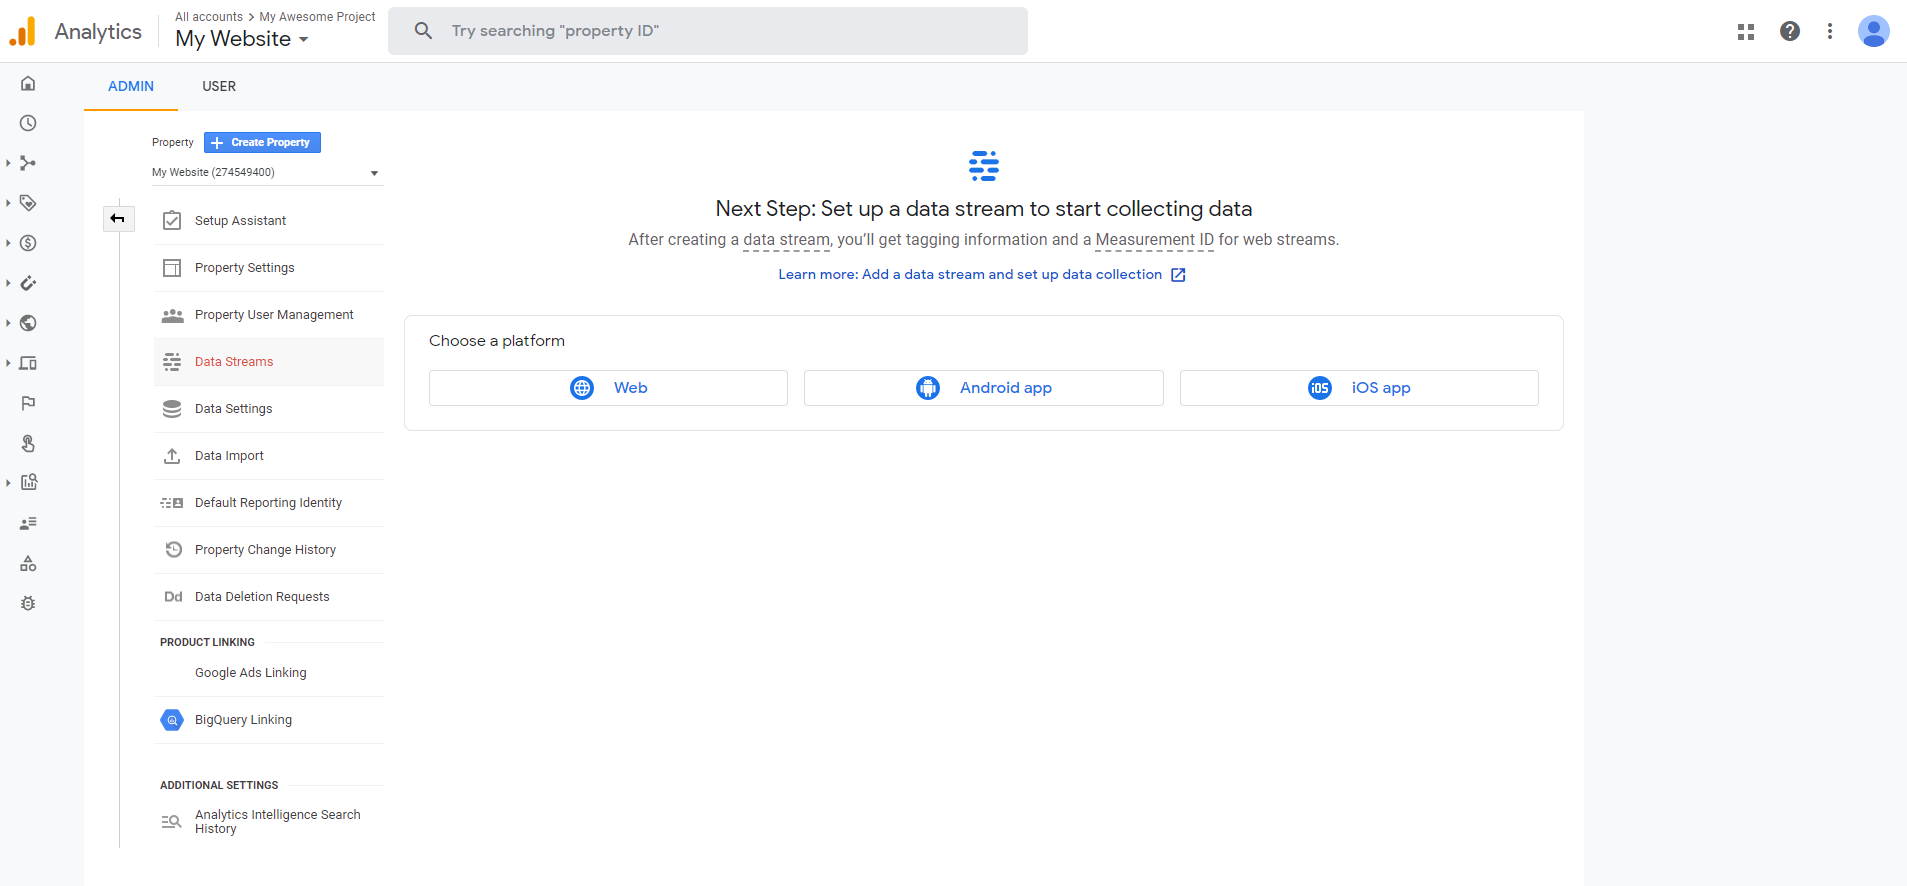
- We will add a Web Data Stream by clicking on the Web platform
- Enter in the website URL and hit Create
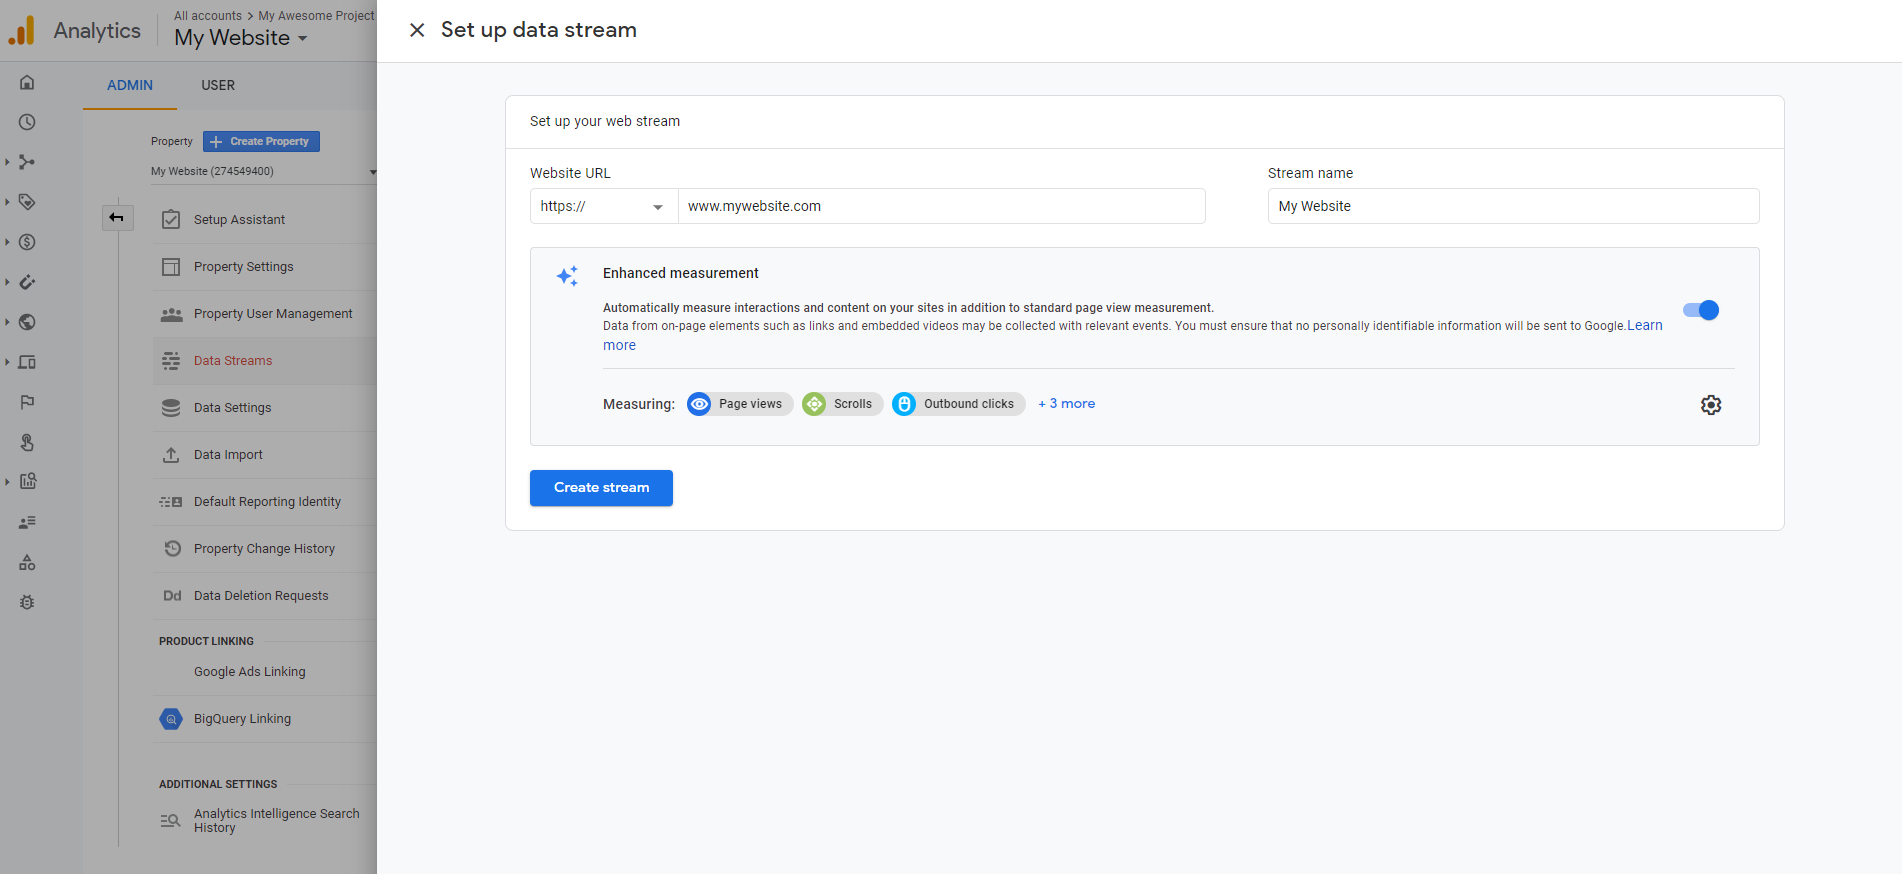
Once successfully created, we will receive a unique Measurement ID that we can use in Google Tag Manager to install Google Analytics in the next step.
Install Google Analytics on Google Tag Manager
Since we have both accounts created, we can now link Google Analytics to Tag Manager.
- Open the Google Tag Manager
- Click Tags > New
- Click Tag Configuration and select GA4 Configuration
- Paste the Measurement ID from the previous step
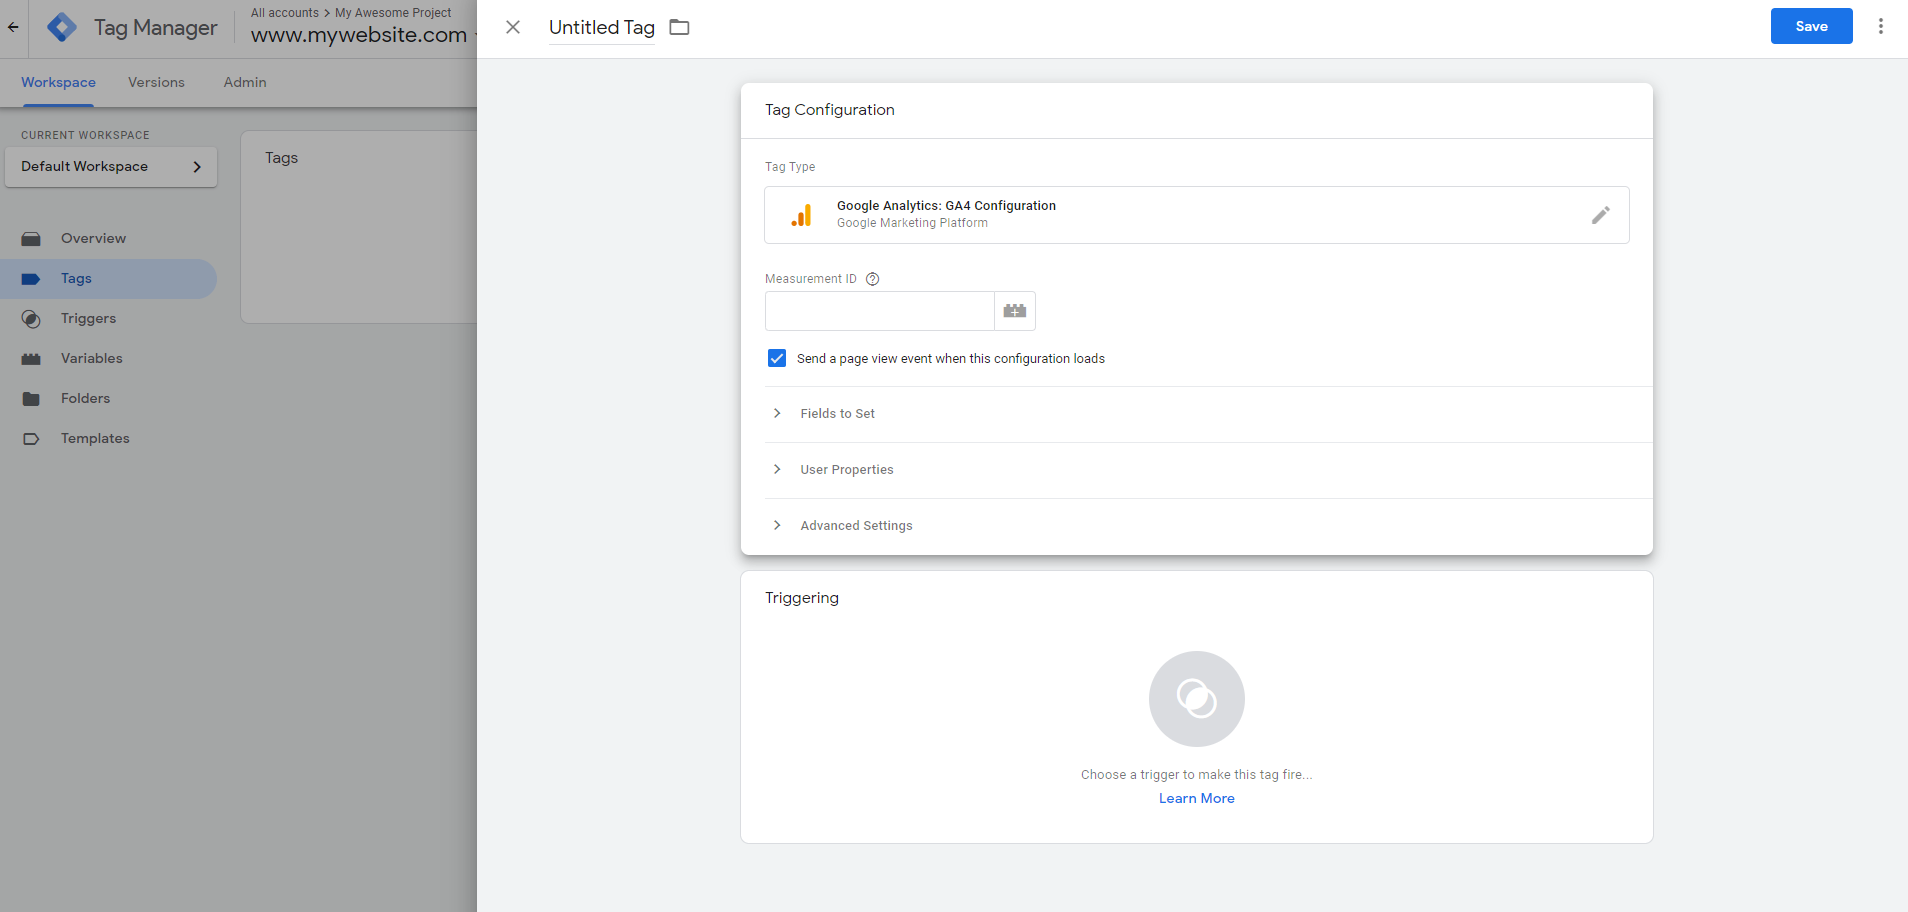
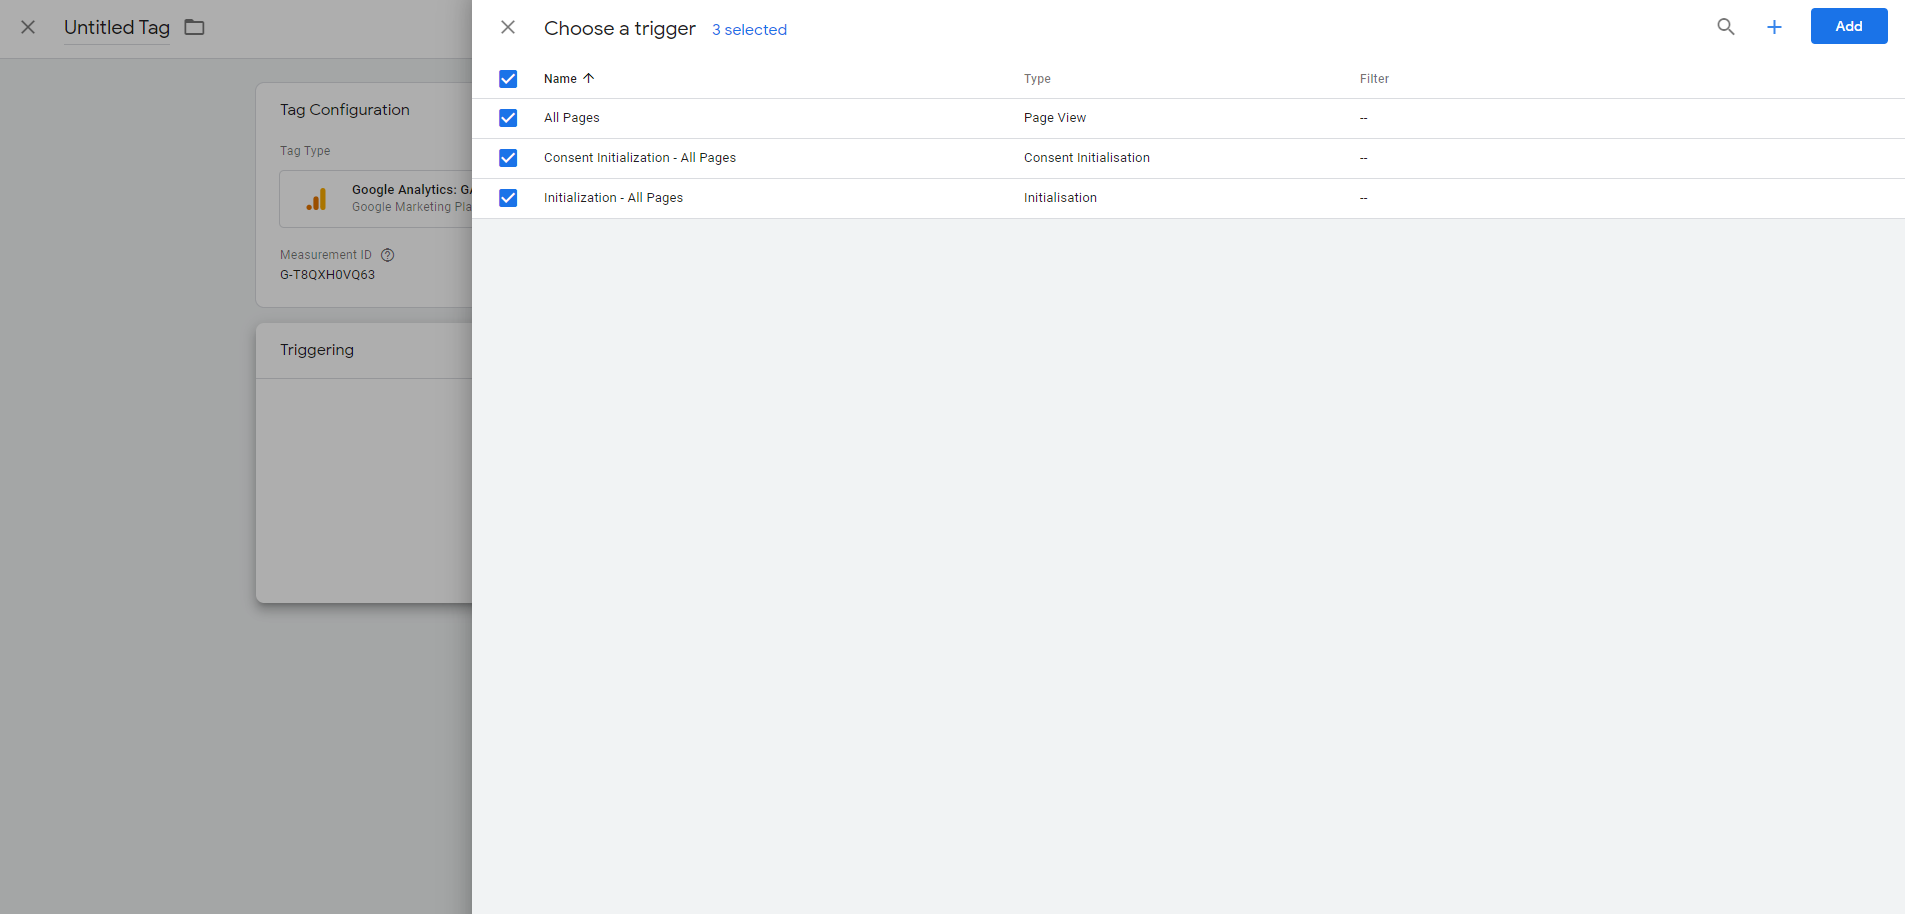
- Enable all the triggers in the Choose a Trigger section
- Click Add
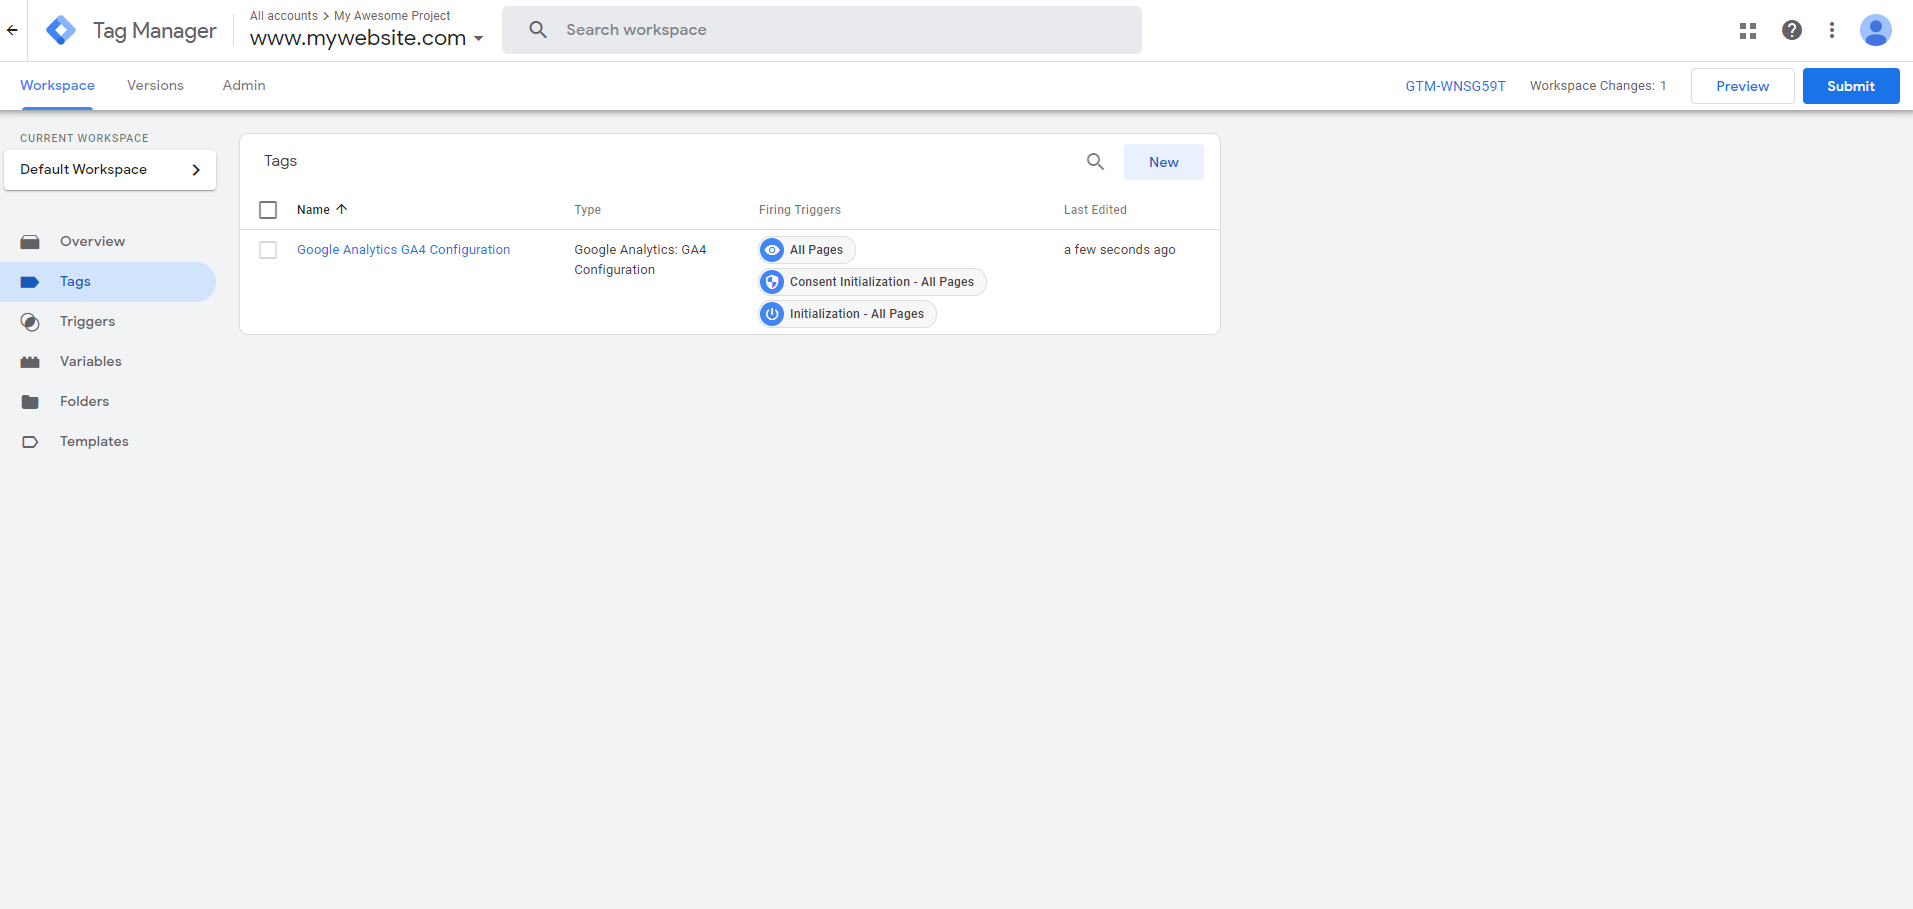
The Google Analytics tag is now added and will fire on all pages.
Track all link clicks
Being able to collect page-related information is great but we can go further and capture events when someone clicks on links on the page. This is extremely useful when trying to record conversions on your page i.e., how many visitors ended up booking a meeting on Calendly for example.
Tracking Link Clicks with only Google Analytics is very cumbersome. Using Google Tag Manager makes this super easy.
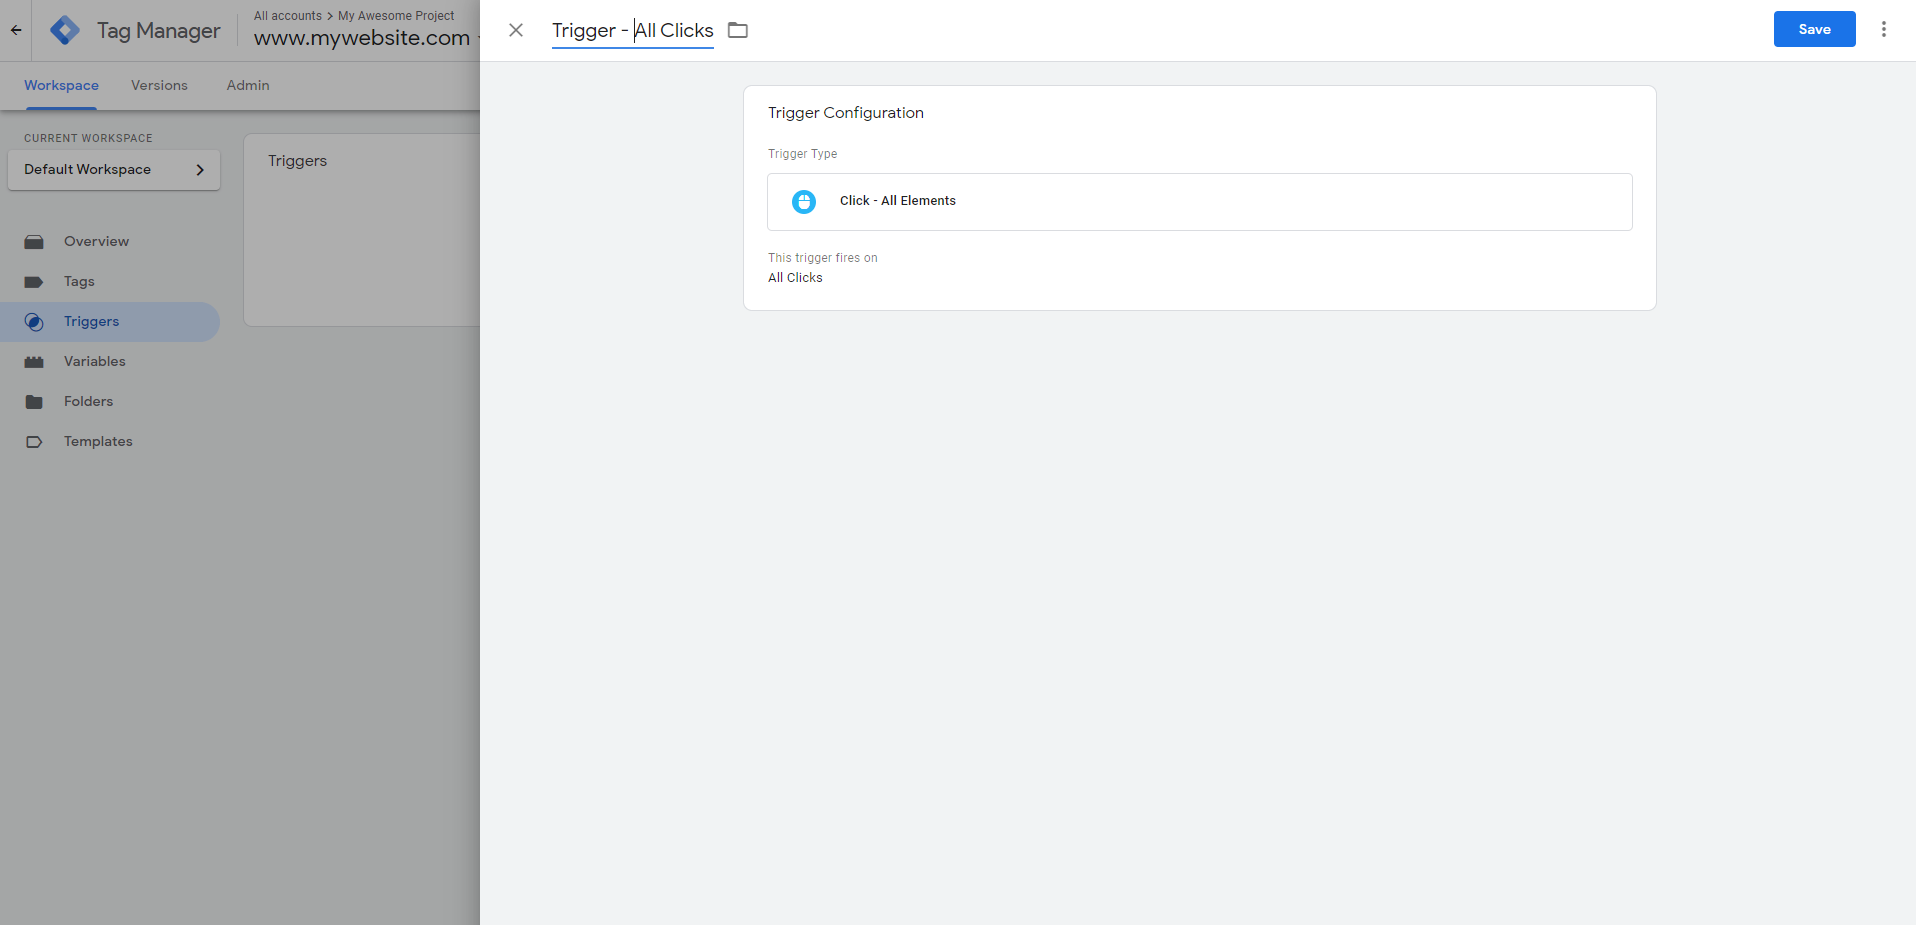
- On your Google Tag Manager account, add a new Trigger by clicking on Triggers > New
- Make sure the Trigger Type is Click - All Elements
- Click Save
We are now mostly done with the setup. All we need to now do is publish changes by clicking the Submit button on the top right and then hitting Publish.
With that, the Tag Manager should start collecting data and retroactively send it to Google Analytics Dashboard.
Note: The dashboard data typically takes a day to show up so you might have to wait and check back later
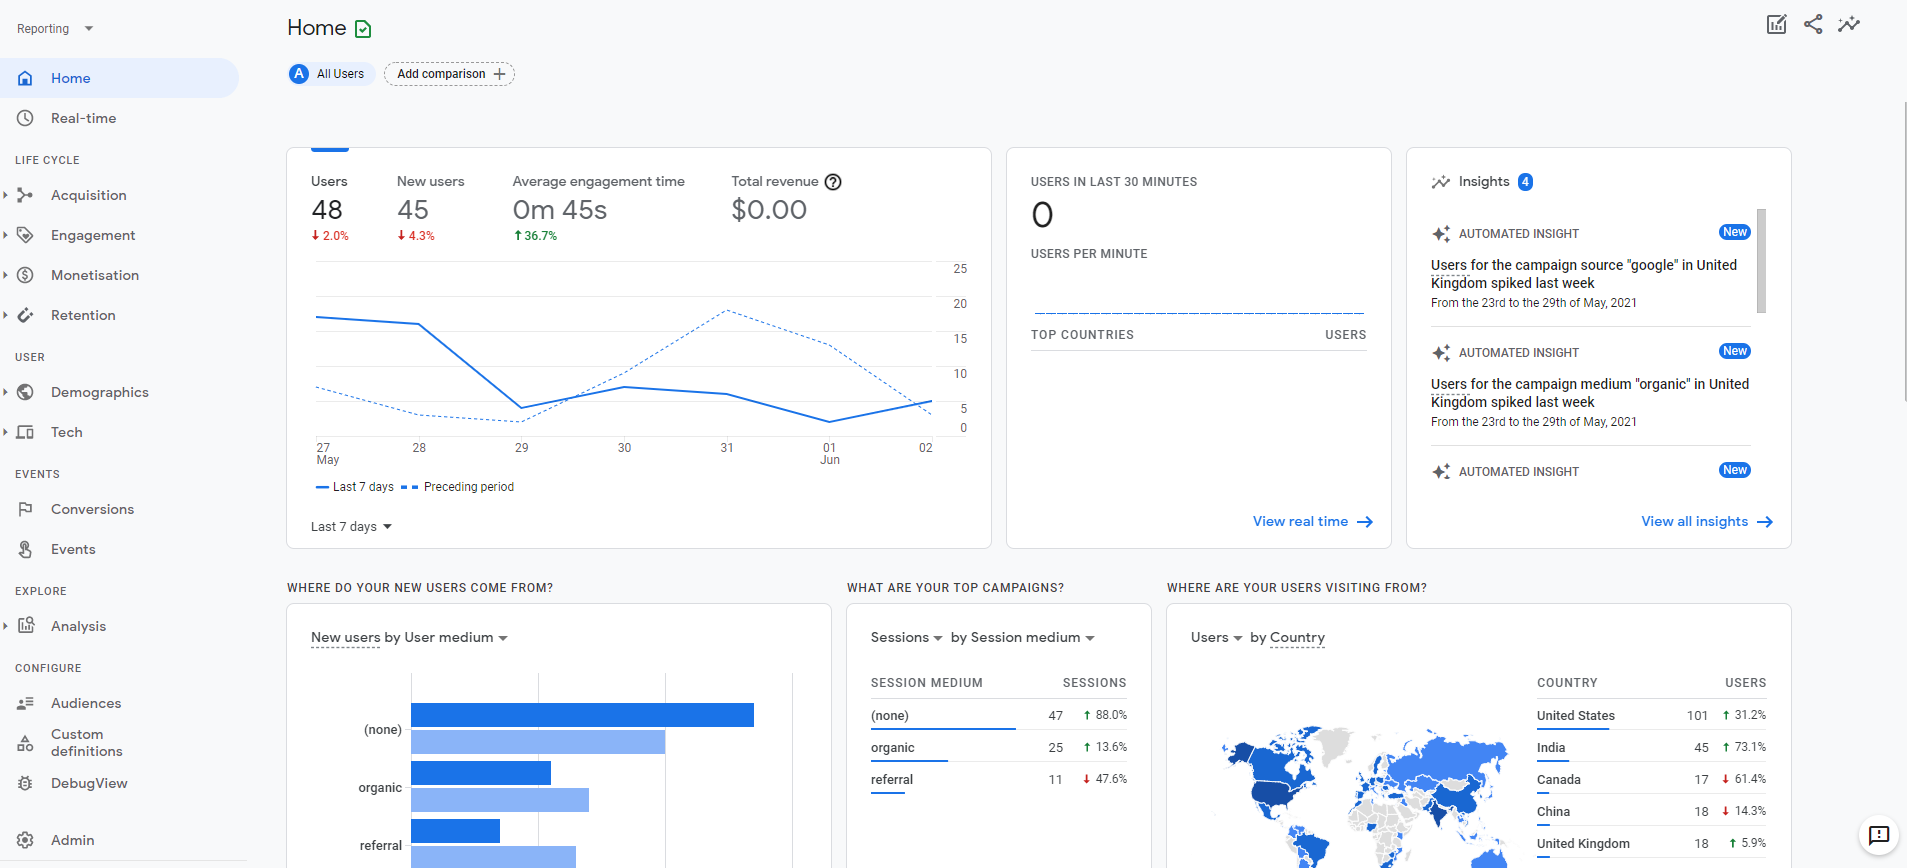
Perfect! Now we have a live view of all the visitors on our website that we can analyze and learn from. This is my dashboard view.
Final Thoughts
In this tutorial, we learned how we can use Google Analytics and Google Tag Manager to very easily start collecting information about our website visitors. The insights gathered will be immensely useful in getting new clients and growing the business. Google Analytics is very useful but very daunting at first glance. Google has a great course on learning the basics of the platform that you watch for free here.
Cheers!

