
- Know Your Website
- Creating a GitHub Account
- Creating a New Repository
- Adding your files to the repository
- Enable GitHub Pages
- Accessing the Deployed Site
- Updating the Website
- Adding a Custom Domain (Optional)
- Alternatively, Just Upload and Host
- FAQ: Hosting Your Website on GitHub?
Getting started with website hosting can feel overwhelming, especially if you’re new to it. You’re probably looking for affordable and accessible solutions to test your website and its features.
Having a free, easy-to-update option—that’s not just a dream!
GitHub Pages is the perfect solution for static sites if you want to see the results while still building your website.
You can host one site per account from your repository, and the cherry on top? It’s completely free!
Know Your Website
Typically, there are two kinds of websites: Static and Dynamic.
GitHub supports hosting a static website but if you have a dynamic website, you can choose another service that can provide you with better functionalities and support.
If you have a static website, keep moving along.
Creating a GitHub Account
The primary step to hosting your website on GitHub is creating an account. If you already have one, feel free to skip to the next step.
You can sign up for free on GitHub.com by filling out their registration form and verifying from the email address you registered from. There are other paid options for GitHub, but a free account will be more than enough for a simple website.

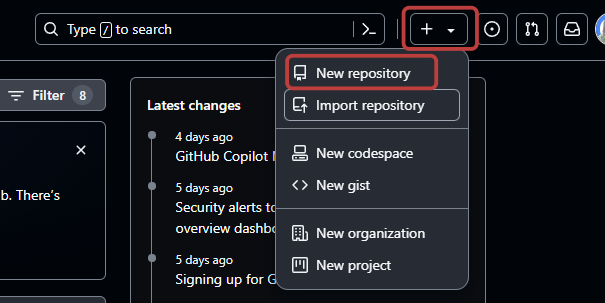
Creating a New Repository
On the top right-hand side of the website, there is a ‘+’ sign available. On clicking that, you will find the option to create a New Repository, which will redirect you to the page where you can fill in details for your project.
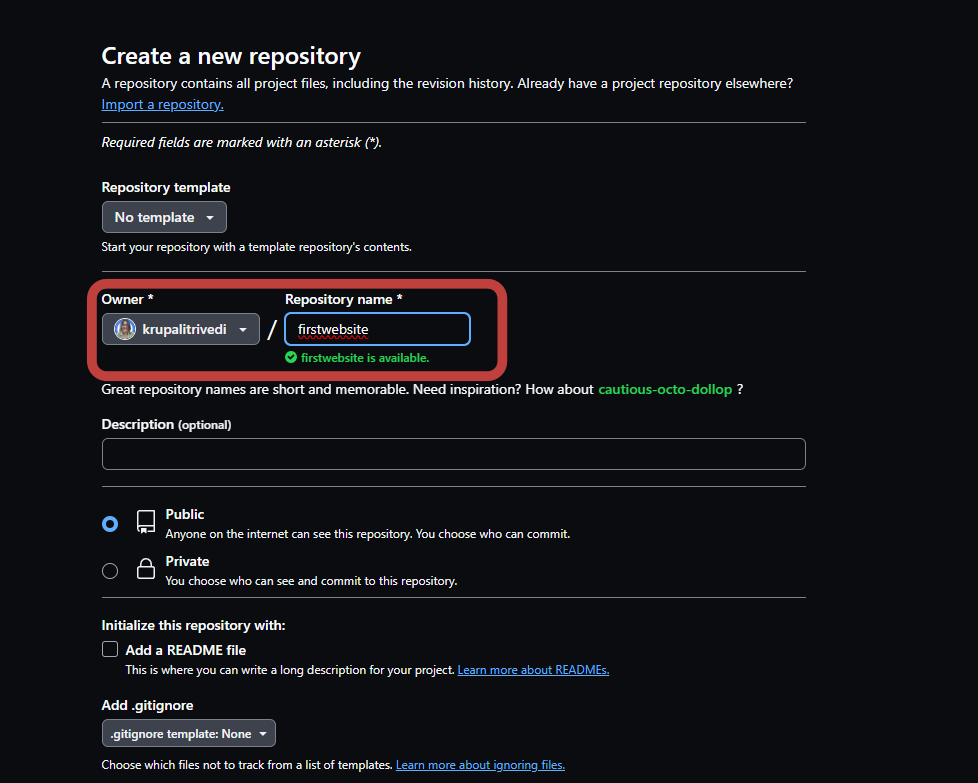
Further, fill in the repository name you want; I have written “firstwebsite” to showcase what it looks like. You can fill in the description if you would like and then scroll down and click on Create Repository.
Keep in mind to keep your repository public.
Adding your files to the repository
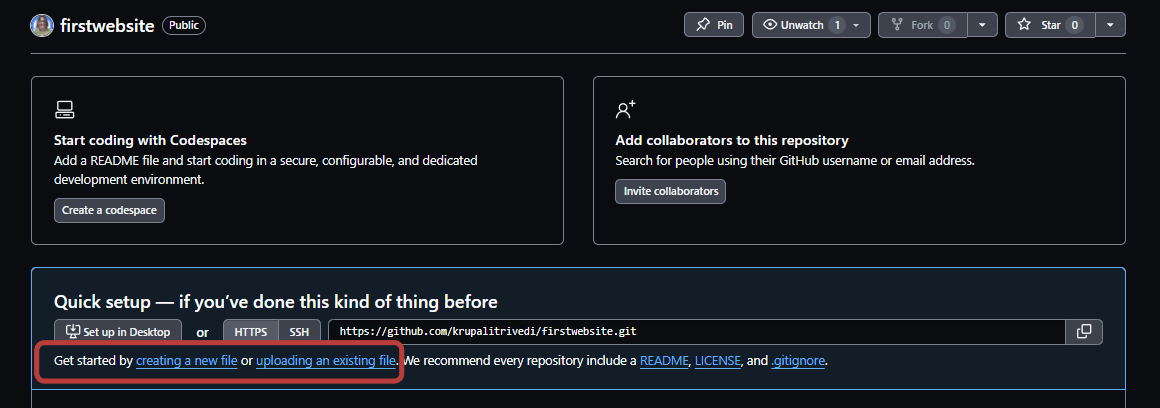
The repository is empty by default, and this is a location where we can create or upload the websites to deploy them further. You can have individual files or folders but keep in mind GitHub will search for index.html or index.md files for hosting.
Now, you can upload your files from your device through drag and drop or by clicking uploading an existing file.
If you prefer to do the same using GitHub CLI, you can use the following code:
git remote add origin https://GitHub.com/<username>/<websitename>.git
git branch -M master
git push -u origin master
Remember to replace <username> with your username and <websitename> with the name you’ve entered as your repository name.
Enable GitHub Pages
We are just one step away from seeing the website live.
You need to enable GitHub pages so that we can access the hosted website
For that, follow the steps below:
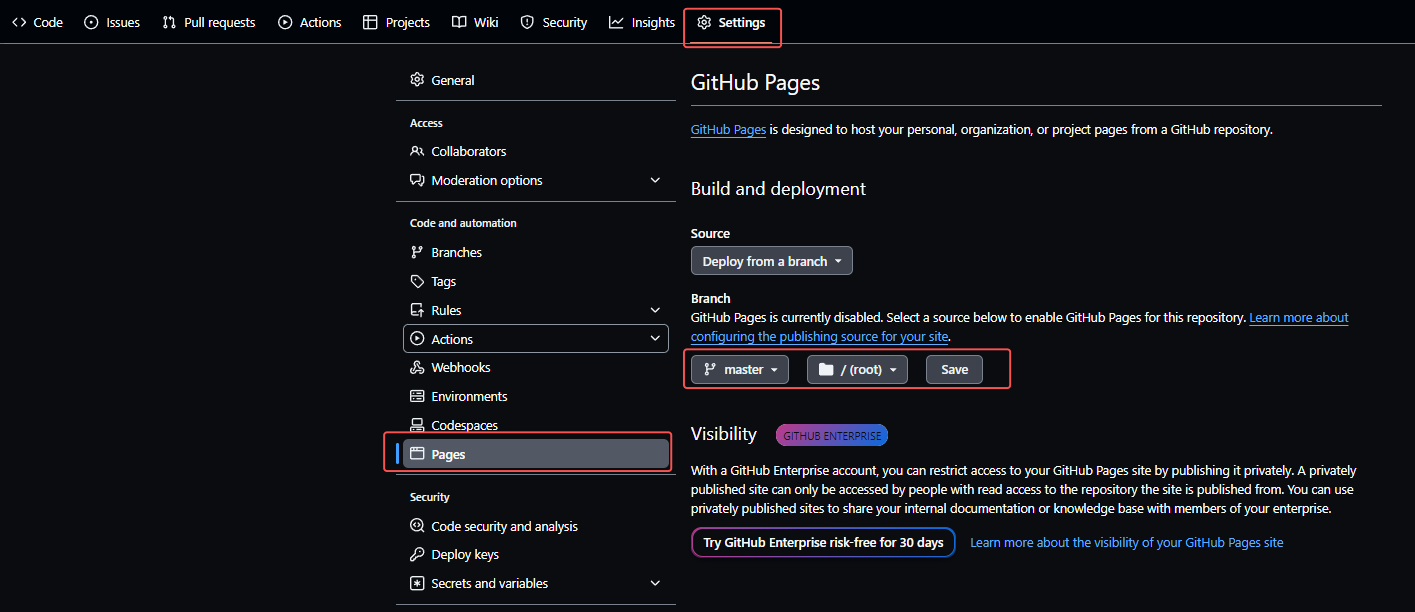
- From the bar below your repository name, navigate to Settings
- On the left sidebar, under Code and Automation, find Pages
- In branch selection, select master or main as the branch used in your repository
Note: You can use another branch if you want the website hosted from an alternate one but for simplicity of this tutorial, we are using the master branch.
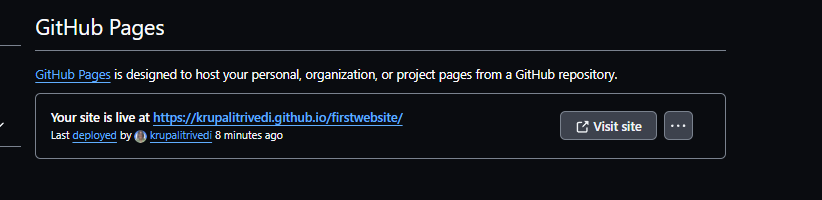
You just deployed your website.
Accessing the Deployed Site
As soon as you click Save on the branch and refresh your page, your website will be live.
You can also access your website by visiting https://<username>.GitHub.io/<website-name>
Updating the Website
Now that you have hosted the website on GitHub, you can update it easily through the repository. Whenever you change the codebase and push it to the repository, it will be rendered on the hosted website.
Adding a Custom Domain (Optional)
This step is optional but useful if you wish to add a custom domain name to remove the GitHub credentials from the website link address.
To add the custom domain name, we followed the steps we did to enable the pages:
- From the bar below your repository name, navigate to Settings
- On the left sidebar, under Code and Automation, find Pages
- Locate the field of Custom Domain and type your domain name, then click on the Save button
If the site is being published from a branch, a ‘CNAME’ file will be added to the root of the repository. Further, you will need to update the DNS settings to point it to the hosted website.
You can finally access the site with your custom website name.
Alternatively, Just Upload and Host
It can be easier than that too, you read it right.
At Tiny Host, it’s just ‘upload and publish’, thus, no hassle for you.
You do not need to learn or install any software or configure anything manually as we take care of it automatically.
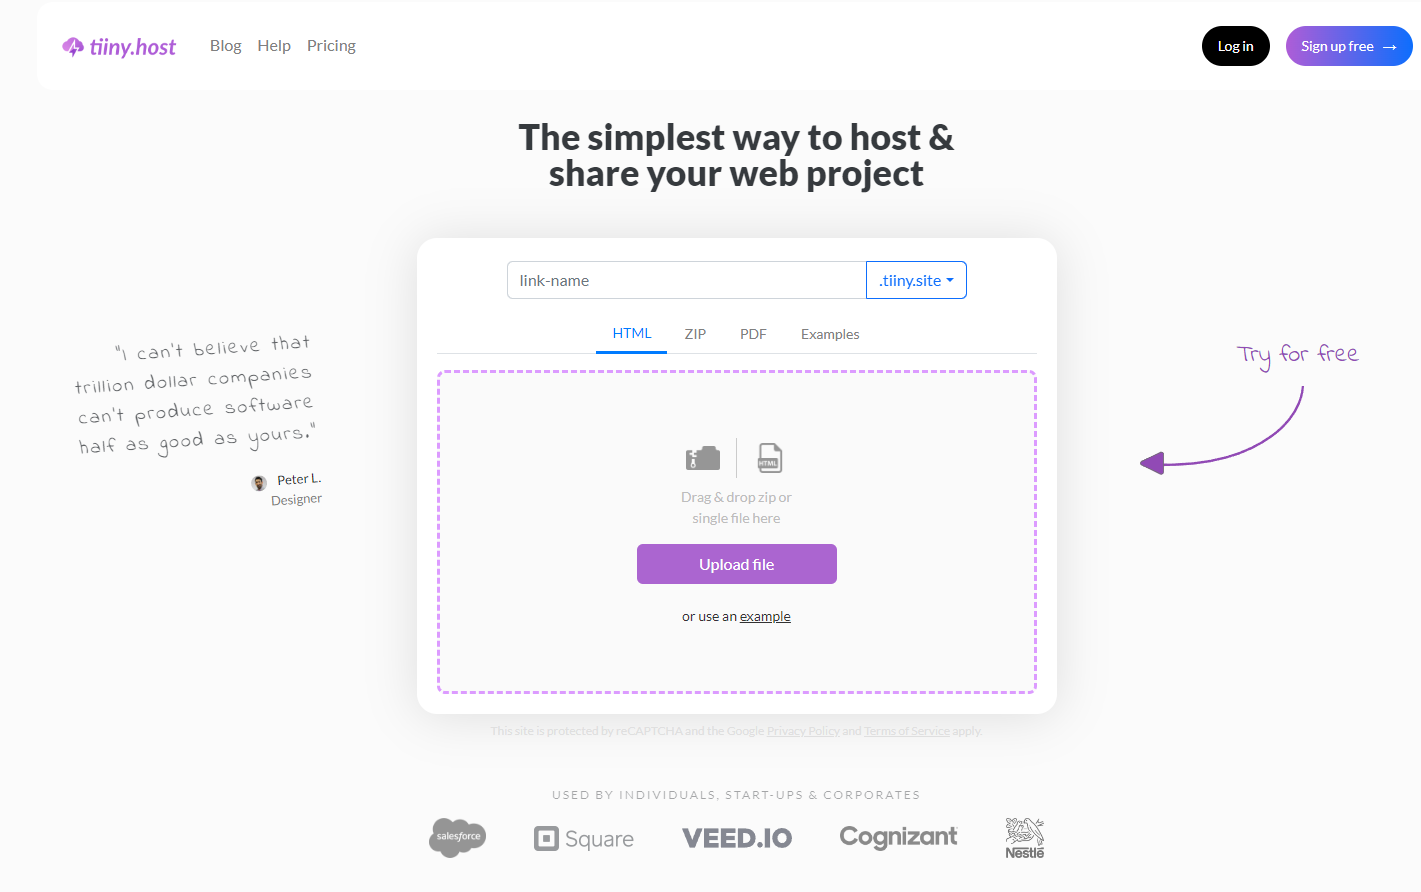
To host a static website on Tiiny.host, you have to follow four simple steps:
- Visit our homepage (https://tiiny.host/)
- Type a name for your website in ‘link-name’ field
- Upload your website that is compressed in a zipped file
- Hit “Publish”
Remember to register yourself first, as this will make linking to custom domains easier. That’s it—it is that easy.
If you still need help (https://tiiny.host/help/), our support executives will always help you.
FAQ: Hosting Your Website on GitHub?
Can I host a dynamic website on GitHub?
GitHub is primarily used to host static websites and provides the best functionality for the same. If you want to host a dynamic website, you can host the static part on GitHub pages and deploy the dynamic pages on other providers like Netlify.
How do I secure my GitHub website?
Ensure that the configuration of custom domains is done correctly. Further, GitHub provides the option of enforcing HTTPS encryption for the website, just select Enforce HTTPS on the GitHub Pages section.
Can I use GitHub Pages for private repositories?
Unfortunately, no, Github Pages requires your repository to be public. If your repository is private, it will be accessible to GitHub Pages. To host it through GitHub, you’ll need to make the website public.
Why should I host my website on GitHub Pages?
For a testing-friendly website, GitHub pages are a great option. It provides free hosting, easy integration with version control using Git, and even HTTPS enforcement options.

