
- What is Hugo?
- Why Use Hugo?
- Create Your First Website With Hugo
- Host Your Hugo Site
- FAQs: How to Deploy Your Hugo Site Within Seconds
- Can I use a custom domain for my Hugo website hosted on Tiiny Host?
- How does Hugo compare to other static site generators for deployment speed?
- How do I update my Hugo site on Tiiny Host?
- How can I track analytics for my Hugo website hosted on Tiiny Host?
- Is it possible to password-protect my Hugo website on Tiiny Host?
If you’re looking for a site generator that’s fast, easy to use, and highly customizable, look no further, Hugo ticks all the boxes. In this guide, we’ll go through how you can quickly create your first-ever Hugo Site and then host it so that you can share it easily.
What is Hugo?
Hugo is a fast, open-source static site generator written in Go. It’s designed for speed and simplicity. Unlike traditional content management systems (CMS) like WordPress, which generate pages dynamically from a database every time they are requested, Hugo builds static HTML pages during the build process. These static files are then served directly to users, making your website load faster and more secure.
Why Use Hugo?
- Speed: You can build large websites with thousands of pages in seconds.
- Ease of Use: Hugo uses simple markdown files for content, which is easy to write and edit.
- Customizability: Hugo provides great flexibility through themes, allowing you to control the look and feel of your website.
- No Backend Needed: Since it creates static sites, there’s no need for complex databases or back-end systems.
- Security: Static sites are less vulnerable to attacks because there’s no dynamic content generation on the server.
Create Your First Website With Hugo
Step 1: Installing Hugo On Your Device
Before you start building, install Git on your device, as it is recommended by Hugo.
It is also important to know that the commands for Hugo on Windows should not be run on Command Prompt or Windows PowerShell. It is recommended to run these commands on WSL, Git Bash, or PowerShell (PowerShell and Windows PowerShell are different).
Install Hugo on Windows:
- Go to the Hugo GitHub releases page and download the Windows binary.
You can check Hugo’s documentation for other installation methods. - Extract the downloaded file and move the hugo.exe to a folder of your choice.
- Add Hugo to the Environment Variables
- Right-click on “This PC” → Properties → Advanced system settings → Environment Variables.
- Find the “Path” variable in your user variables, click Edit, and add the folder containing hugo.exe.
- Open your terminal, then type:
hugo version
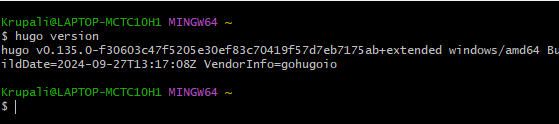
You should see Hugo’s version printed, confirming it’s installed correctly.
Install Hugo on macOS:
-
Open your terminal and use Homebrew to install Hugo:
brew install hugo -
Verify the installation:
hugo version
Install Hugo on Linux:
-
For most Linux distributions, you can use the package manager to install Hugo:
sudo apt-get install hugo -
Verify the installation:
hugo version
Step 2: Create a New Hugo Website
Now that you have Hugo installed, let’s create your first Hugo site.
- Open the terminal
- Navigate to the folder where you want to create your new website. For example, if you want to create the site in your “Documents” folder:
cd ~/Documents
- Run the following Hugo command to create a new site:
hugo new site my-first-hugo-site
This will create a new folder called my-first-hugo-site, which will have the basic structure of a Hugo website.
- Navigate to your new site folder:
cd my-first-hugo-site
Step 3: Add a Theme to Your Hugo Site
Hugo uses themes to style your website. Let’s install a theme to make your site look good.
- Go to the Hugo Themes website and browse the available themes. Select one that you like. Let’s use the “Ananke” theme as an example.
- Inside your project folder, run the following commands to install the Ananke theme:
git init

git submodule add https://github.com/theNewDynamic/gohugo-theme-ananke.git themes/ananke
- Open the config.toml file (this is your Hugo site’s configuration file) using any text editor and add the theme to it. Here we are doing it through the bash terminal directly.
echo "theme = 'ananke'" >> hugo.toml
Your basic static website template is ready! You can check it out by running it on server and checking locally.
Step 4: Preview Your Website Locally
Hugo comes with a built-in development server so you can see your site as you build it.
- Start the server by running:
hugo server
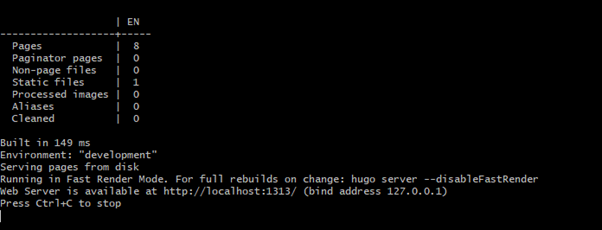
- Open your browser and go to http://localhost:1313. You should see your Hugo website live with the post you just created.
Step 5: Create Your First Page
Now that your site has a theme, let’s create some content for it.
- Run this command to create a new post:
hugo new posts/my-first-post.md
This creates a new Markdown file called my-first-post.md inside the content/posts folder.

- Open the
my-first-post.mdfile in the text editor of your choice. Yo’ll see some default boiler plate content. - Write some content below the same. For example:
# Welcome to My Hugo Blog!

This is my very first blog post using Hugo and it is hosted using Tiiny.host

- Set the draft to false if you want this post to be visible:
draft: false
You can run the server again using Hugo server in the terminal to watch the site with the content you added. The server will watch for changes, so if you edit the Markdown files or other content, your site will automatically refresh.
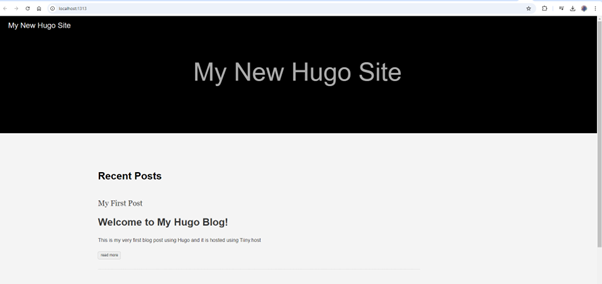
You can see that our site is hosted but it is running locally at this moment, now we will move to publish it online quickly!
Step 6: Build the Site for Deployment
Once you’re happy with your site, it’s time to build it for deployment. This will generate all the static files Hugo needs to serve your website.
- Stop the Hugo server (press Ctrl + C in the terminal).
- Build your site:
hugo
- Hugo will create a public directory, which contains all your website’s static HTML files.
Host Your Hugo Site
Now that your Hugo site is ready, you can deploy it to Tiiny Host.
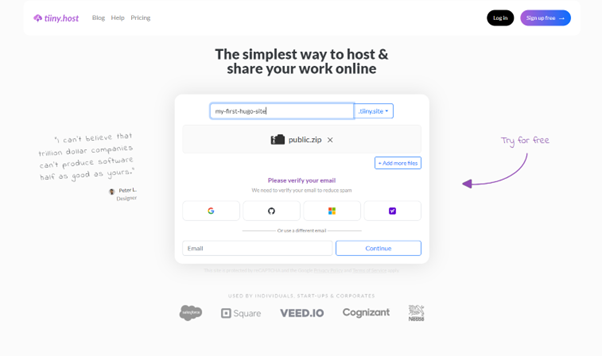
- Go to Tiiny Host
- Convert the public directory generated by Hugo as mentioned in Step 6, into a zip file.
- Select the zip to be uploaded on Tiiny.
- Give an appropriate name for the site in the field ‘link-name’ or leave it blank.
- Login or Sign Up, Click Upload, and wait for the upload to finish.
FAQs: How to Deploy Your Hugo Site Within Seconds
Can I use a custom domain for my Hugo website hosted on Tiiny Host?
Yes, Tiiny Host offers support for custom domains on their premium plans. You can set up your Hugo website to be accessible via a custom domain by following their domain configuration steps.
How does Hugo compare to other static site generators for deployment speed?
Hugo is one of the fastest static site generators available today. Due to its efficient architecture, Hugo can generate a site with thousands of pages in seconds, making it ideal for fast deployments on platforms like Tiiny Host.
How do I update my Hugo site on Tiiny Host?
To update your Hugo site on Tiiny Host, simply rebuild your site using the hugo command and then re-upload the new contents of your public folder to Tiiny Host. Tiiny Host will overwrite the old version of your site with the updated one.
How can I track analytics for my Hugo website hosted on Tiiny Host?
To track the performance of your Hugo website on Tiiny Host, you can upgrade to one of Tiiny’s premium plans, which includes built-in analytics. This allows you to monitor key metrics such as visitor numbers and site activity, giving you insights into how your site is performing.
Is it possible to password-protect my Hugo website on Tiiny Host?
Yes, Tiiny Host offers password protection for your Hugo website as part of their premium plans. By upgrading, you can restrict access to your site and share it securely with only those who have the password.

