- Building an interactive text game with Twine
- The basics of Twine are simple.
- What is a storyboard?
- Let’s get started.
- Use the Twine Story Grid to create your Passages
- How to use the [[double square bracket]] code
- Can I use HTML in my Twine Passages?
- What do you do next?
- How do I test my interactive story?
- How do I publish my interactive text game with Twine?
- What is the easiest way to host and share my file?
- Where can I go from here?
Twine is an easy-to-use platform for writing interactive fiction and games. Once published, your Twine story can be viewed by anyone with a modern JavaScript-enabled browser.
Twinery.org is the home site for Twine and explains Twine in this way:
“You don’t need to write any code to create a simple story with Twine, but you can extend your stories with variables, conditional logic, images, CSS, and JavaScript when you’re ready.
Twine publishes directly to HTML so that you can post your work nearly anywhere. Anything you create with it is free to use any way you like, including for commercial purposes…
As of this writing, the latest version of Twine is 2.5.1, released 28 August 2022.”
Building an interactive text game with Twine
It’s easy to get started with Twine, and that’s what we’ll cover in this article.
The basics of Twine are simple.
- Use the Twine app to create a storyboard
- Type your story into separate “Passages” or screens
- Link the Passages using a simple [[double square bracket]] code
- Test your story and edit it to perfection
- Save your story as an HTML file and upload it to a server
- Share the link to share your story
You can see a simple example here:
hello twine.tiny.site. This is the story we’ll build now.
What is a storyboard?
Storyboards are used to plot out and experience an interactive story—or a story of any kind. A storyboard is a sequence of individual pages, each containing a single step in the story. For example:
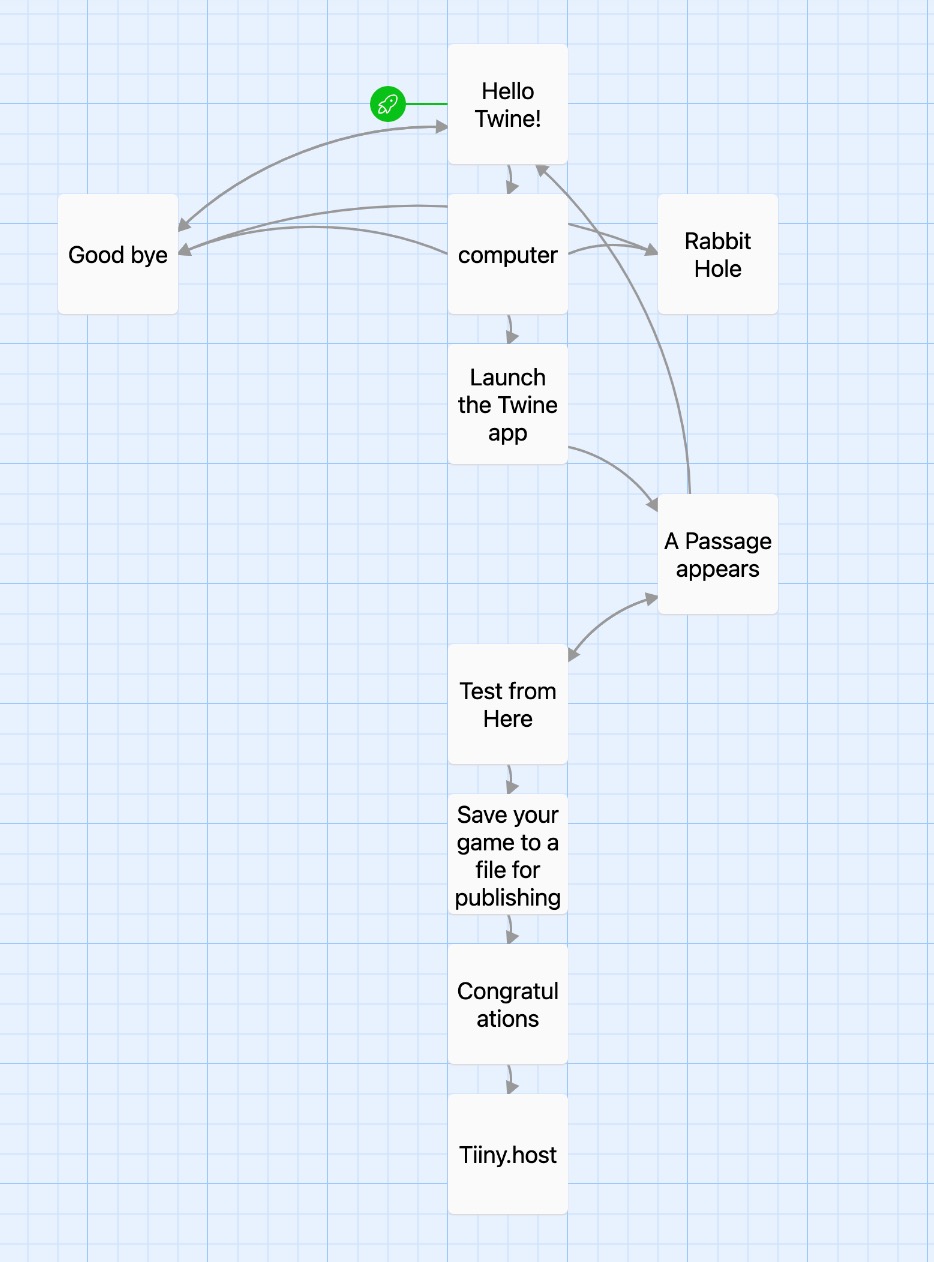
An interactive storyboard also looks and acts like a flow chart, showing the story’s main points and indicating the directions the story can take.
Twine enables you to build your story using a storyboard approach and then does the heavy lifting in turning your story into a sharable app.
Let’s get started.
- Download Twine
The Twinery.org homepage provides links for you to download the app.
While it is possible to use Twine online on just about any device, it is strongly recommended that you download the app and use it on a desktop or tablet with the largest screen available. The program itself runs more smoothly this way, and you have ample room to view and edit your storyboard.
- Launch Twine and create a new storyboard.
The Twine app opens on a library screen. This screen will have no stories at first, but once you create stories, they will be available here.
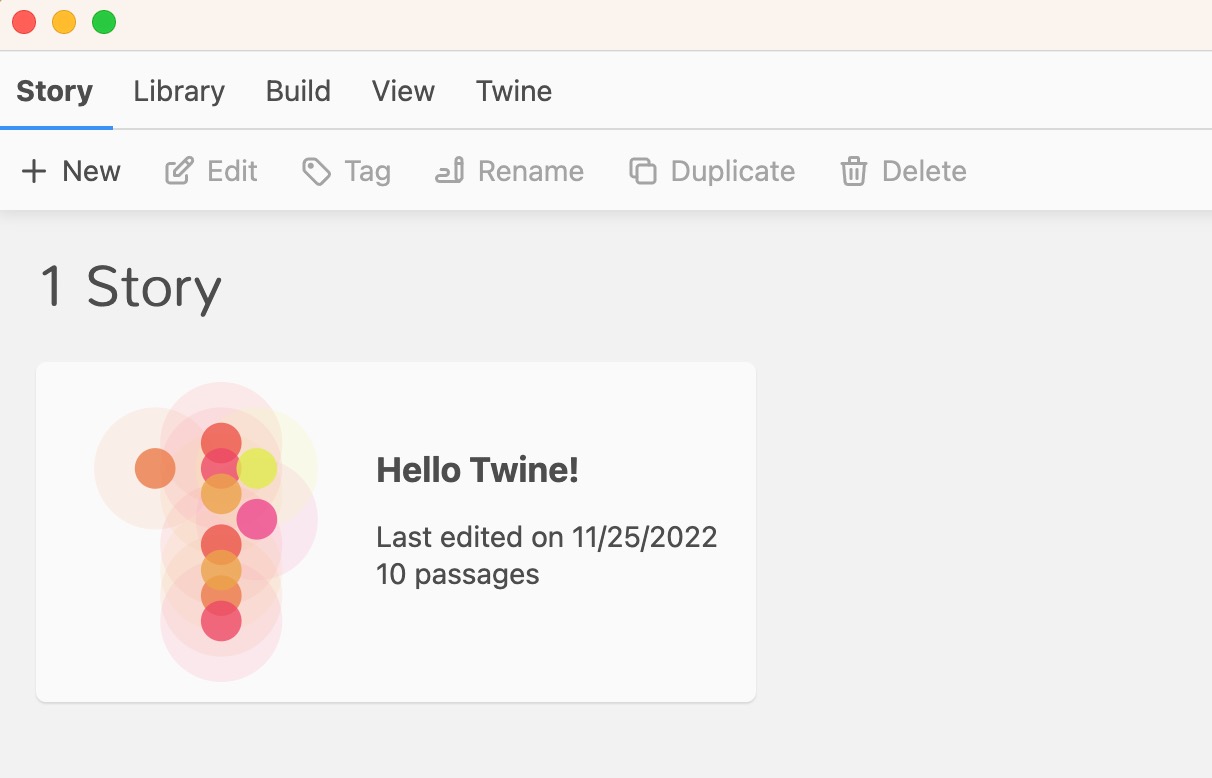
- Click the “+ New” button on the left side of the Story menu bar. You will be asked to name your story. Then click “Create”
Use the Twine Story Grid to create your Passages
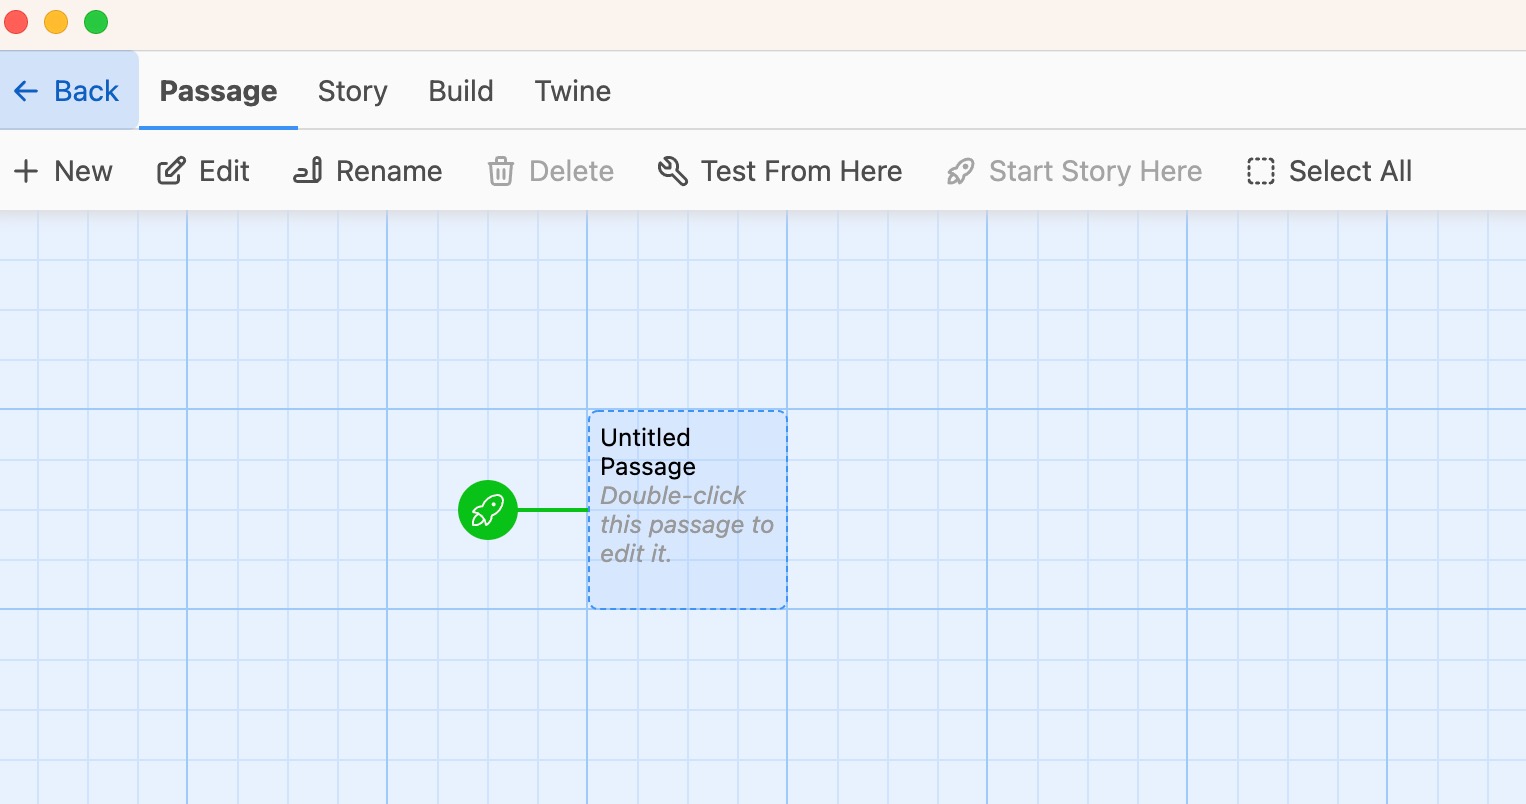
The menu bar changes to Passage. Now you are on the storyboard grid and can write and edit your interactive story.
- Double-click on the square to enter the text for the first passage.
The word “Passage” is used to describe one screen of information. You can think of this like an index card. One index card has one screenful of information and no more. Use the same idea for each passage you create.
Also, on the Passage screen, you’ll enter your linking commands. We’ll discuss this in a moment.
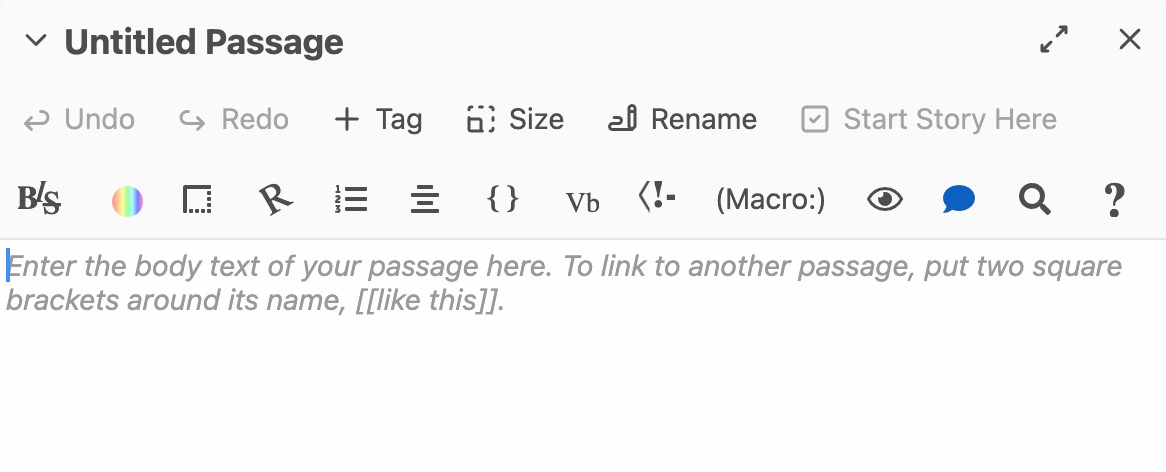
An editing area appears to the right of the screen.
- Click “Rename” to change the name of this Passage to something useful.
Important: This name is a crucial label—it appears in the tab title of your web page. It also serves as the anchor name for the Passage. You will link between Passages using this label.
The “body text” area is what shows up in your published game. It is the story you are telling, one Passage at a time.
- Type the text you see below into your Passage body text, including the [[double square brackets]].
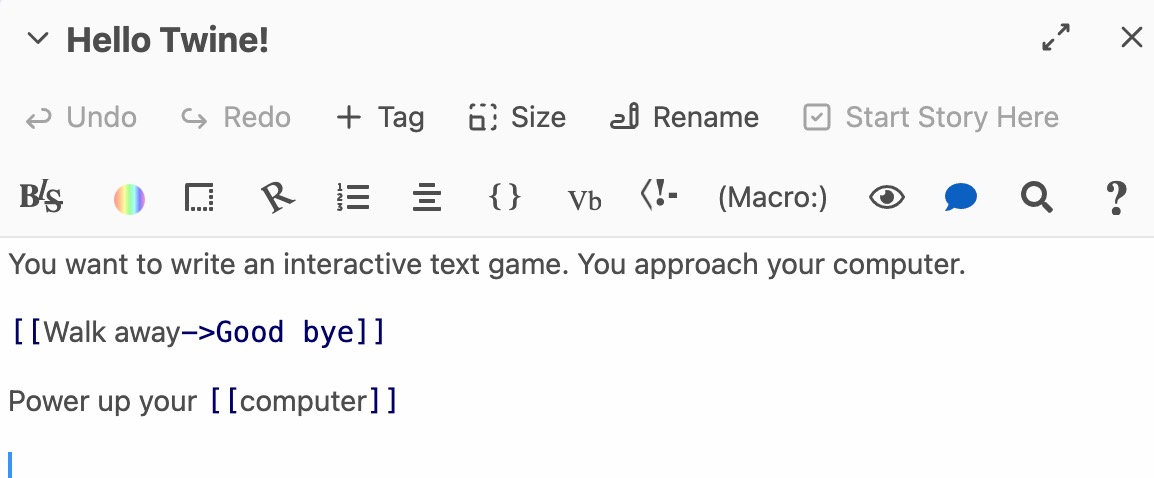
A couple of things are happening on this screen.
- The first line of the body text is exactly what the screen will show when viewed by your reader.
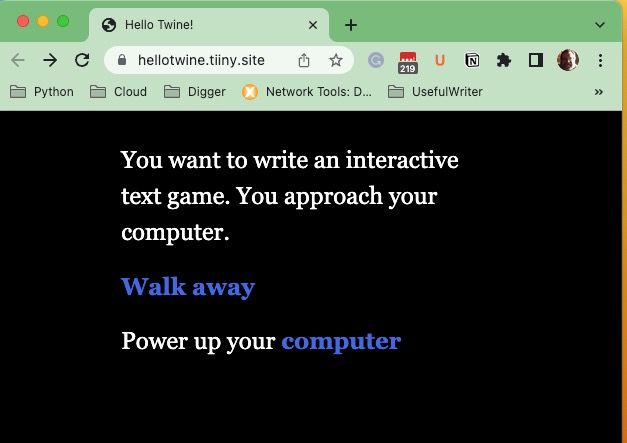
- The next two lines show the use of the [[double square bracket]] code we mentioned earlier and appear as colored-text links on the final screen.
The final result looks like this:
How to use the [[double square bracket]] code
Use the [[double square bracket]] code to tell Twine which Passages you want to be linked to the Passage you are now editing. Those Passages may not exist yet; that’s okay. Twine will automatically create them for you.
There are two variations on the [[double square bracket]] code shown. Each link and apply text slightly differently.
- [[Walk Away->Good bye]] — The text “Walk away” will show up as a colored link and will link to a Passage exactly named “Good bye”
- Power up your [[computer]] — This displays the plain text “Power up your “, then links to a Passage named “computer”
There are other bracket link types available. See the docs. But you get the basic principles with these two examples.
Can I use HTML in my Twine Passages?
You can enter any text you like into the body text field, which will appear on the final screen exactly as you typed it.
You can use HTML anywhere in the body text field by including proper HTML tags.
- Exit the Passage editor by clicking the “X” in the box’s top-right corner.
What do you do next?
- You may repeat this process to add all the Passages you see in the online game “Hello Twine” hellotwine.tiiny.site. Please refer to the storyboard at the beginning of this tutorial for a complete guide.
Or,
- You may decide to write your own interactive story and link it up with the Twine storyboard grid. Feel free to make your own story.
How do I test my interactive story?
- Choose “Test from Here” in the Passage menu bar.
To test the entire story, choose “Build” from the menu bar, and then you may choose between four essential options.
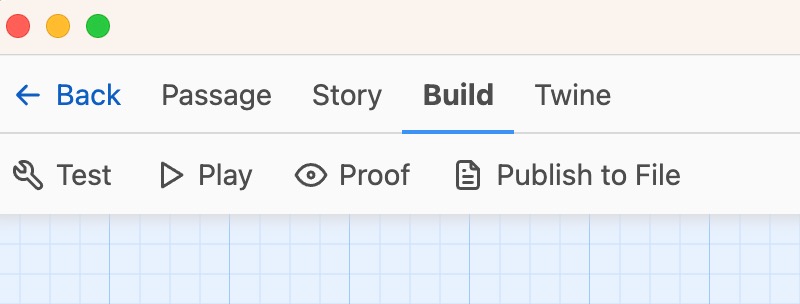
These four options are self-explanatory except for “Proof.”
Proof lists all the text of the Passages you have created. This is useful for catching typos, ensuring your [[double square bracket]] code is written correctly, and general text-tidying duties.
How do I publish my interactive text game with Twine?
- From the Build menu, choose “Publish to File”.
A file dialog will appear, and you save your game to a file in the storage location of your choice.
IMPORTANT: Make sure the file extension “.html” is at the end of your chosen filename. This file extension ensures that your game will launch in a web browser.
What is the easiest way to host and share my file?
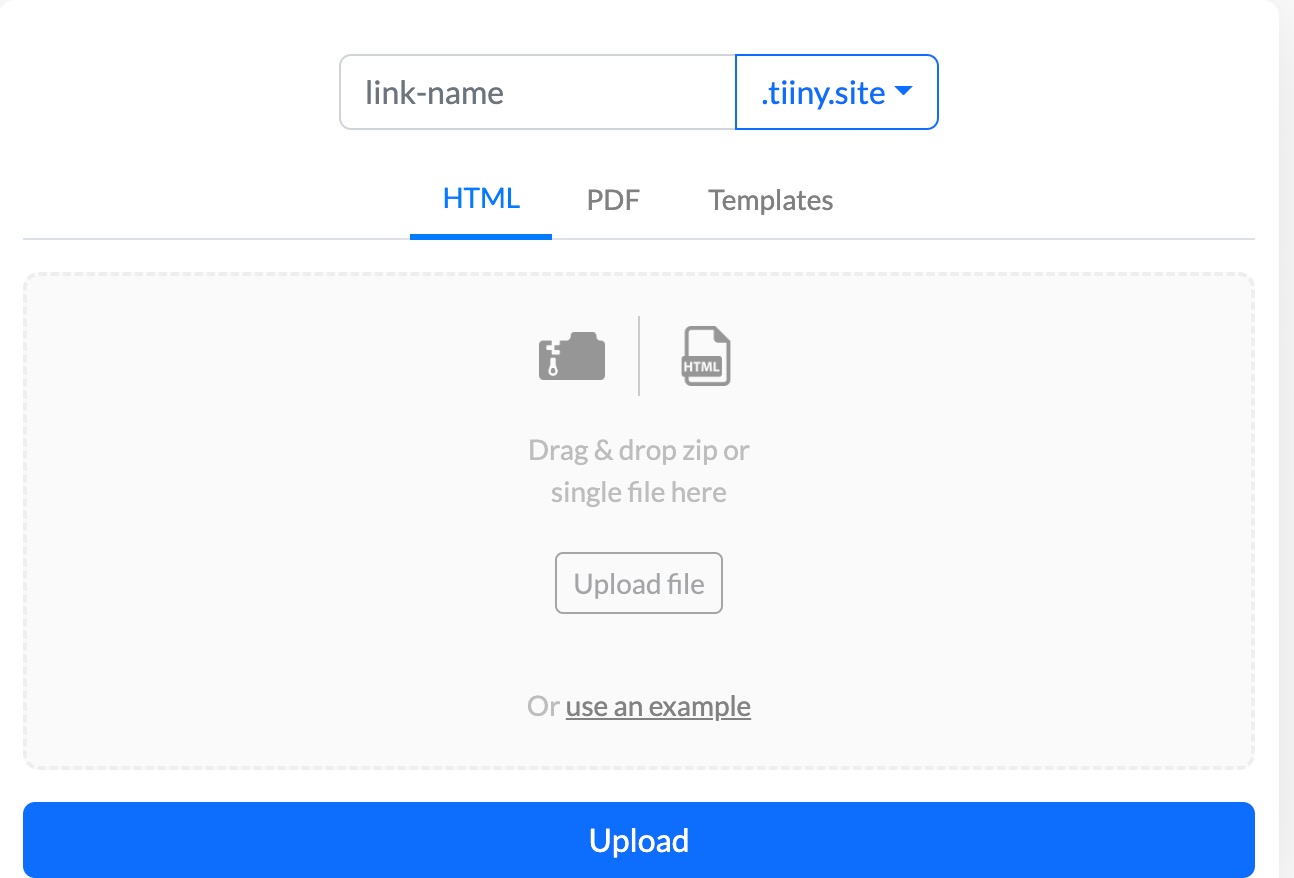
We recommend that you visit the Tiiny.host home page.
- Provide a link name in the field provided, such as “HelloTwine”
- Upload your finished Twine HTML file using drag & drop or the file dialog
- Click “Upload”
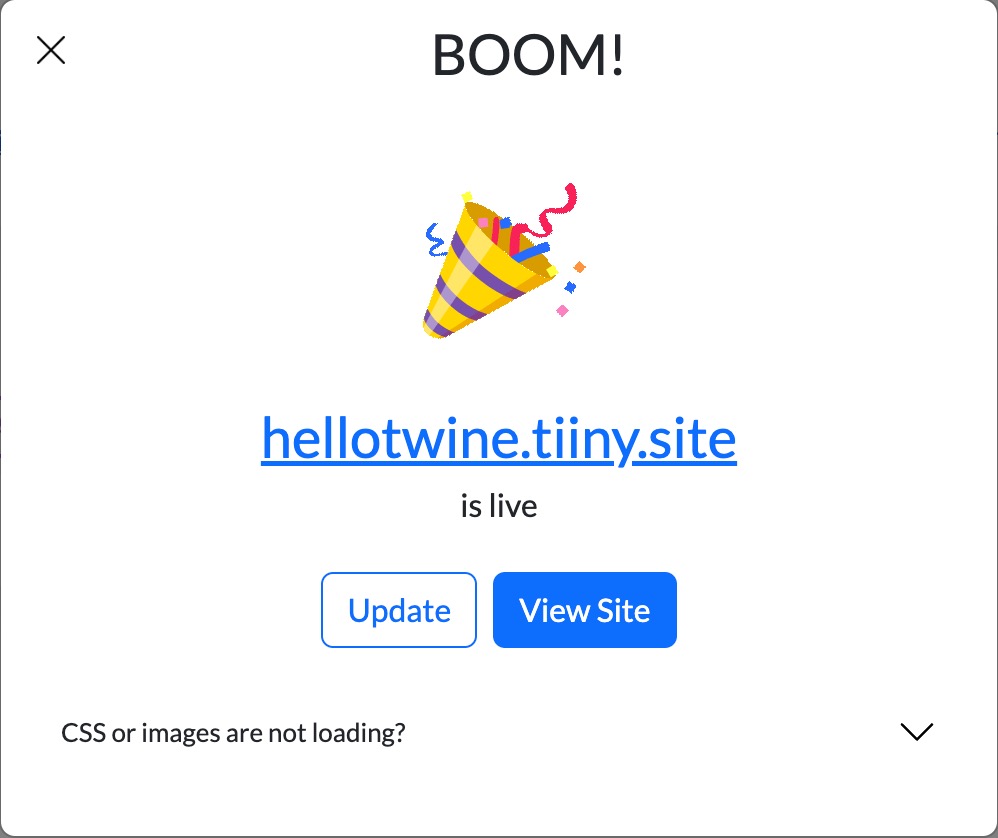
That’s it. Easy and simple. Your Twine game is now available online at link-name.tiiny.site.
Where can I go from here?
You have many options with Twine. Anything a web browser supports can be done in Twine using HTML, CSS, JavaScript, images, etc. It all depends on your story and your technical savvy. Or, get someone to help you. There is a growing community of Twine users, particularly in the Interactive Fiction community.
For hosting your interactive game with a custom domain name, password protection, or any other hosting features, contact Tiiny.host for more information. Their services range in price from free to quite reasonable. Try it today for free.


