
- How to Use Cursor AI to Build an App without Writing a Single Line of Code
- Step 1: Setting Up the Development Environment
- Step 2: Open The Project Folder In Cursor
- Step 3: Customize The App
- Step 4: Share The App with Others by Hosting it on Tiiny Host
- Step 5: Install The Tiiny Host Extension (Optional)
- Essential Keyboard Shortcuts
- A Quick Guide to Cursor’s Four Modes
- Cursor Rules Files
- Bonus: How to Build a Portfolio Site with Cursor
- FAQs: A Beginner’s Guide to Building & Publishing an App in 5 Minutes With Cursor AI
- What is Cursor AI?
- Is Cursor AI free to Use?
- What’s the difference between Cursor AI and GitHub Copilot?
- Can I use VS Code extensions in Cursor?
- What types of apps can I build with Cursor AI?
- What’s the difference between Cursor and Claude Code?
- Do I need to know how to code to use Cursor AI?
- Can I update my app after hosting it?
- Is Tiiny Host free?
- Can I integrate external APIs into my app built with Cursor AI?
- Can I monitor my app’s performance with Tiiny Host?
- Cursor vs VS Code: What’s the difference?
- Final Thoughts
Building apps used to require years of programming knowledge.
Now, you can build apps in minutes without any prior experience.
No coding required!
The secret? Cursor AI.
Instead of writing code by hand, you simply describe what you want to build. Its AI agent generates the code, edits files, and even debugs the errors for you.
In this guide, we are going to build a fully functional prototype of a calculator and put it on the internet for the world to see.
Here’s what we will cover in this guide:
- how to install Cursor and get your development environment ready
- how to build an app even if you’re a complete beginner
- how to host that app on the internet so other people can use it
- how to add new features to your app by just talking to the AI
- Bonus: How to take these same skills to create a portfolio for your services
EMBED: https://www.youtube.com/watch?v=zv-qWhjxjW4
How to Use Cursor AI to Build an App without Writing a Single Line of Code
With other editors, you write code…
With Cursor, you write instructions in plain English.
Just tell it what you want to build, and it edits the files for you.
Think of Cursor’s AI Agent as your personal Senior Developer.
You simply give it a task in plain English.
“Build a calculator app”
“Make the buttons orange”
“Add a history panel”
Cursor takes your instructions, analyzes the entire code base, and edits the required files for you. On Autopilot!
The best part?
Cursor is a fork of the Visual Studio Code IDE. If you are coming from VS Code, you will find that all of your favorite plugins and shortcuts still work in Cursor.
Step 1: Setting Up the Development Environment
Before we dive into building your first application, we need to first set up your development environment. It’s a one-time setup that takes less than 10 minutes.
Warning: This is the only section where you need to use the terminal. If you don’t understand what a command does, don’t worry about it. Just follow the instructions.
To start building apps with Cursor, first and foremost, you need to install it on your computer.
Cursor is available for all operating systems including MacOS, Linux, and Windows.
Visit Cursor’s website and download the setup file.
Once you install Cursor, you will be asked to sign in. If you don’t have an account, this is where you create one. Once you create your account, you will be automatically logged into Cursor.
To get started, we will need to create a new React app.
To create the React app, you will need to install Node.JS. You can download it from the official Node.JS website.
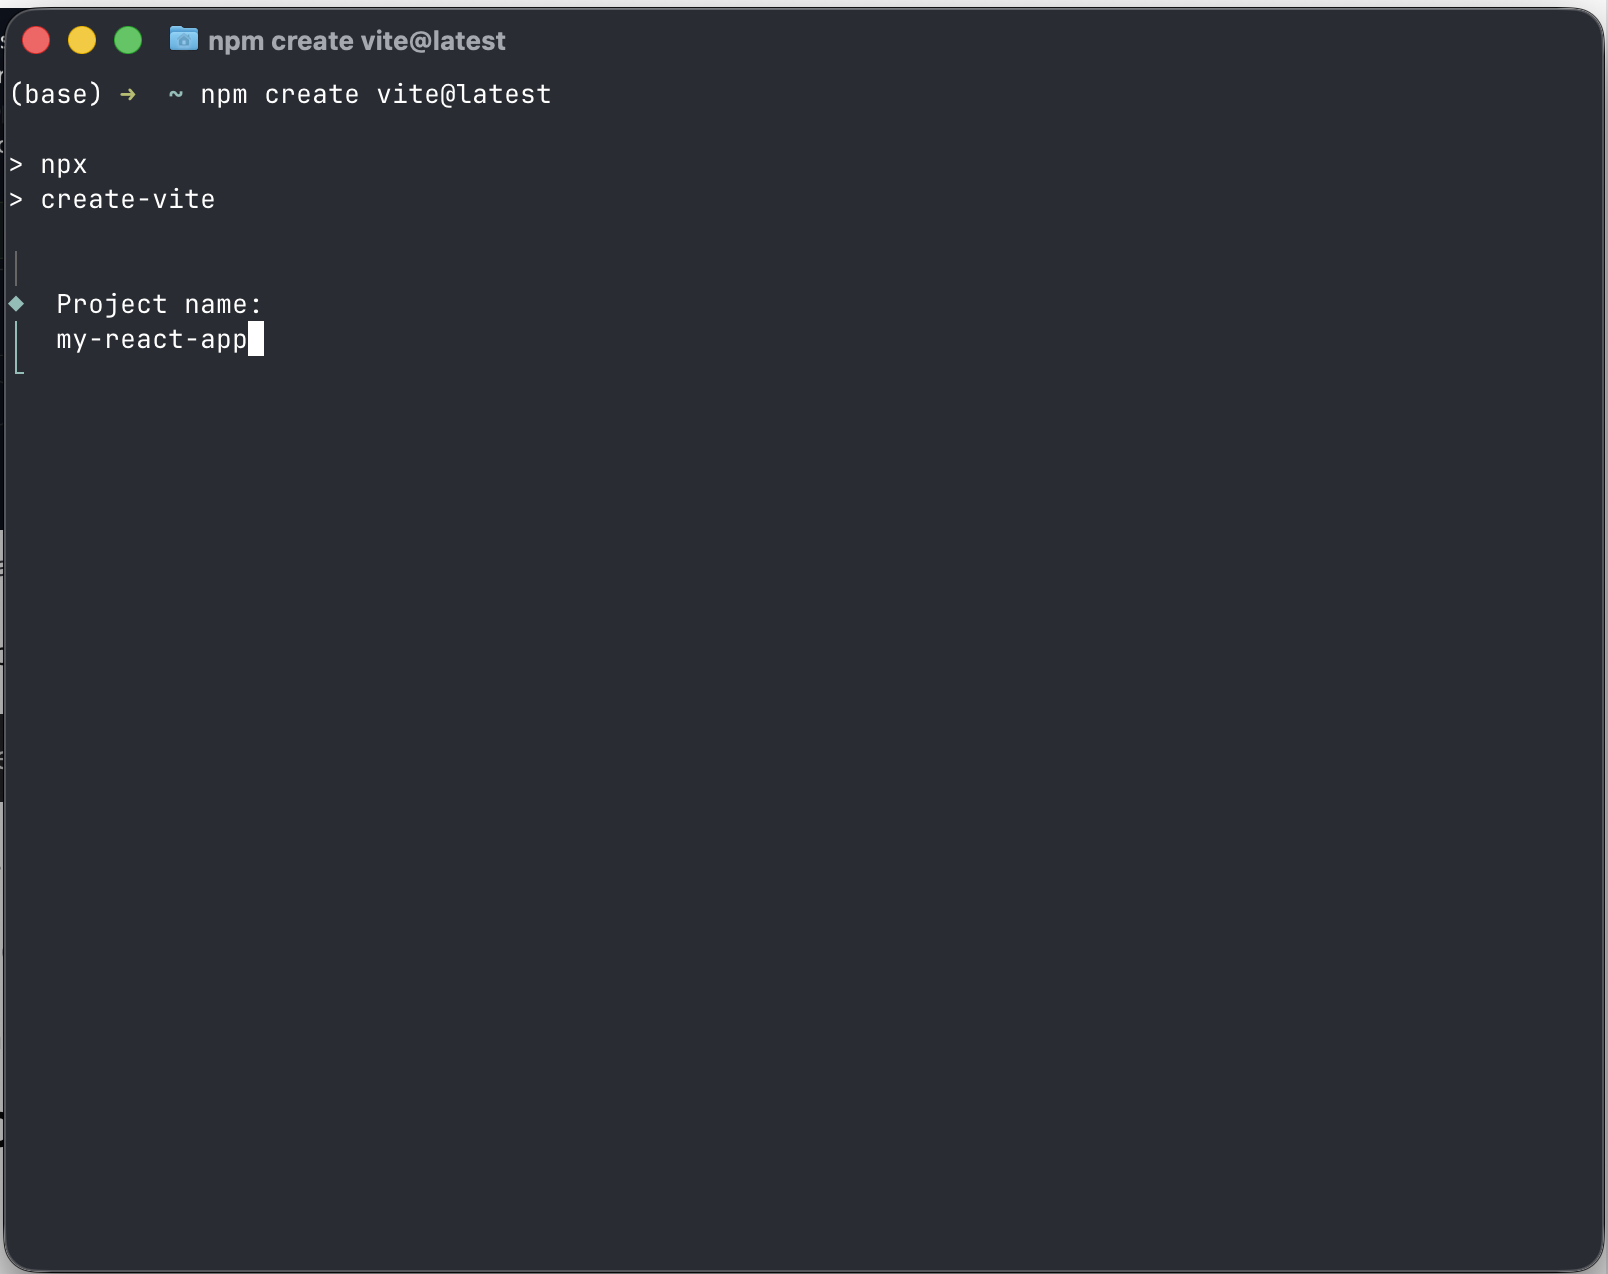
Now, create a project folder anywhere on your computer.
Open the project folder in your terminal and create a new React project by running the following command:
npm create vite@latest
Tip: If you see the error “command not found: npm,” close your terminal and open it again. If you still see the issue, try reinstalling Node.JS and then restart your computer.
The above command simply creates a React app with industry-standard best practices.
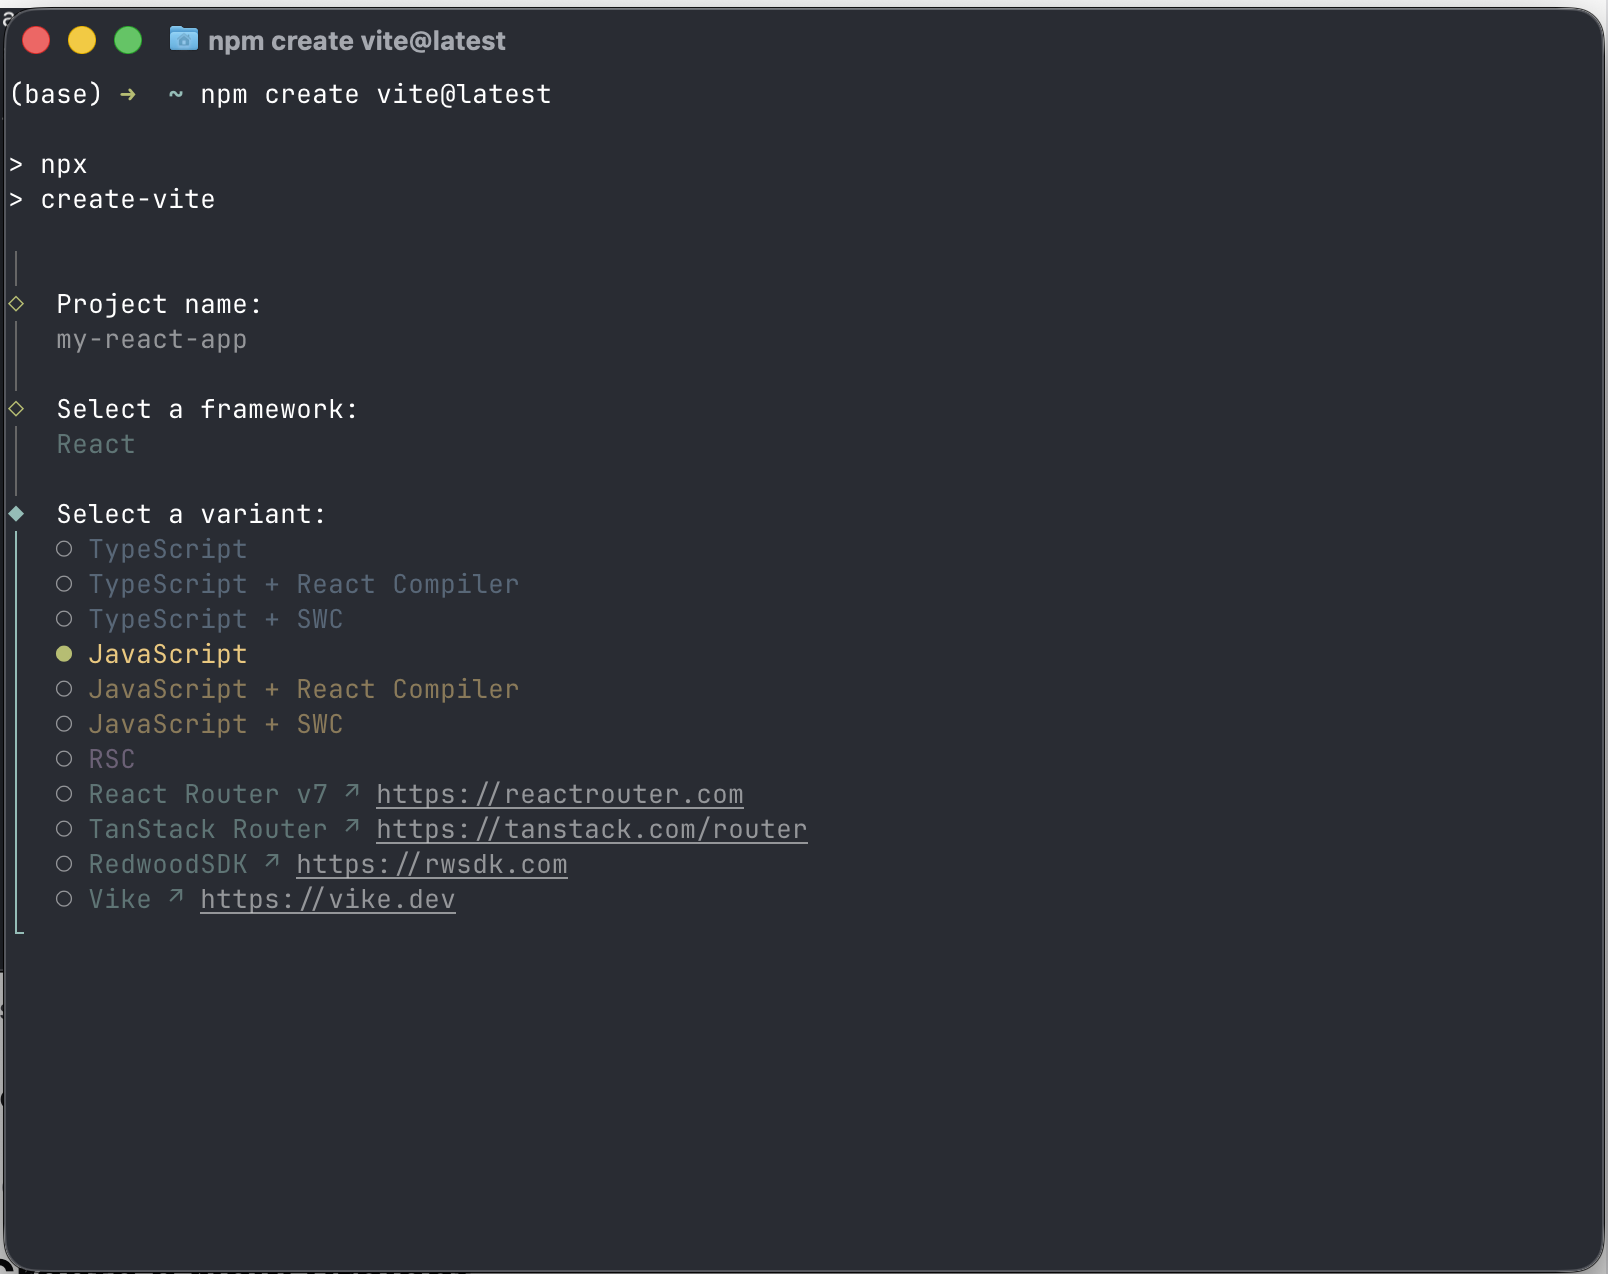
When you run the above command, it will first ask you for a project name. Type a name and hit Enter.
Now, use the arrow keys to select React as the Framework and hit Enter.
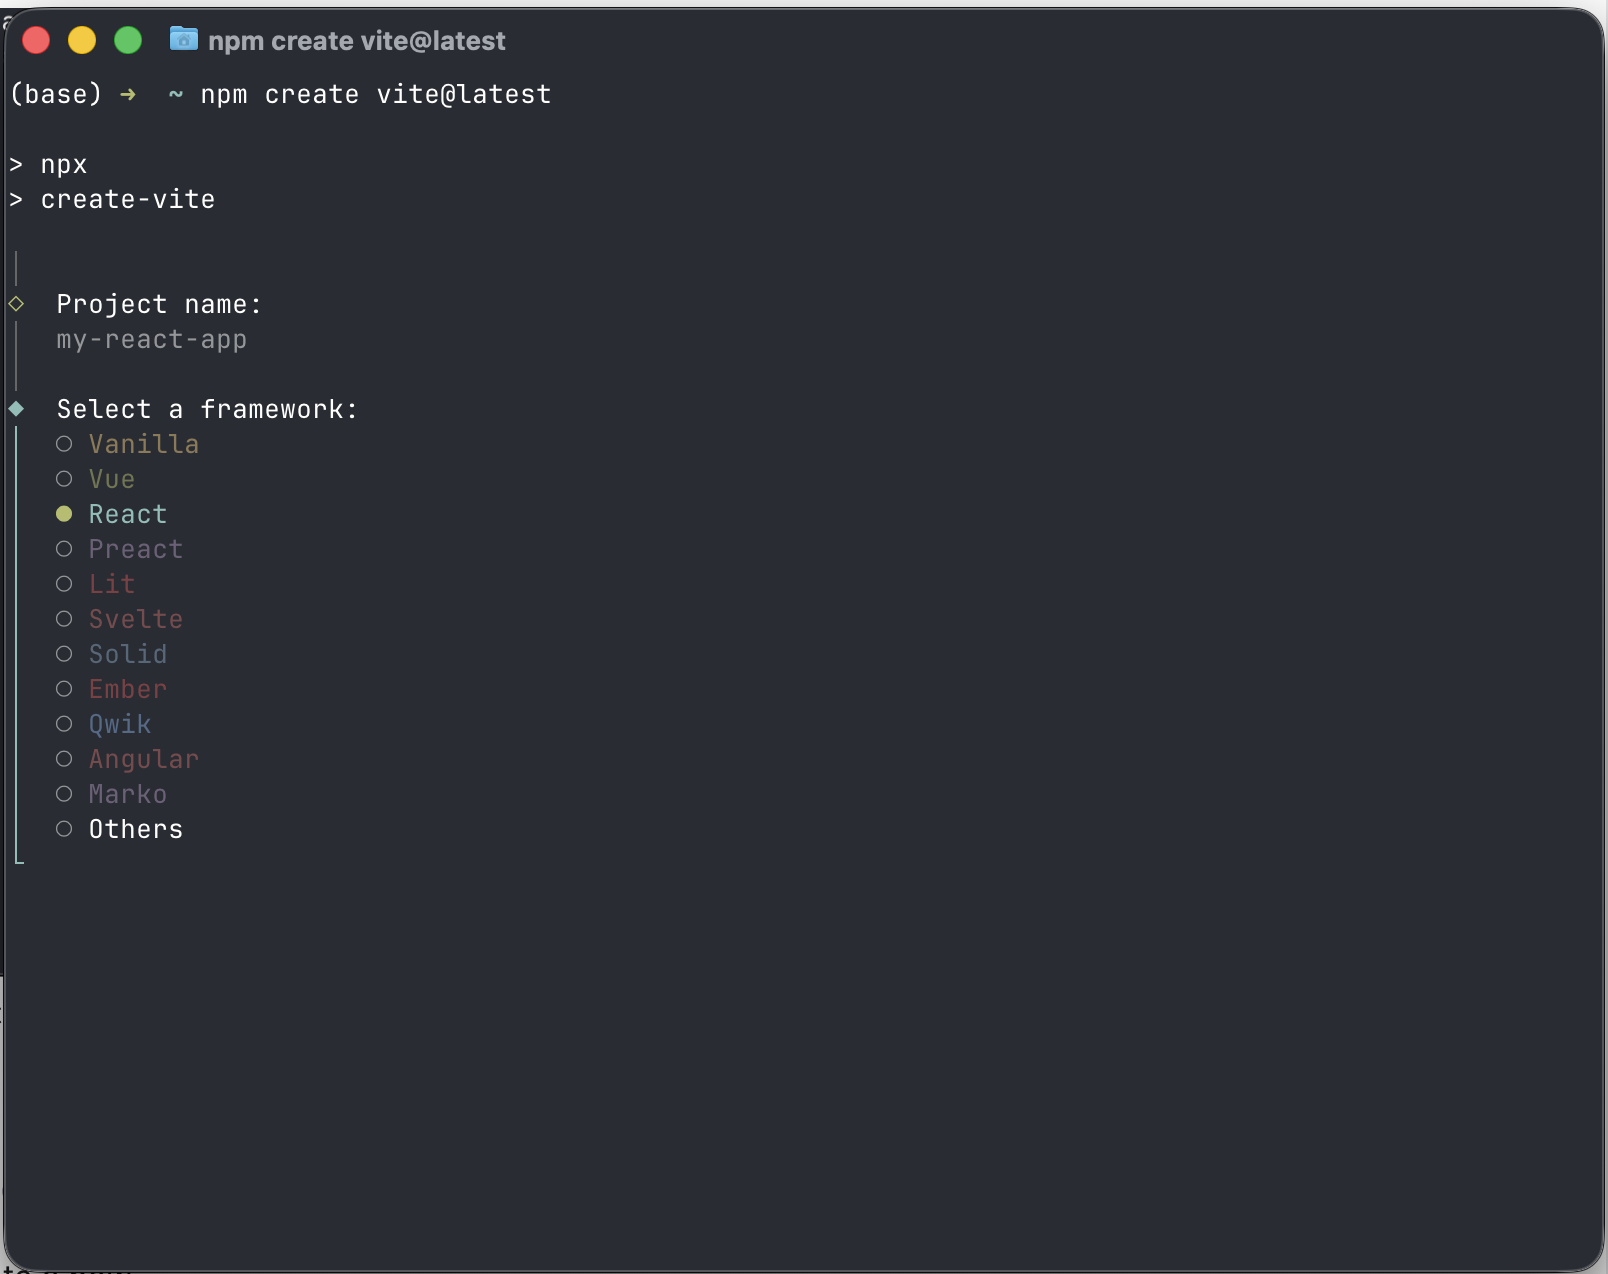
Select JavaScript as the Variant and press Enter.
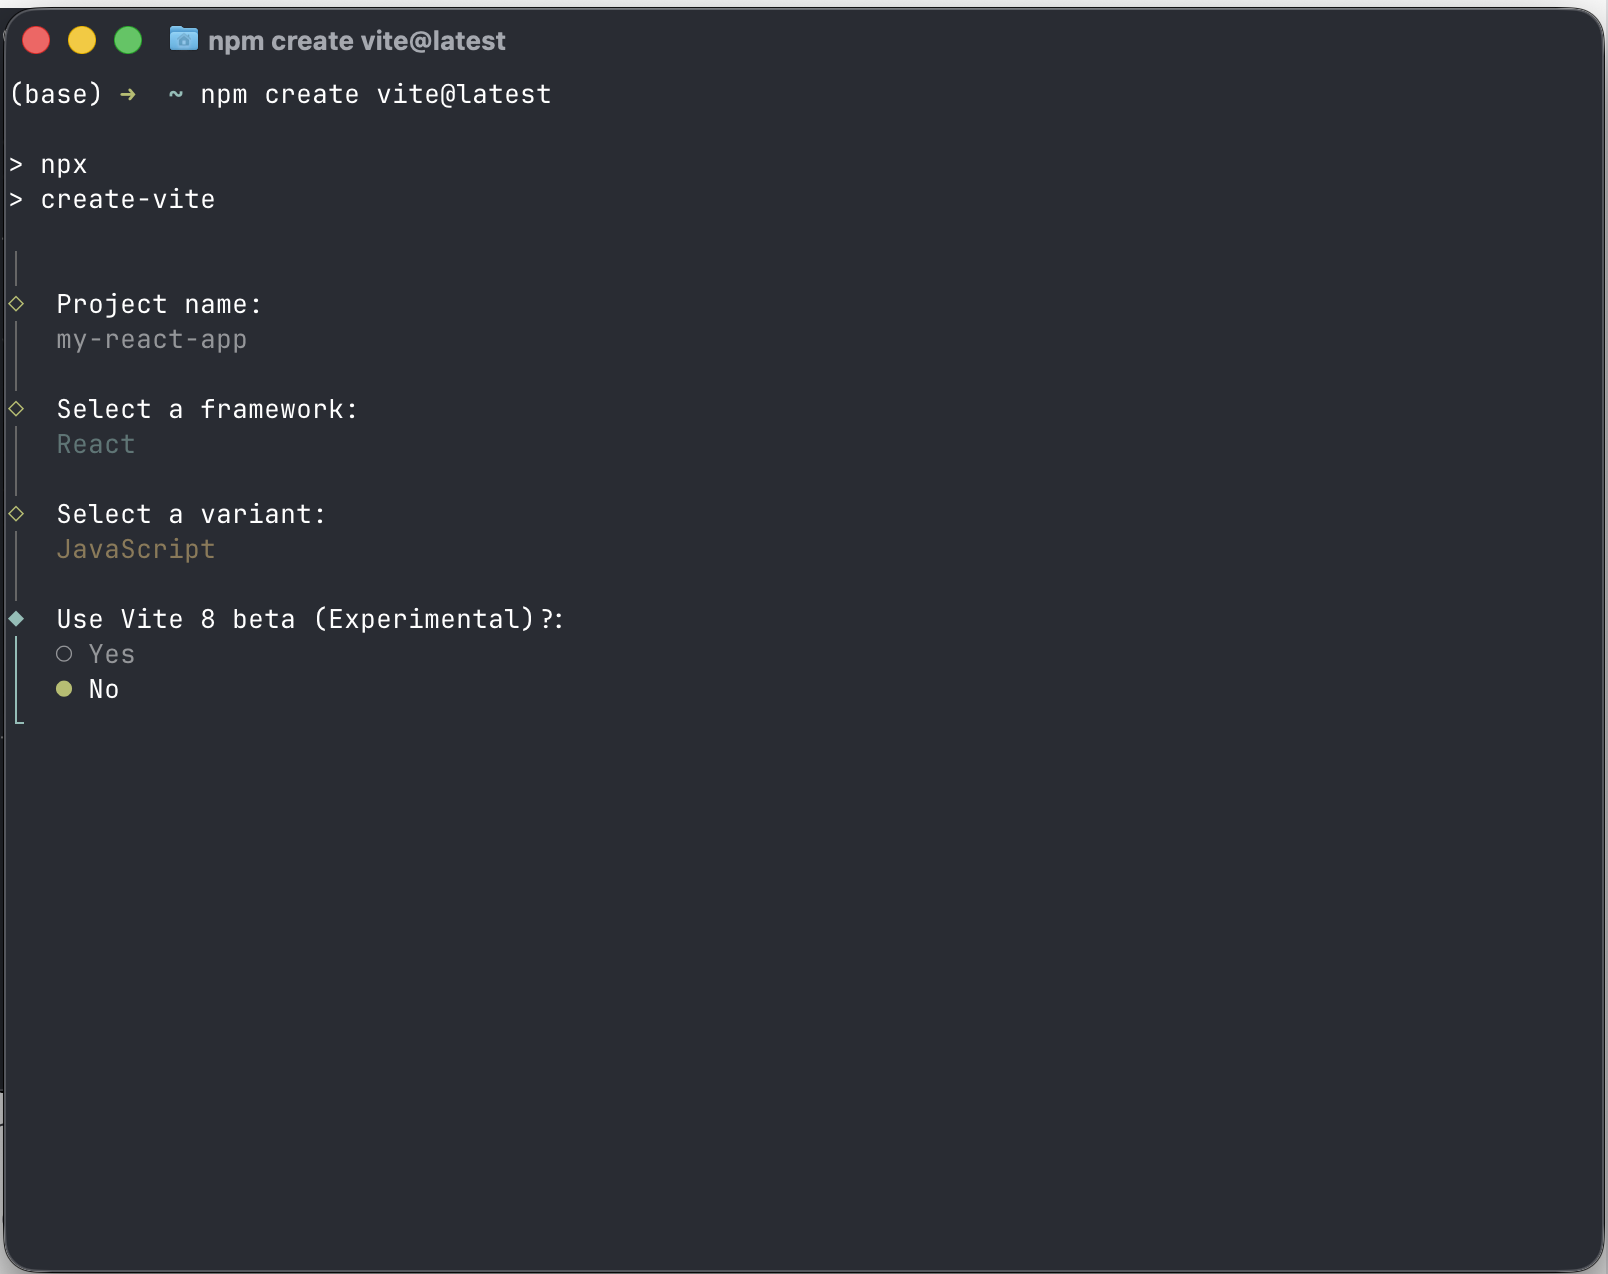
Select No and press Enter again when asked if you want to use Vite 8.
Now, select Yes and press Enter when asked if you want to start the app.
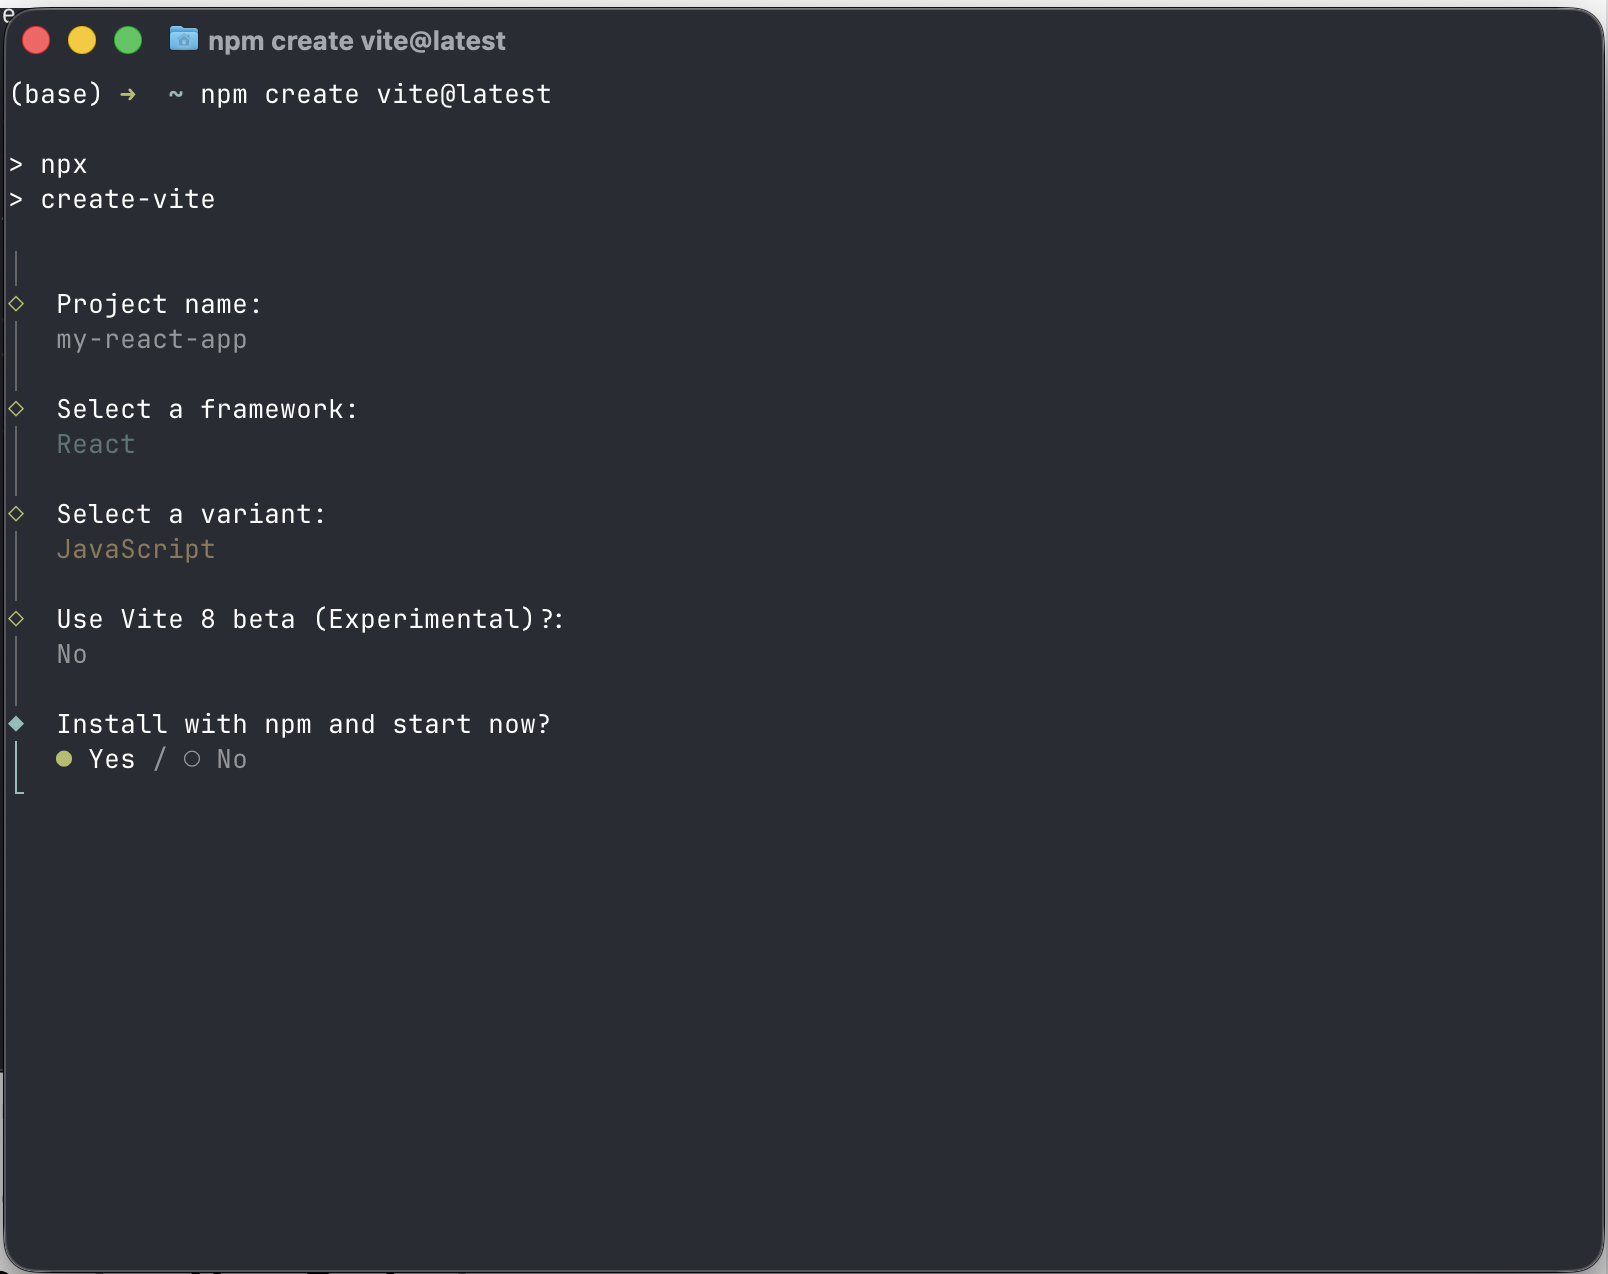
It will take a minute or two for dependencies to install for this new app.
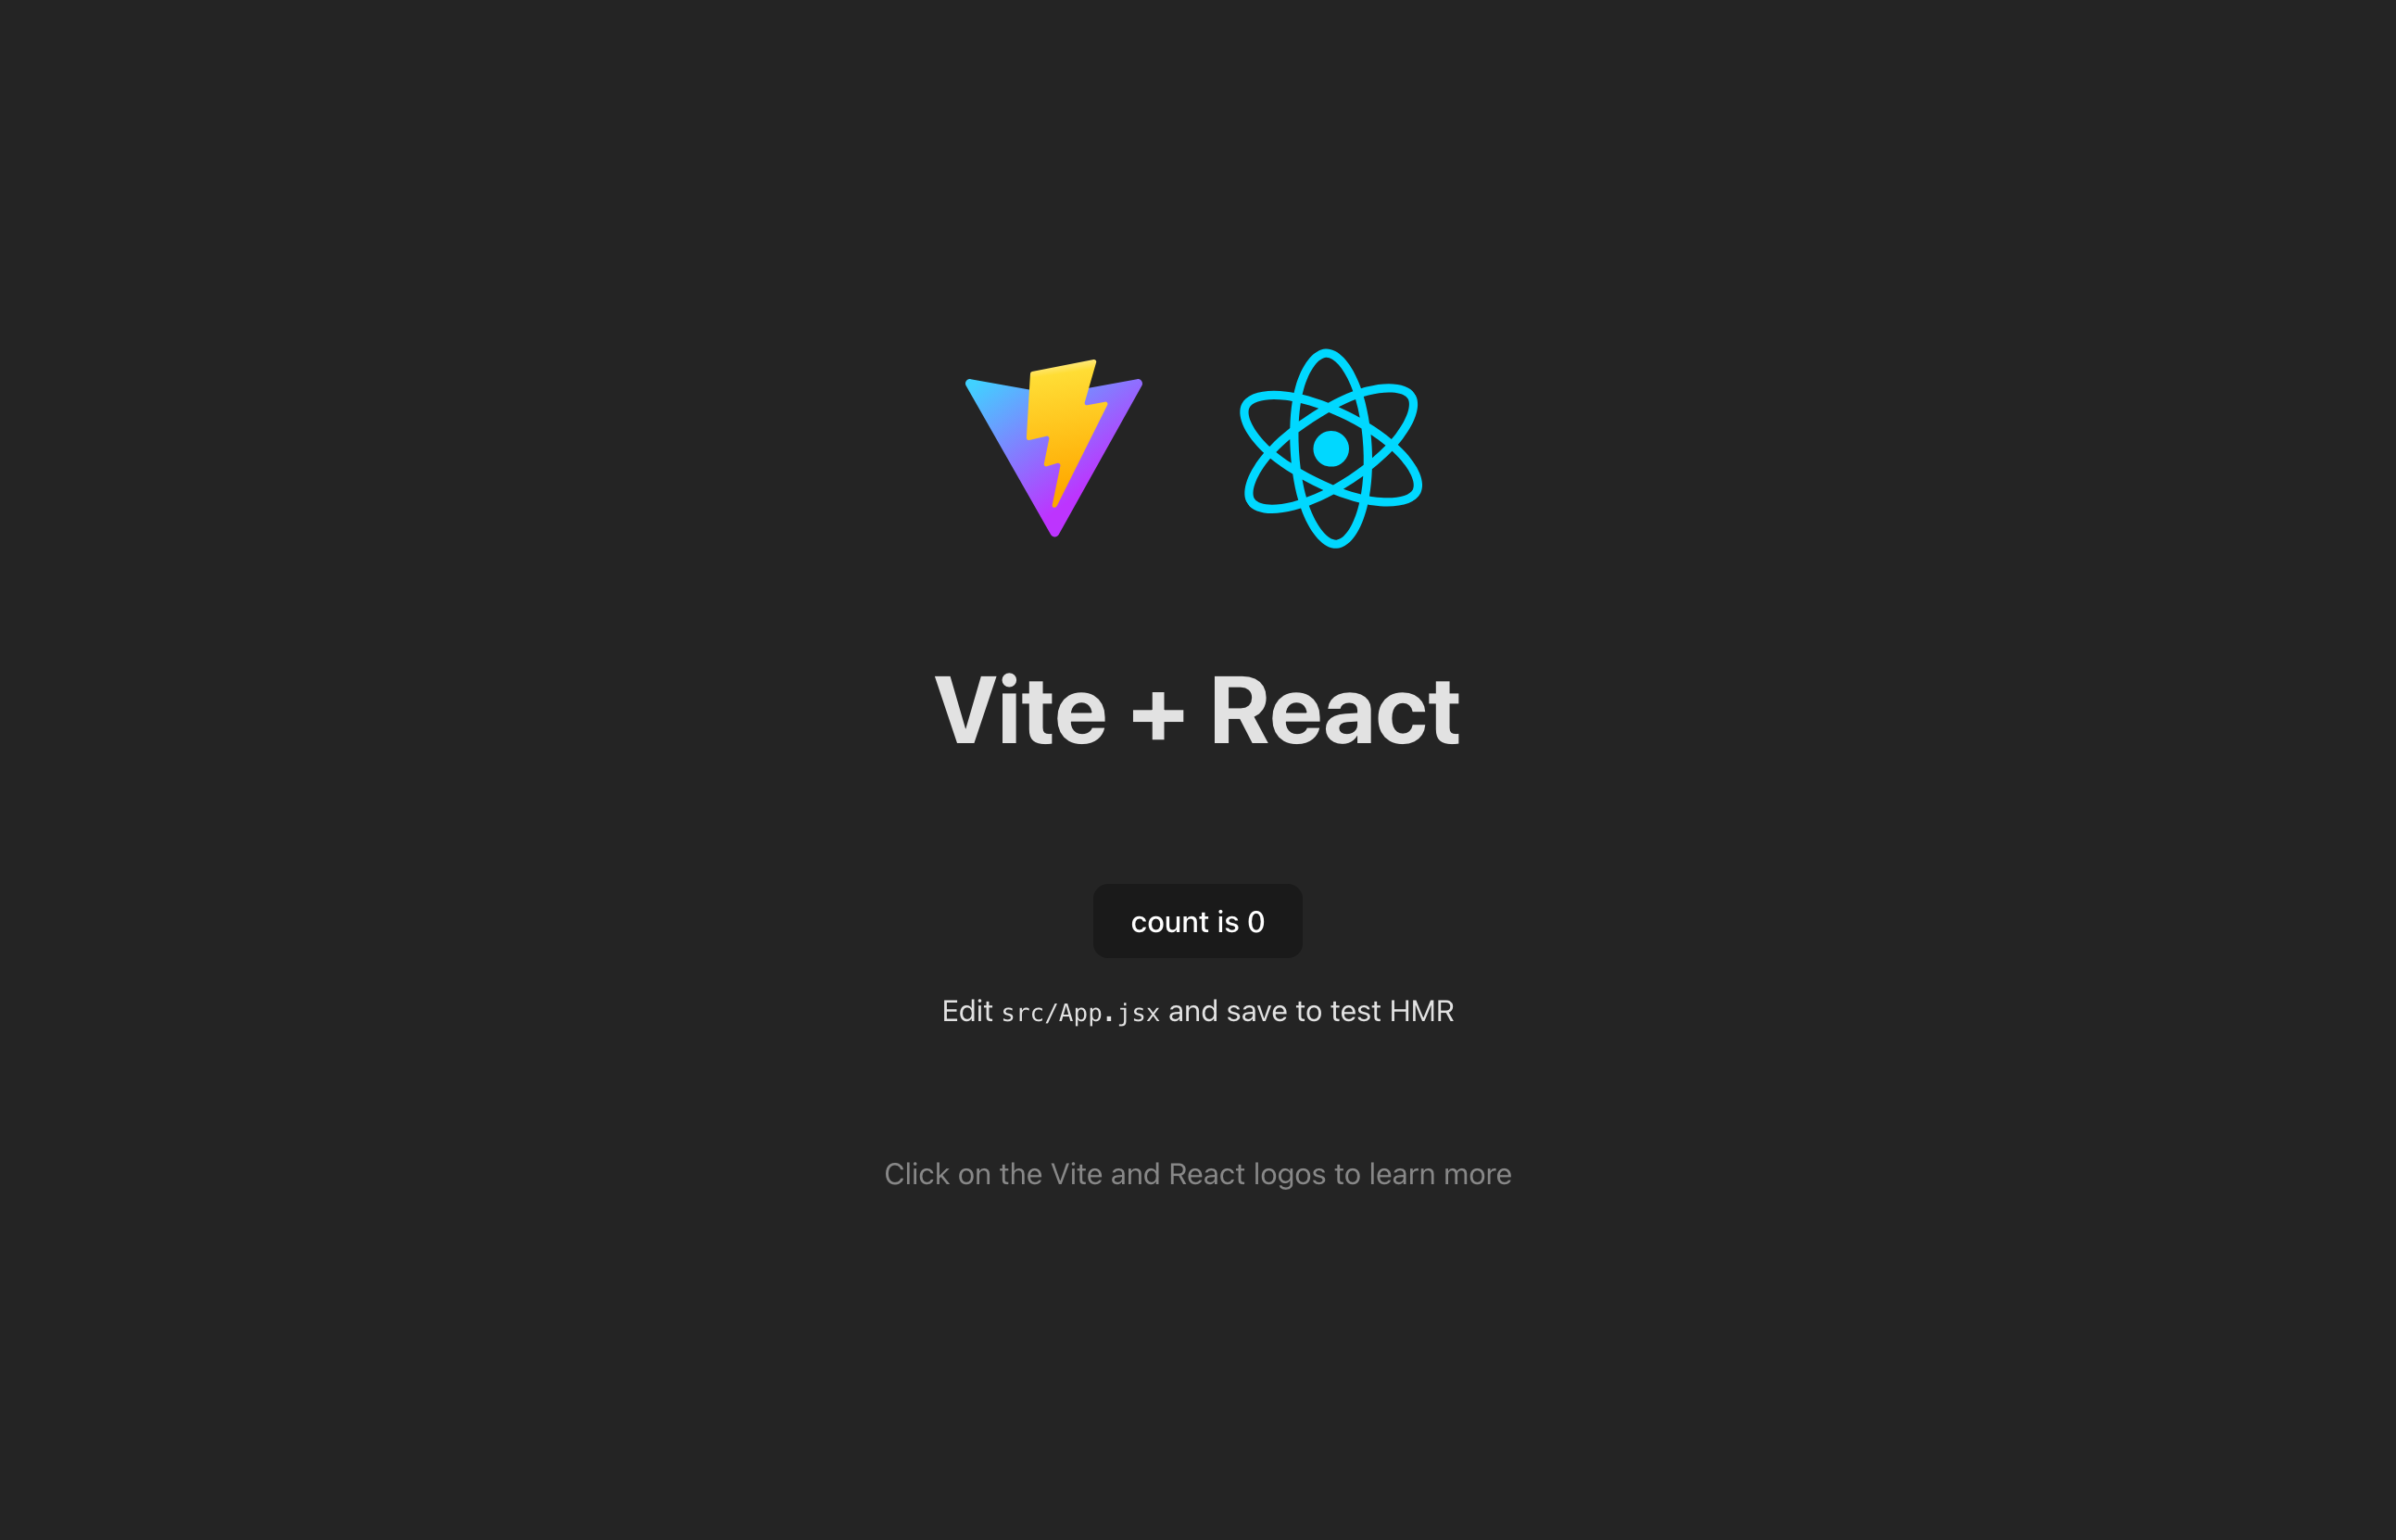
Once that’s over, you can open your React app locally on http://localhost:5173/
If you visit the URL, you will see a basic click counter app made with React.
That’s it! That’s all the setup steps.
We’re now ready to dive into the fun part.
Step 2: Open The Project Folder In Cursor
When you open Cursor, you will see this screen:
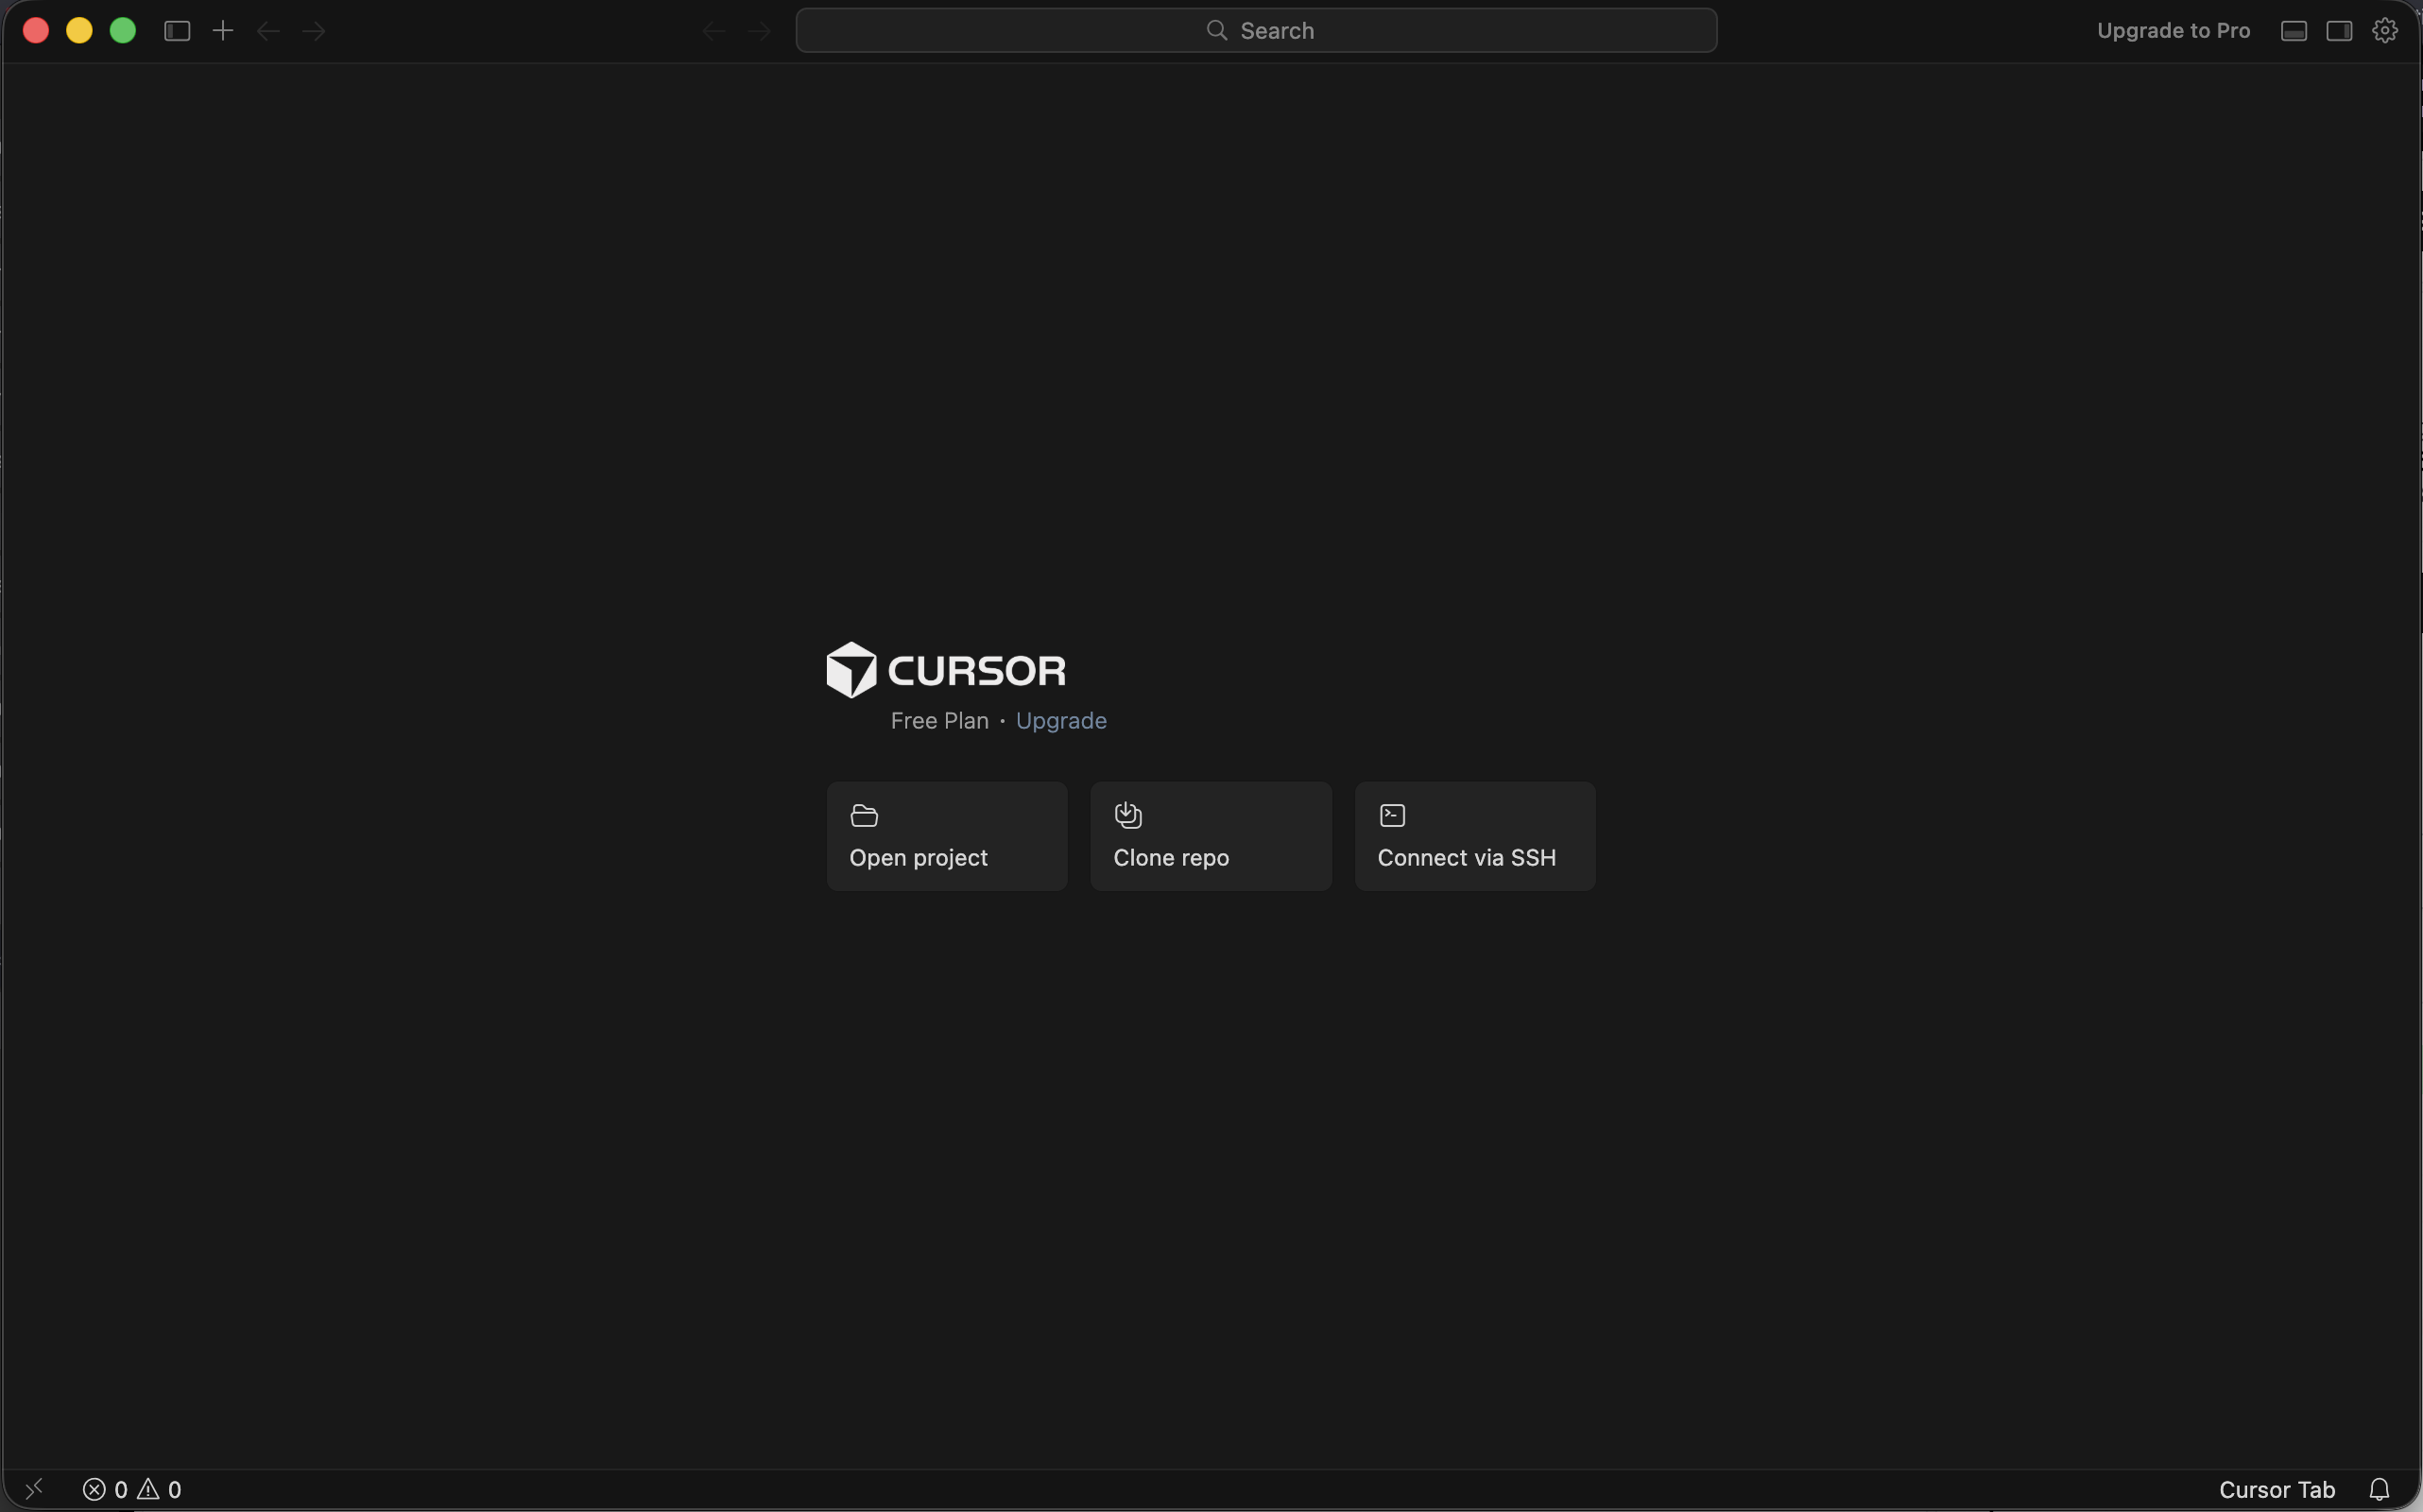
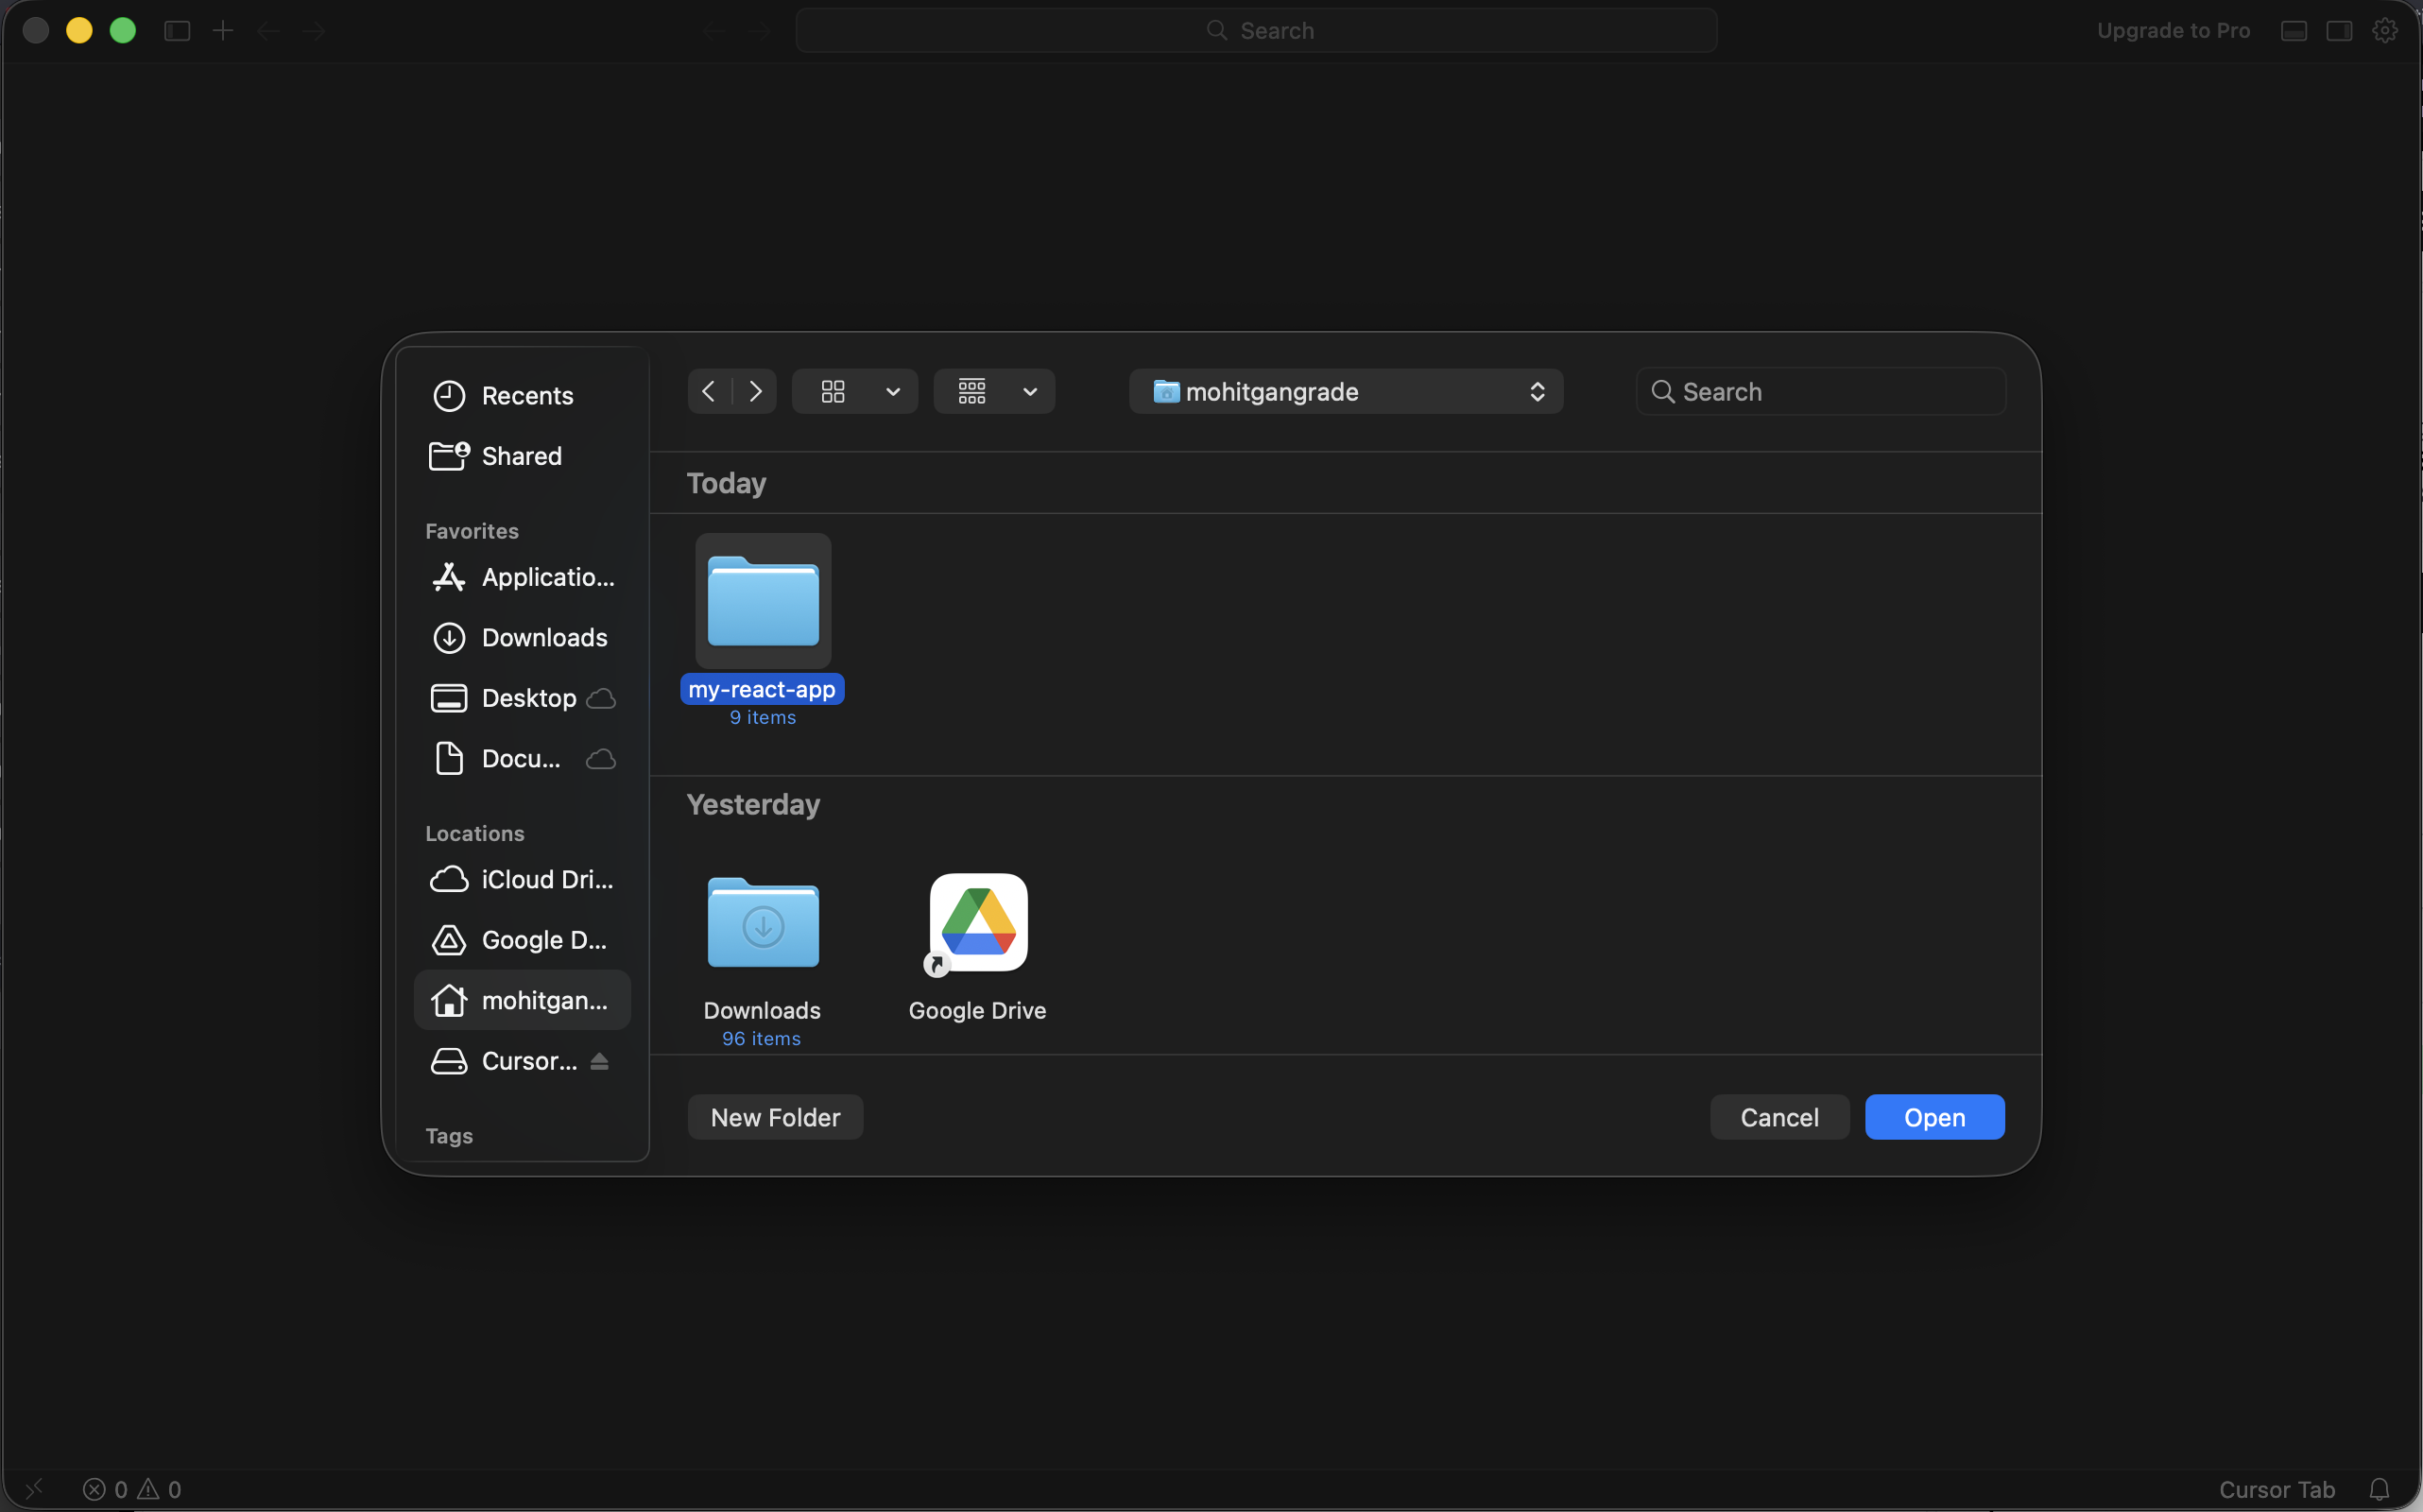
Click the Open Project button and select your project’s folder from the folder picker window.
You will now see Cursor’s Agent mode window.
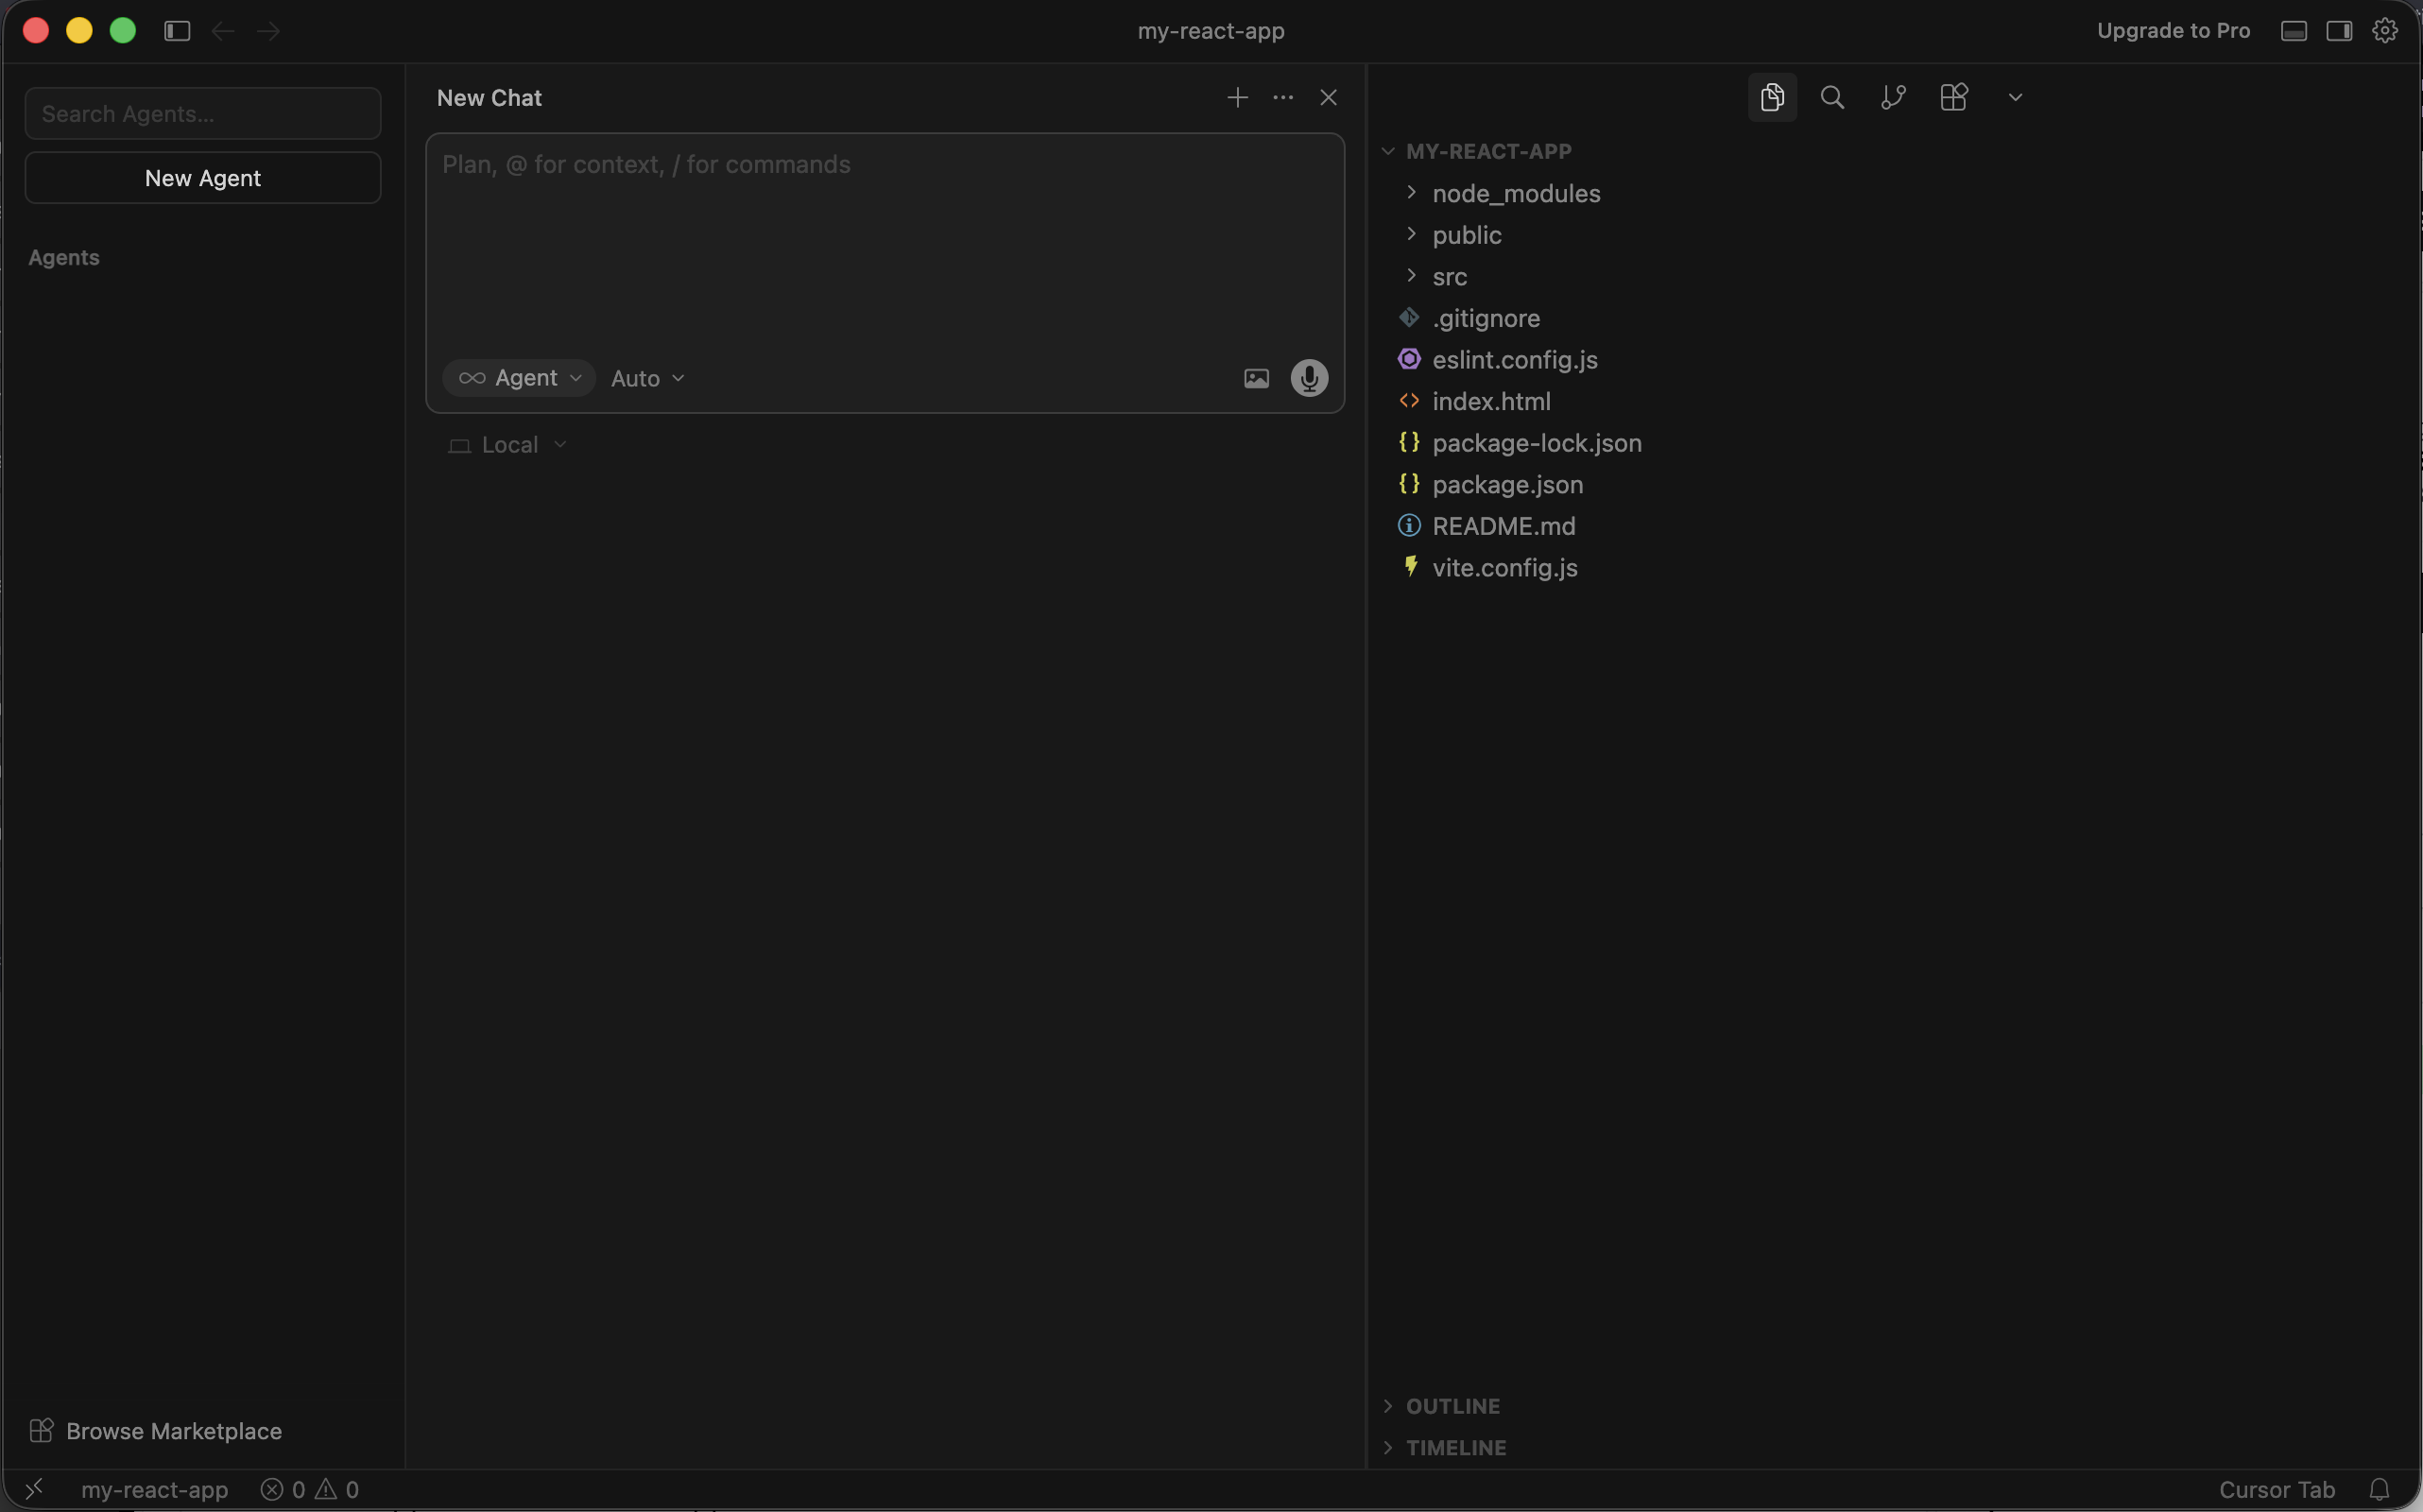
The Agent mode allows you to build apps without having to write code.
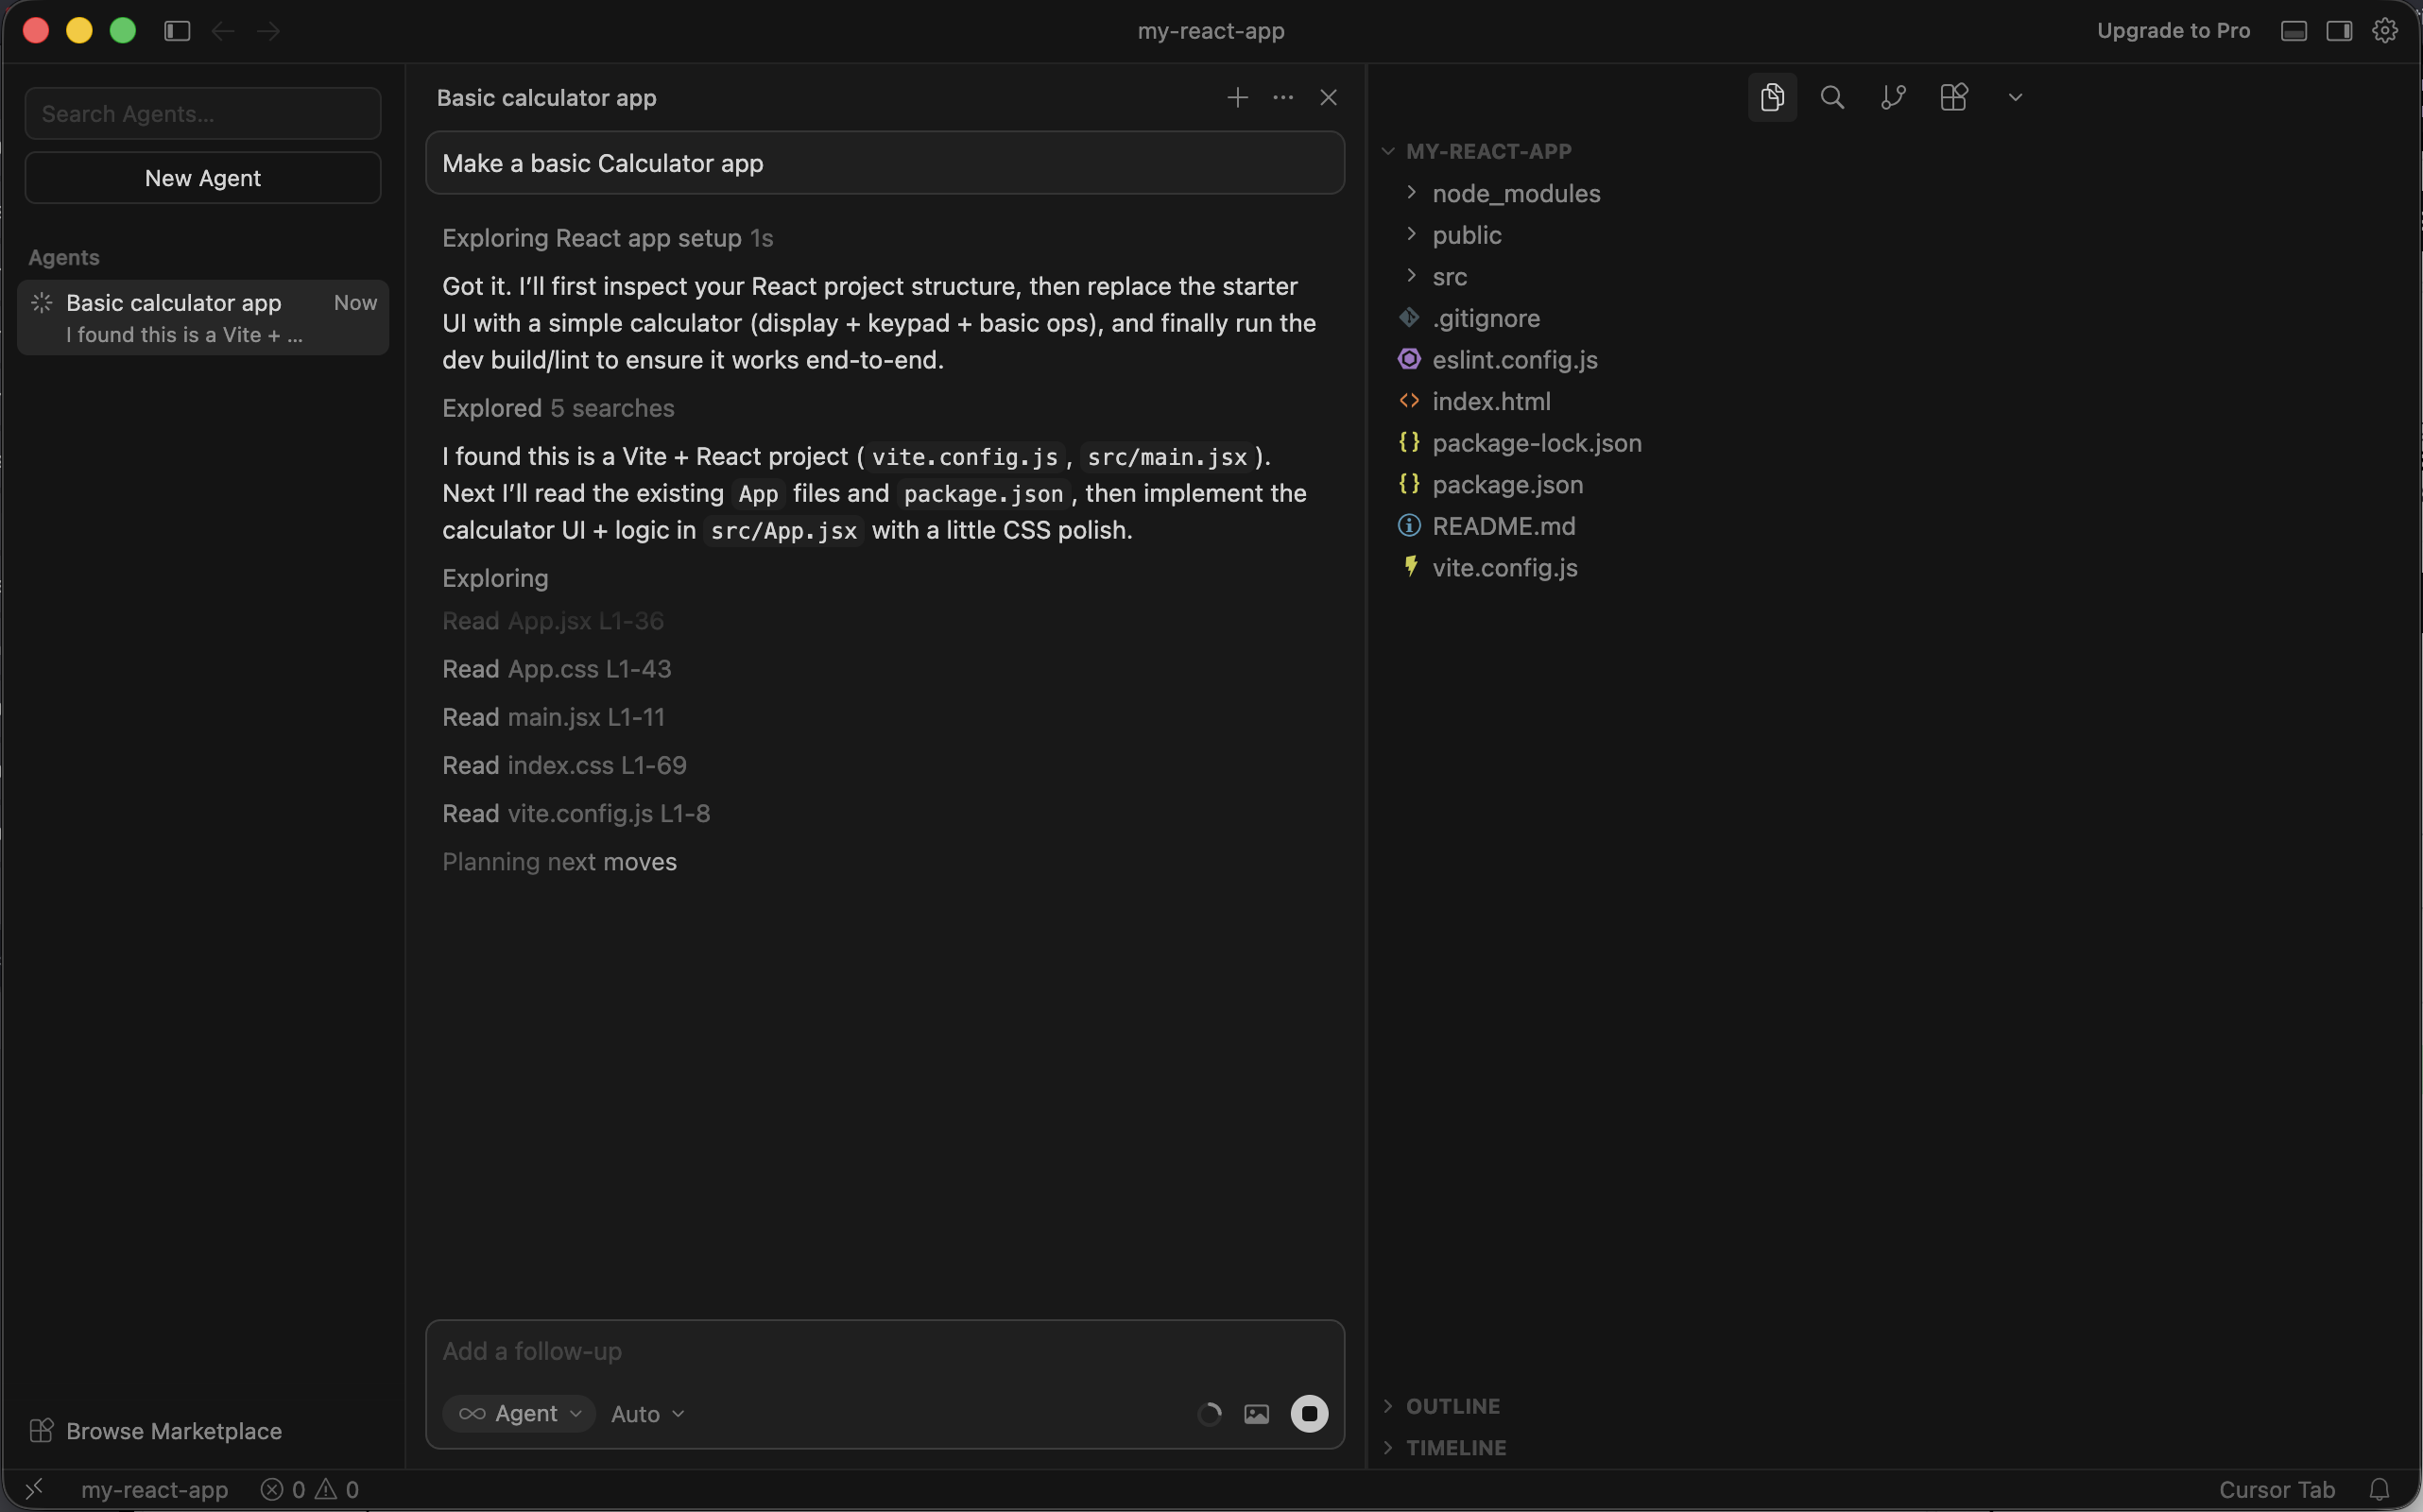
To get started, prompt the Agent with what you want it to build.
Here’s the prompt I used:
Make a basic Calculator app
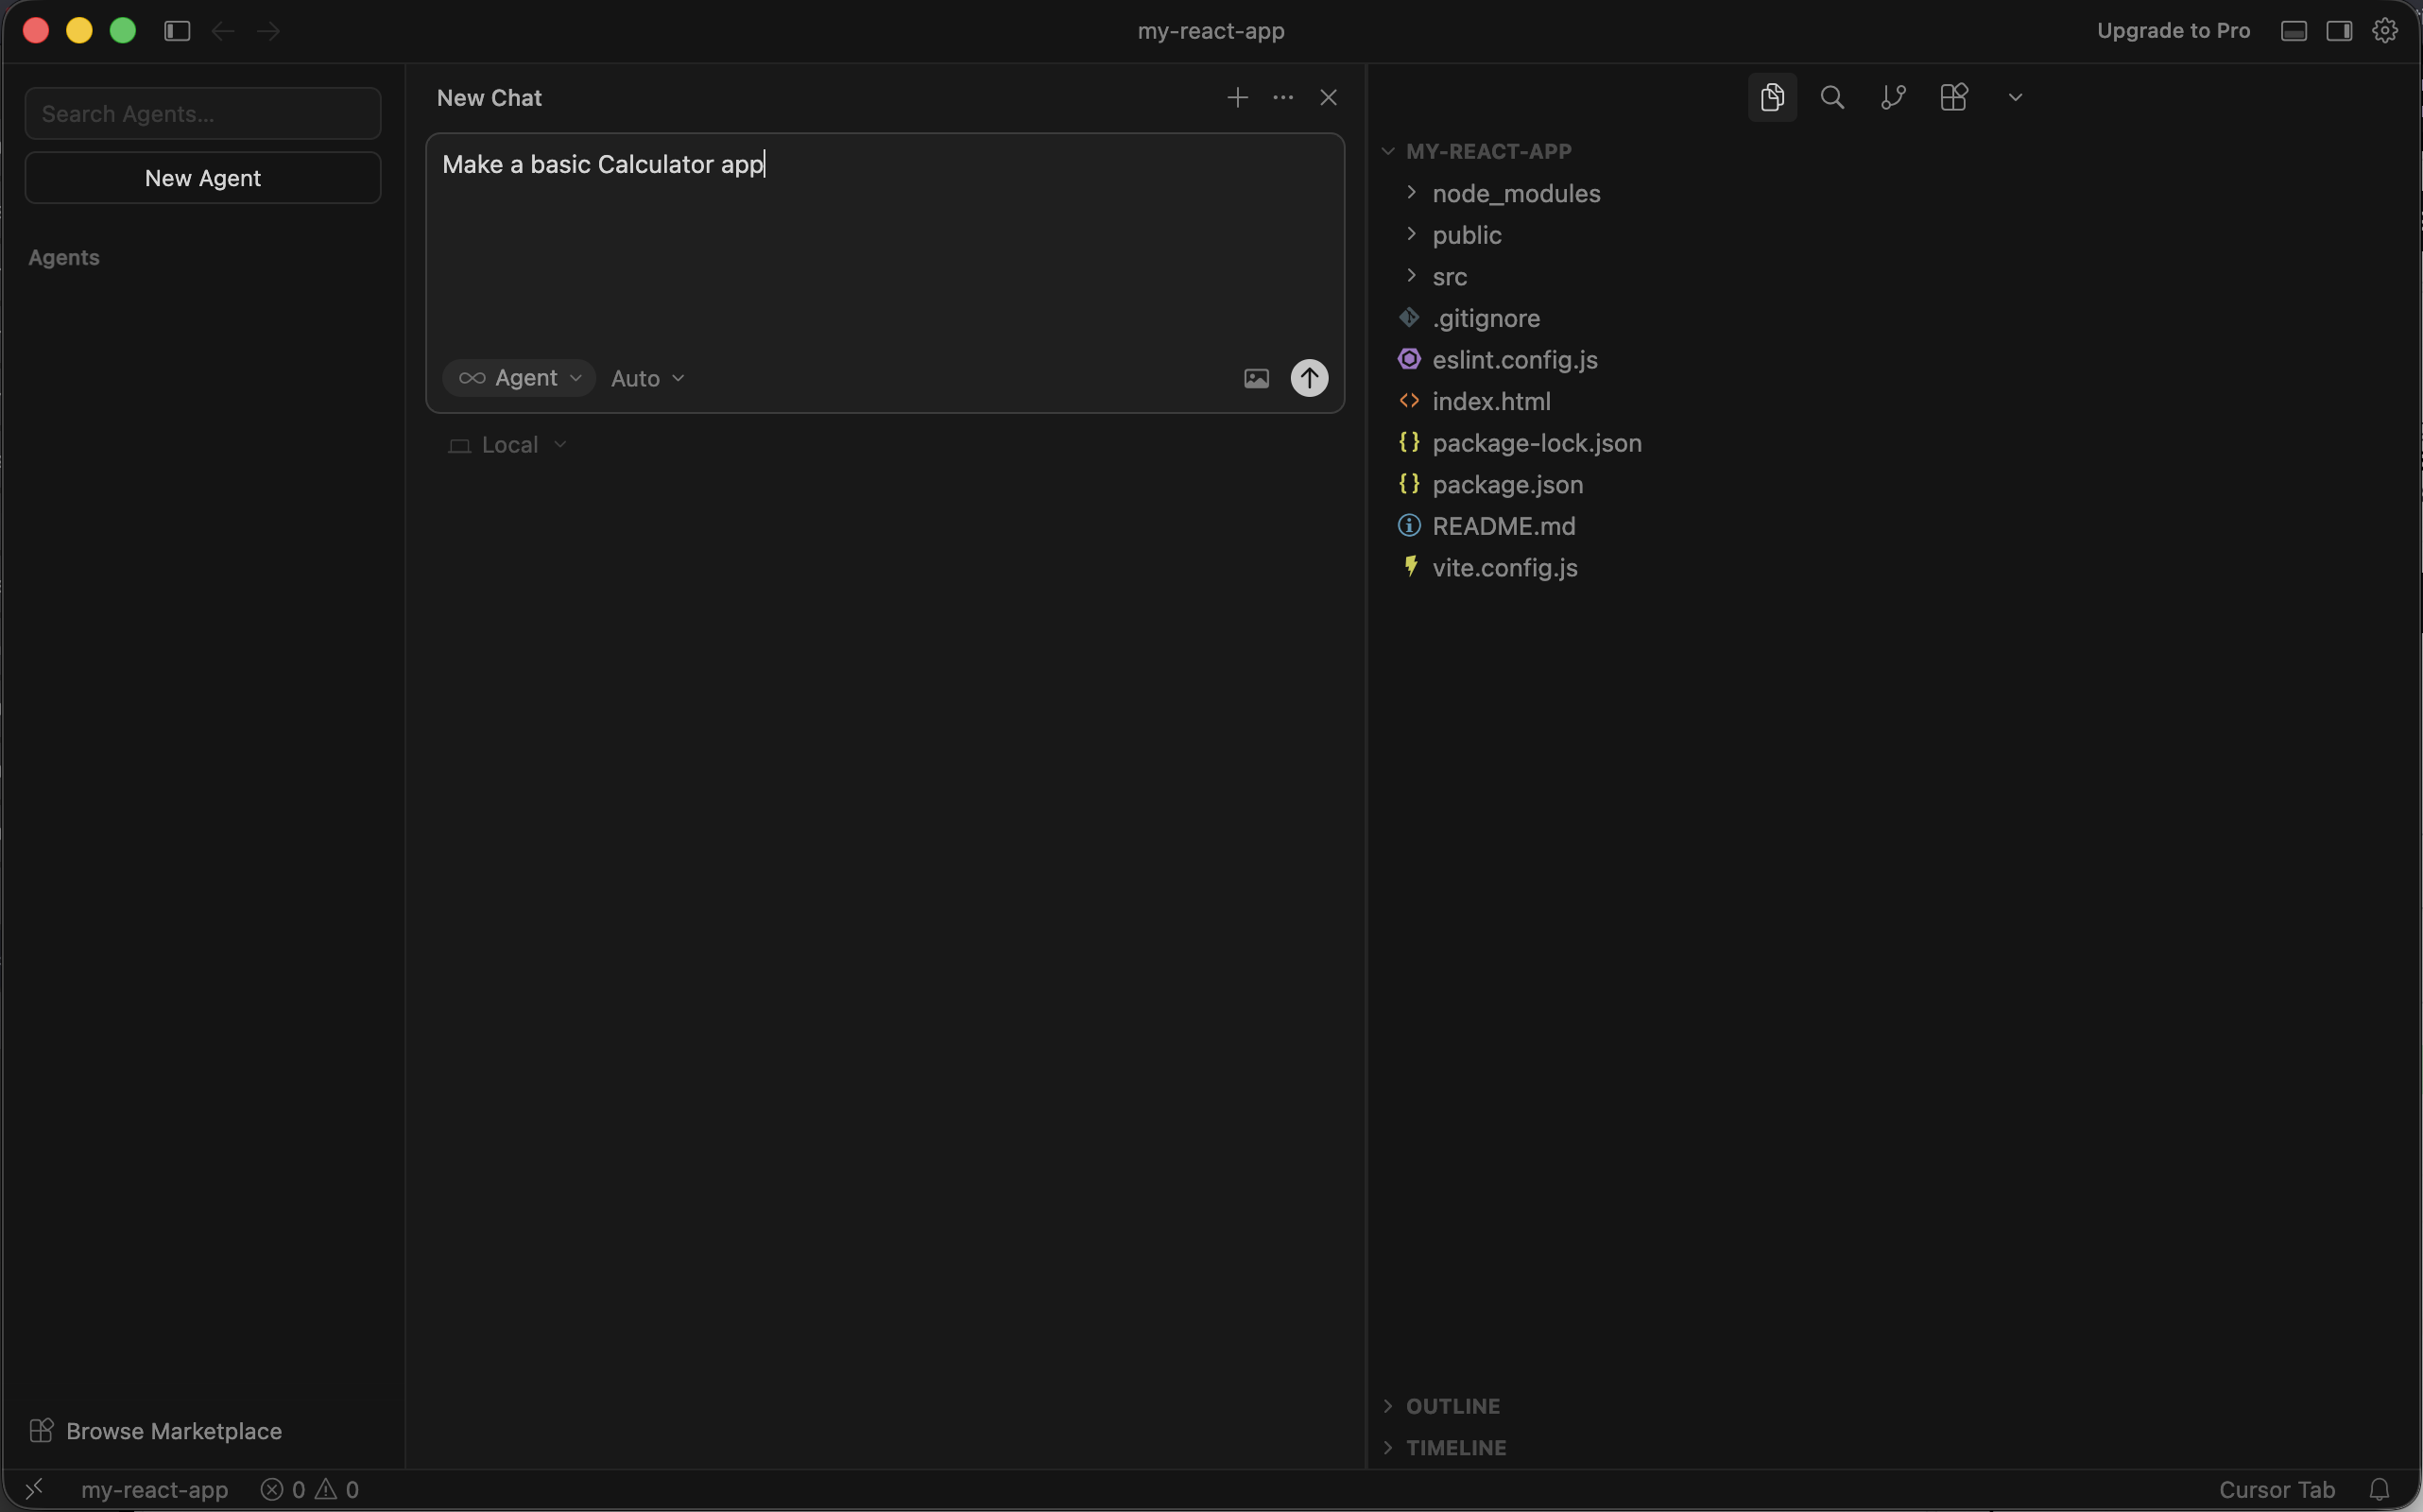
First, Cursor’s intelligent AI Agent will explore the files in our project to figure out what framework we are using. It will only take a minute or two for Cursor to understand the project structure.
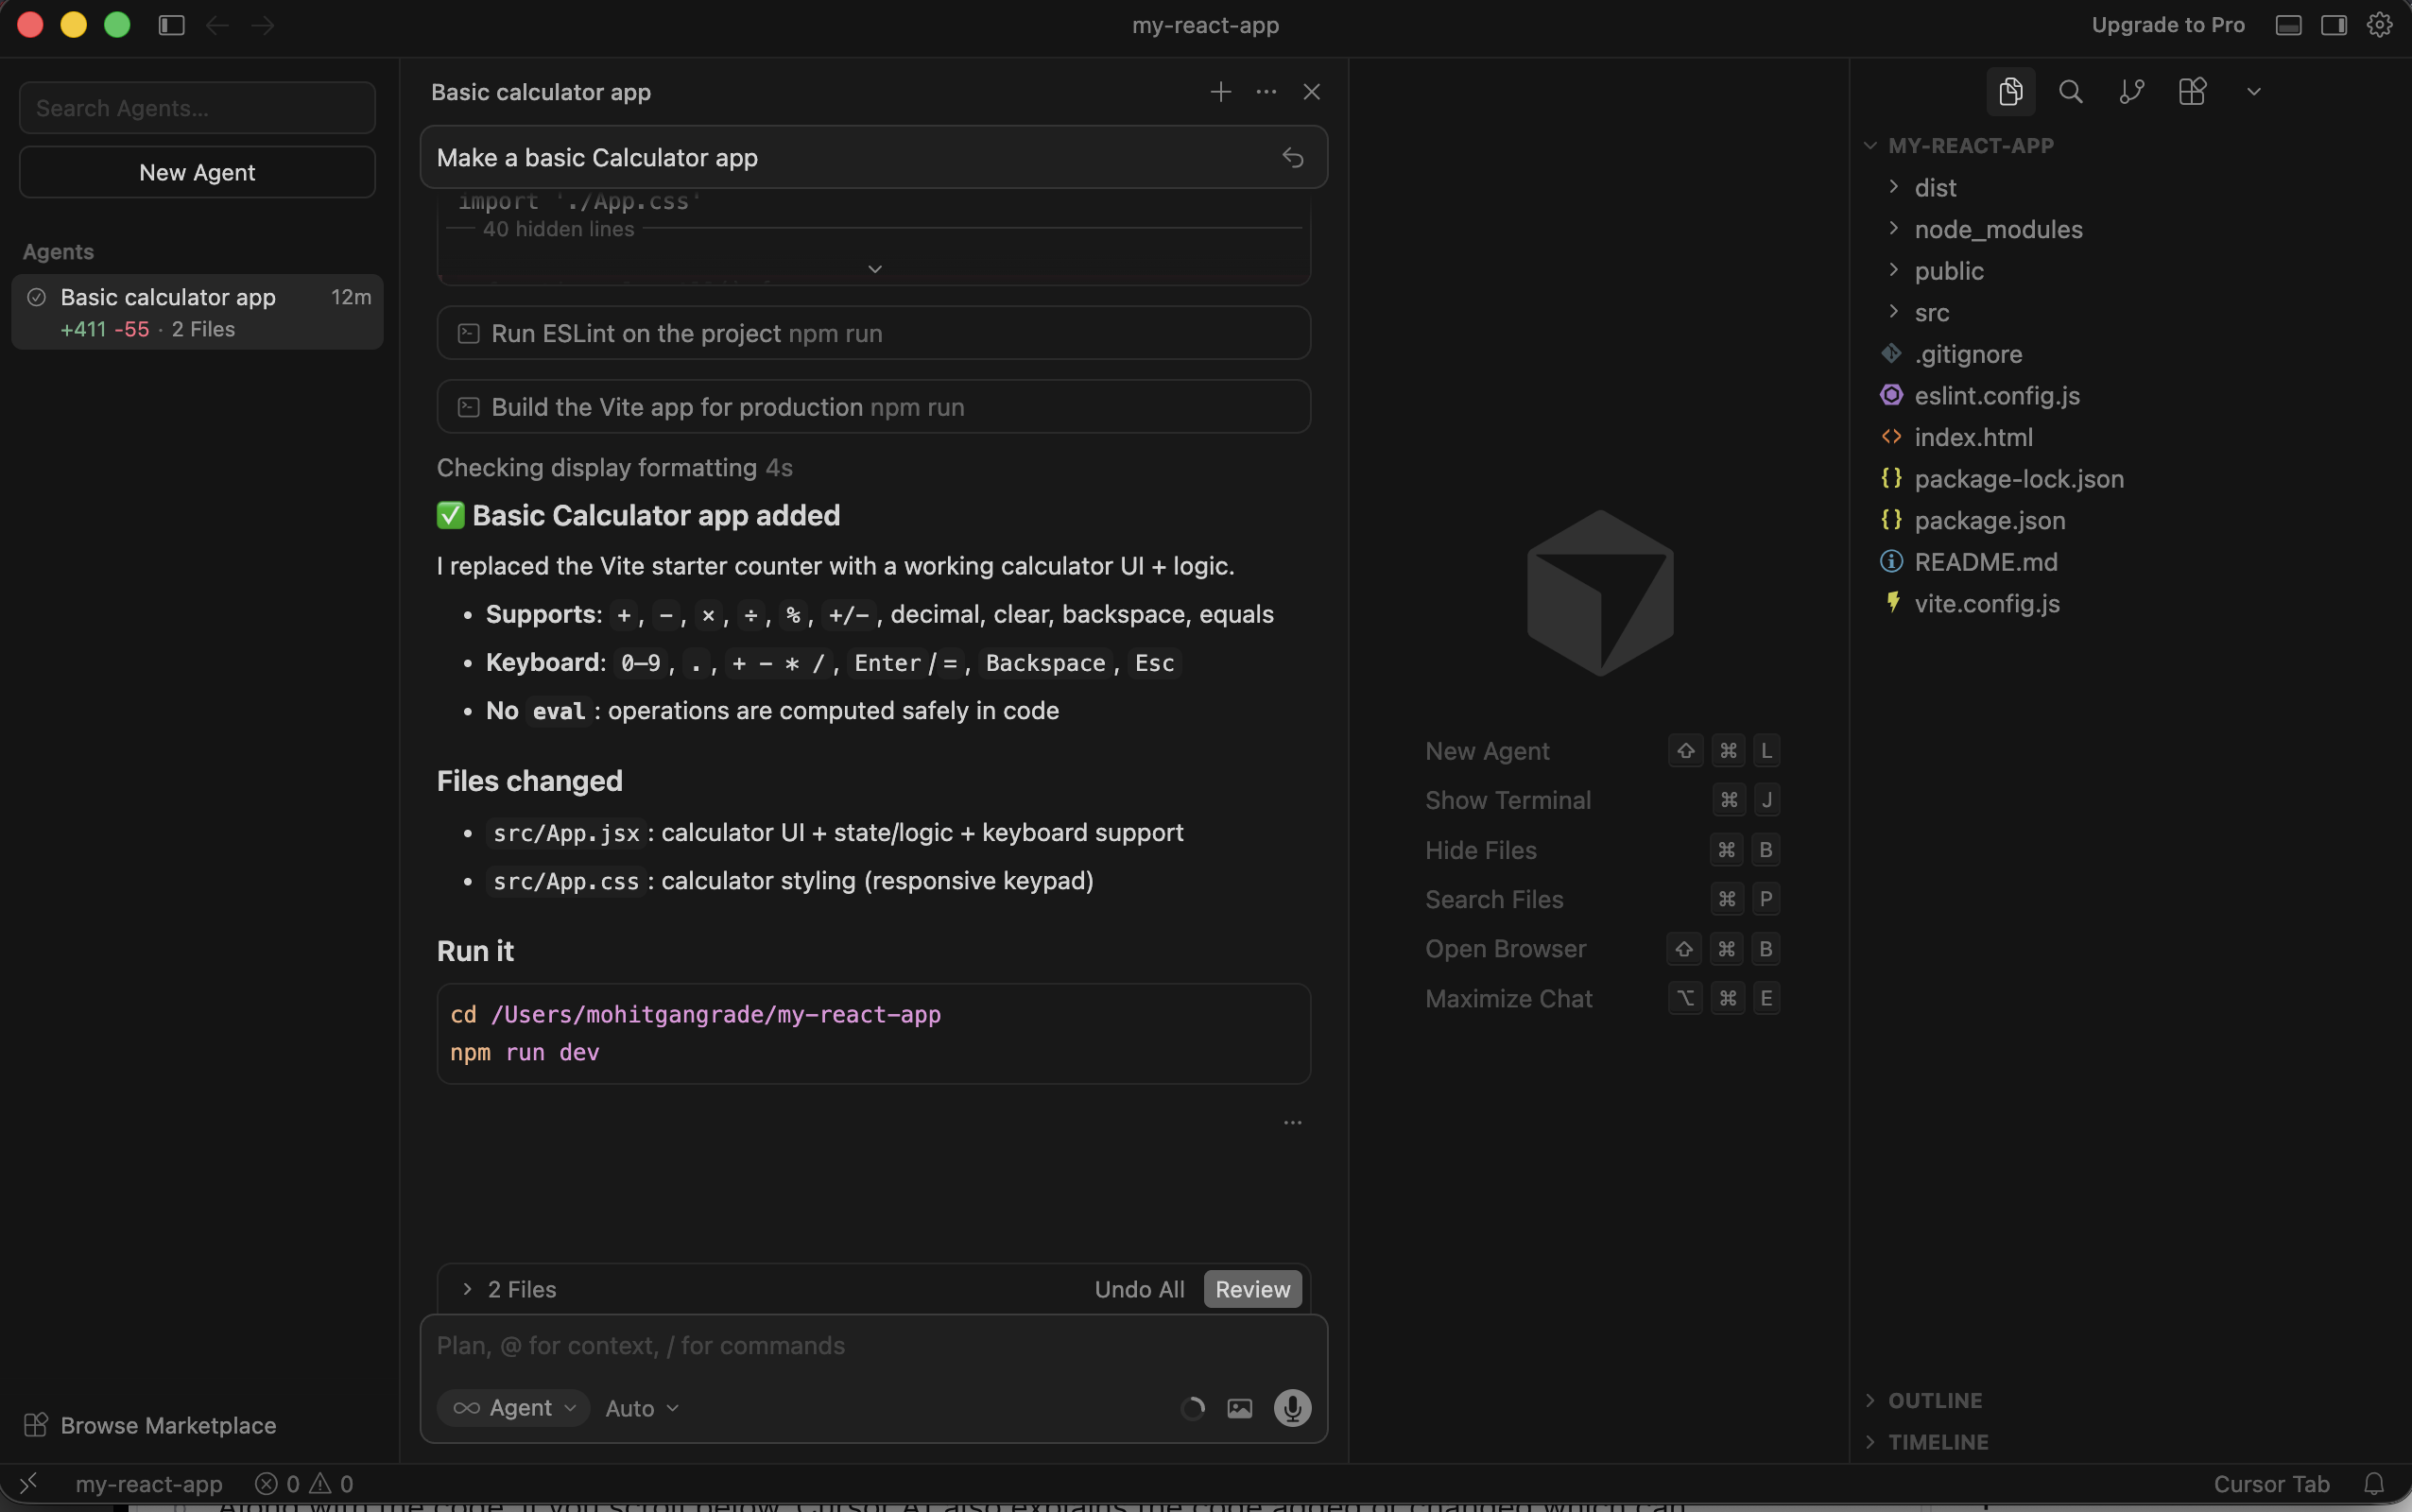
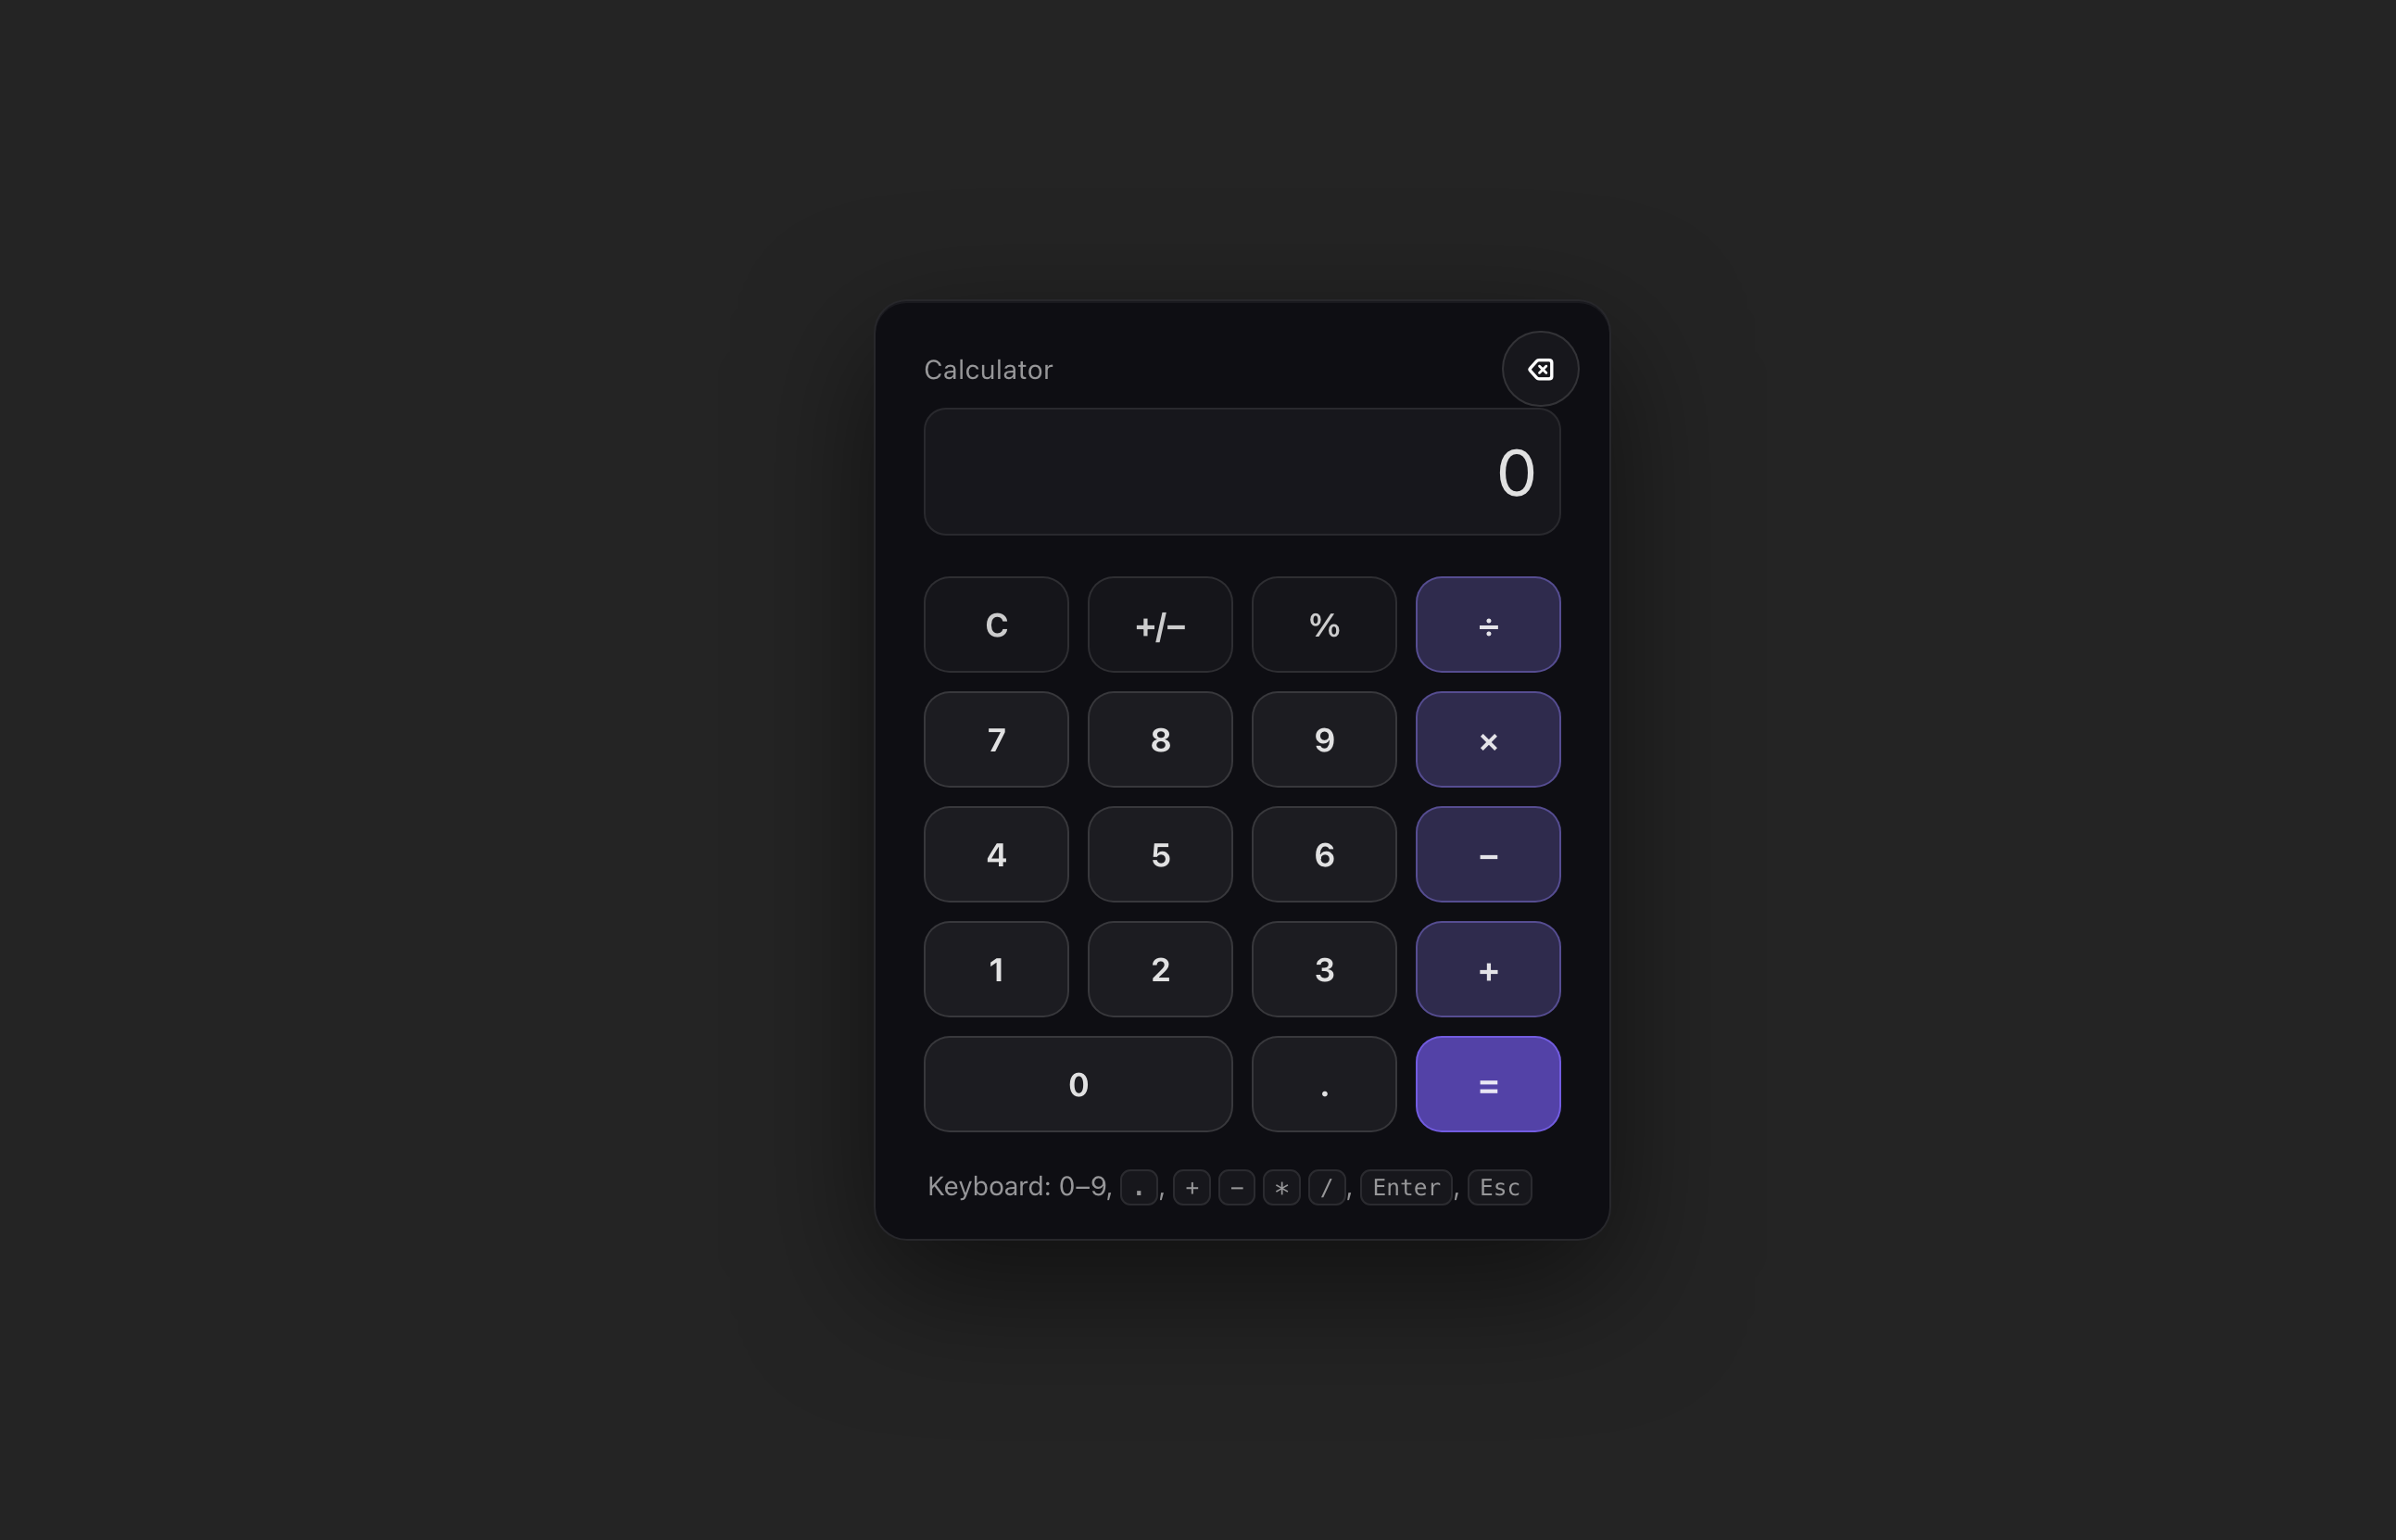
When Cursor is done editing the project files, you will see something like this if you visit the running React app in your browser (http://localhost:5173):

Back in the Cursor app, you can see an explanation of the changes Cursor’s Agent made.
Step 3: Customize The App
You can now prompt the Agent to customize the app to your liking.
For me, the calculator is displayed on the left side of the screen. So, I asked the Cursor AI Agent to center the calculator.
It took Cursor less than a minute to apply this change.
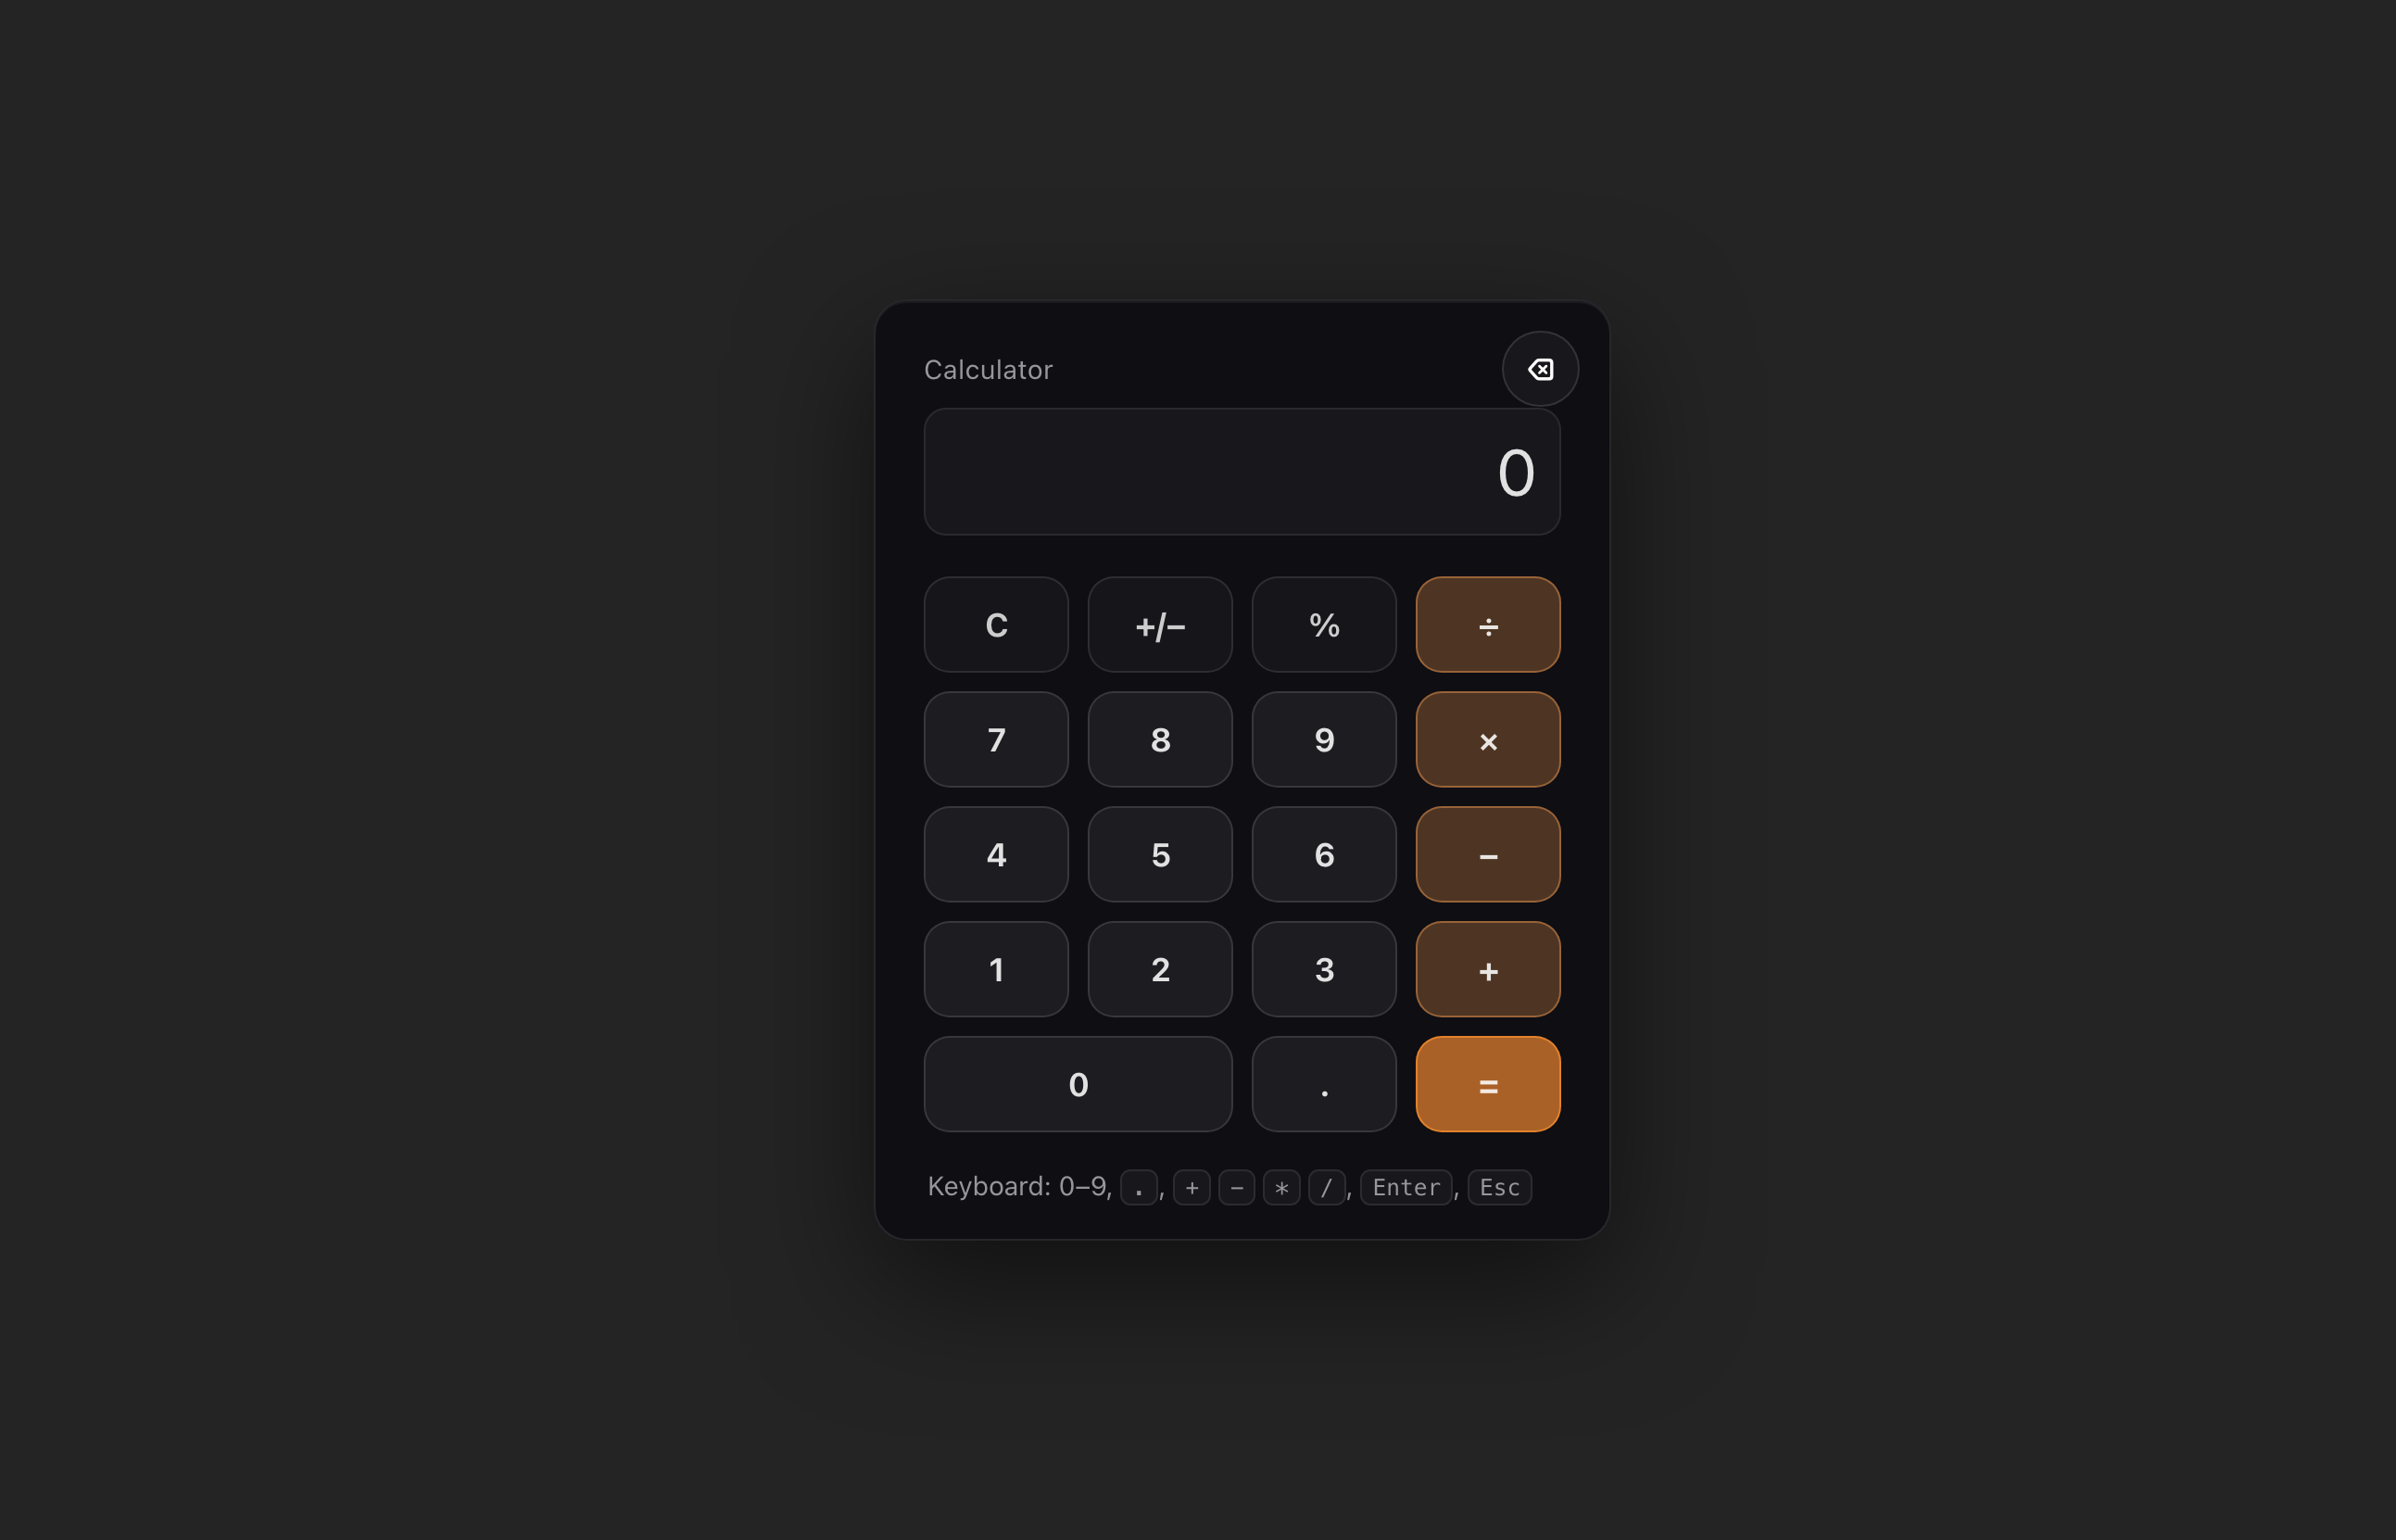
Let’s ask Cursor to customize the color scheme to orange.

Here’s the result:
Updating the color scheme is fun, but let’s add some real features to the calculator.
I asked Cursor to add a History panel to the calculator with this prompt:
Can you add a history panel to the calculator? It should be displayed on the right side of the calculator.
The result?
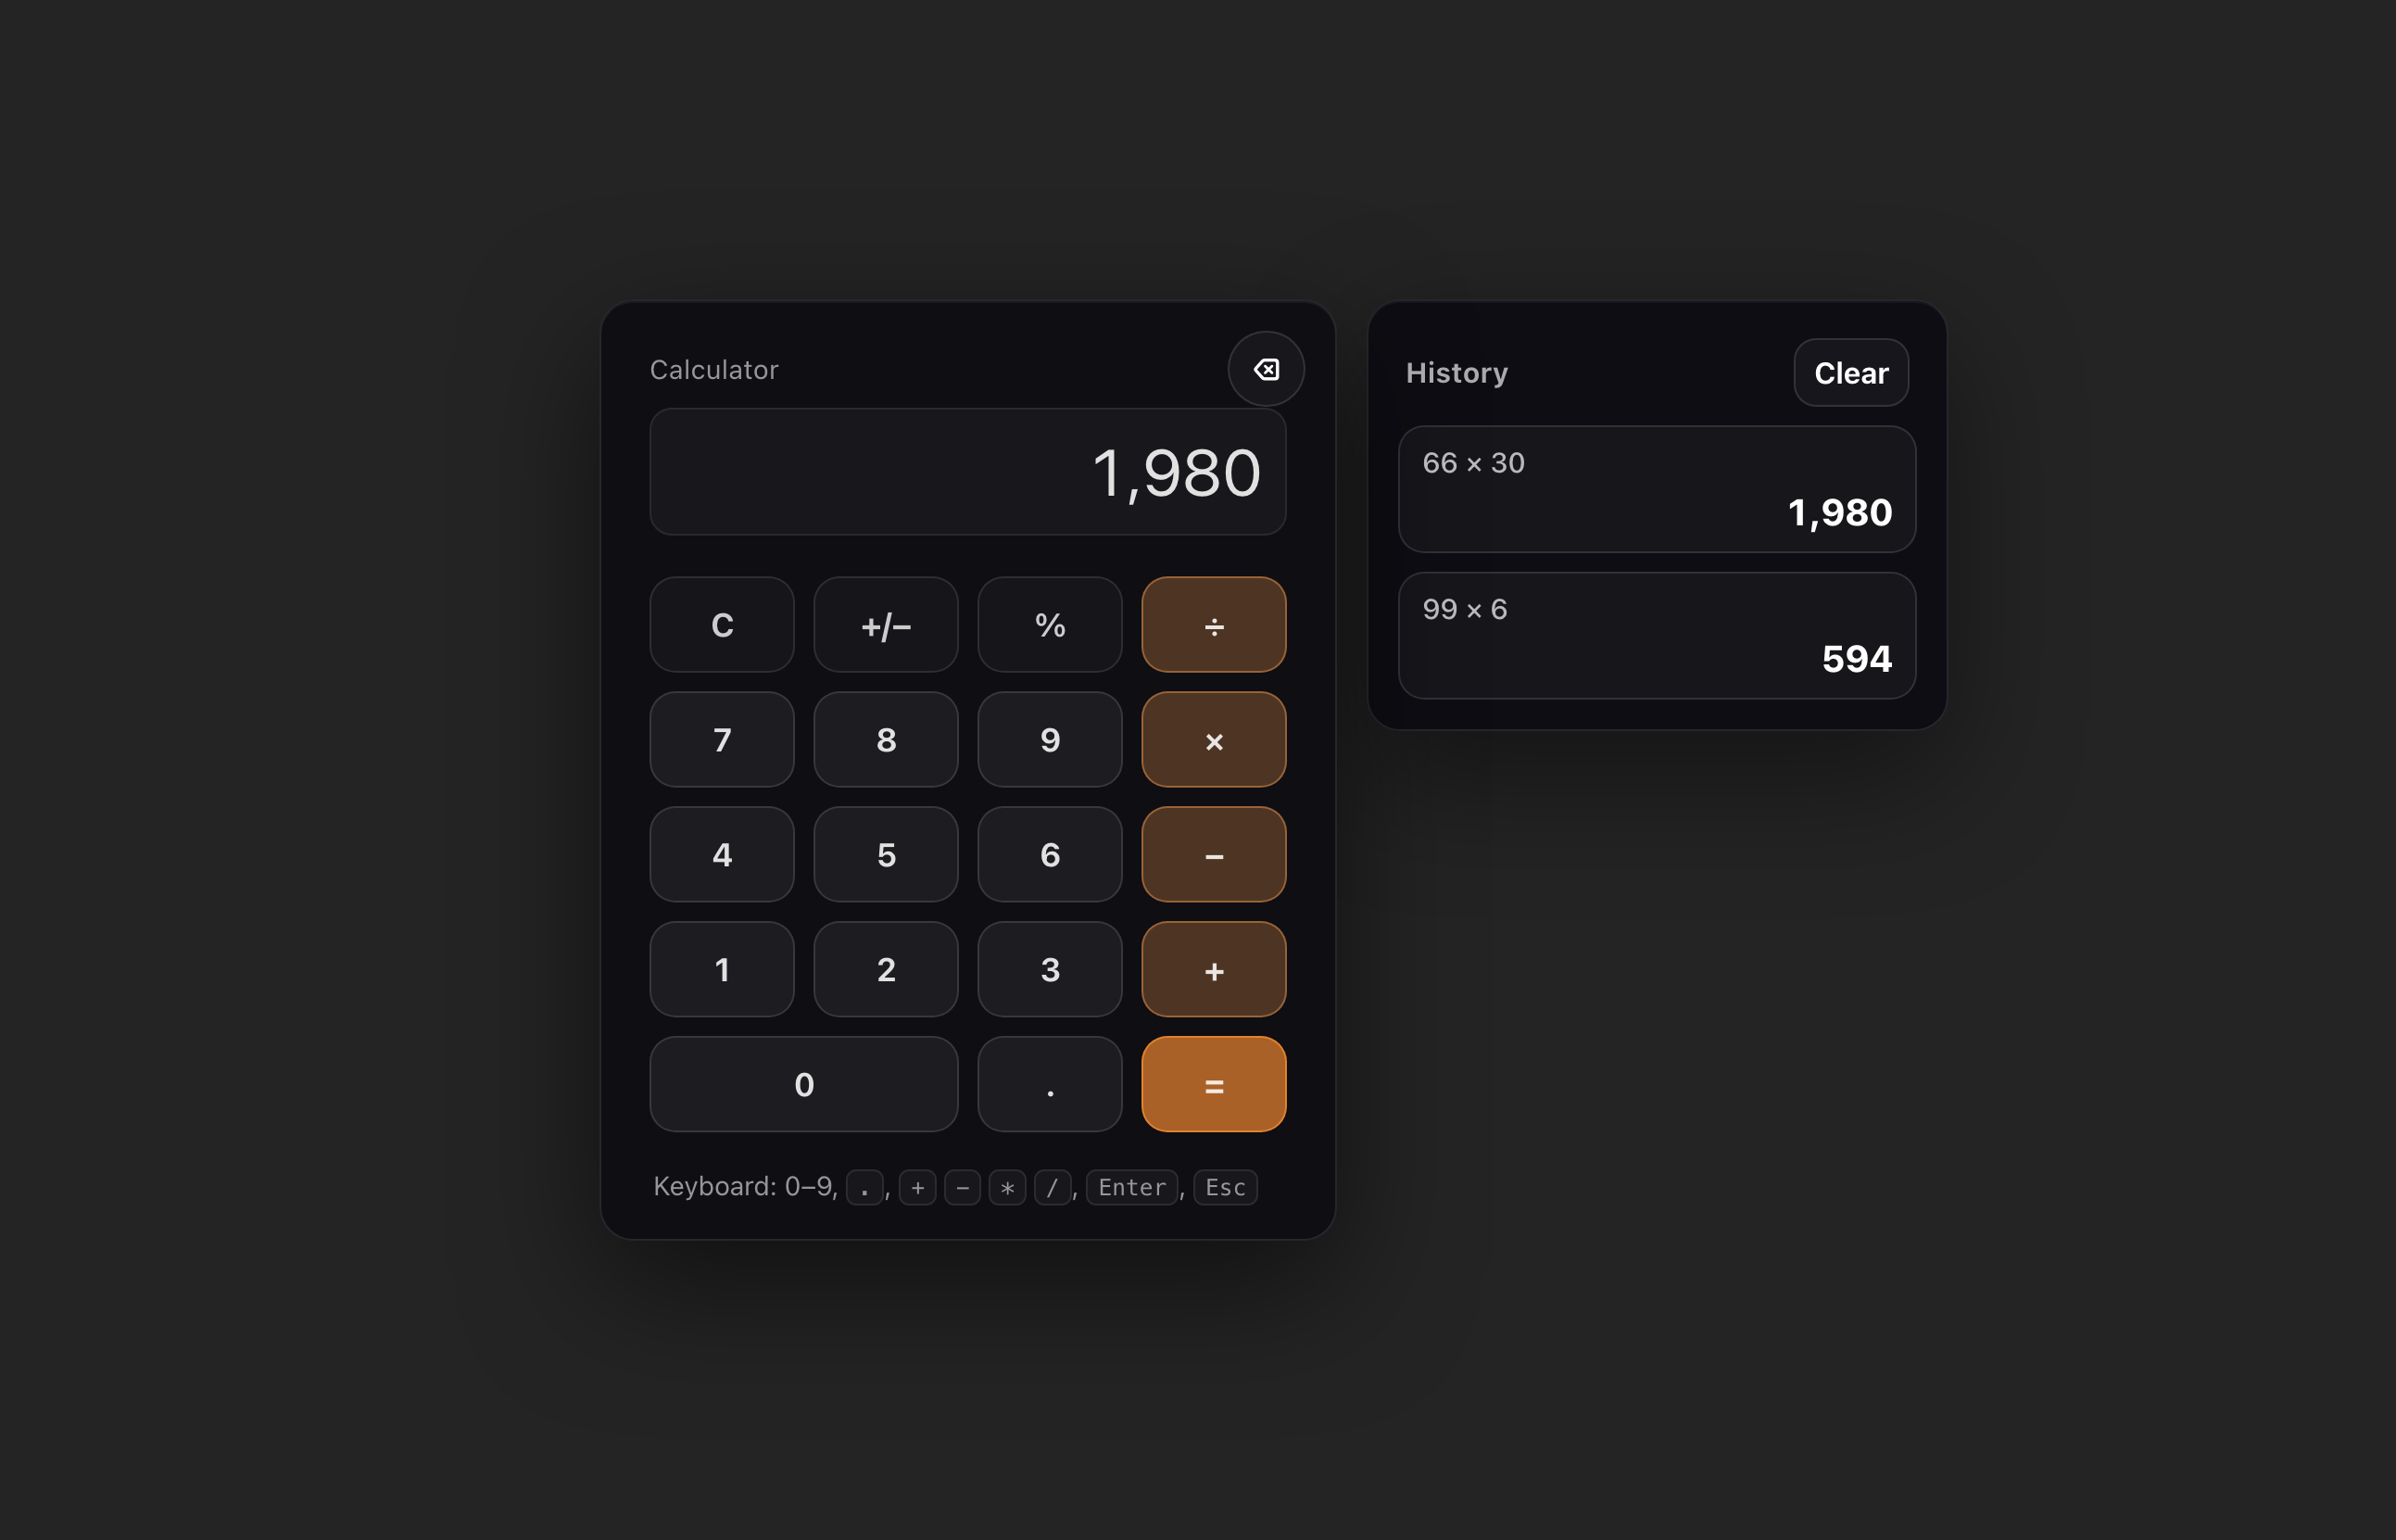
Right now, if you refresh the page, the history is lost. Let’s ask Cursor to add a new feature: automatically saving the history to the browser local storage.
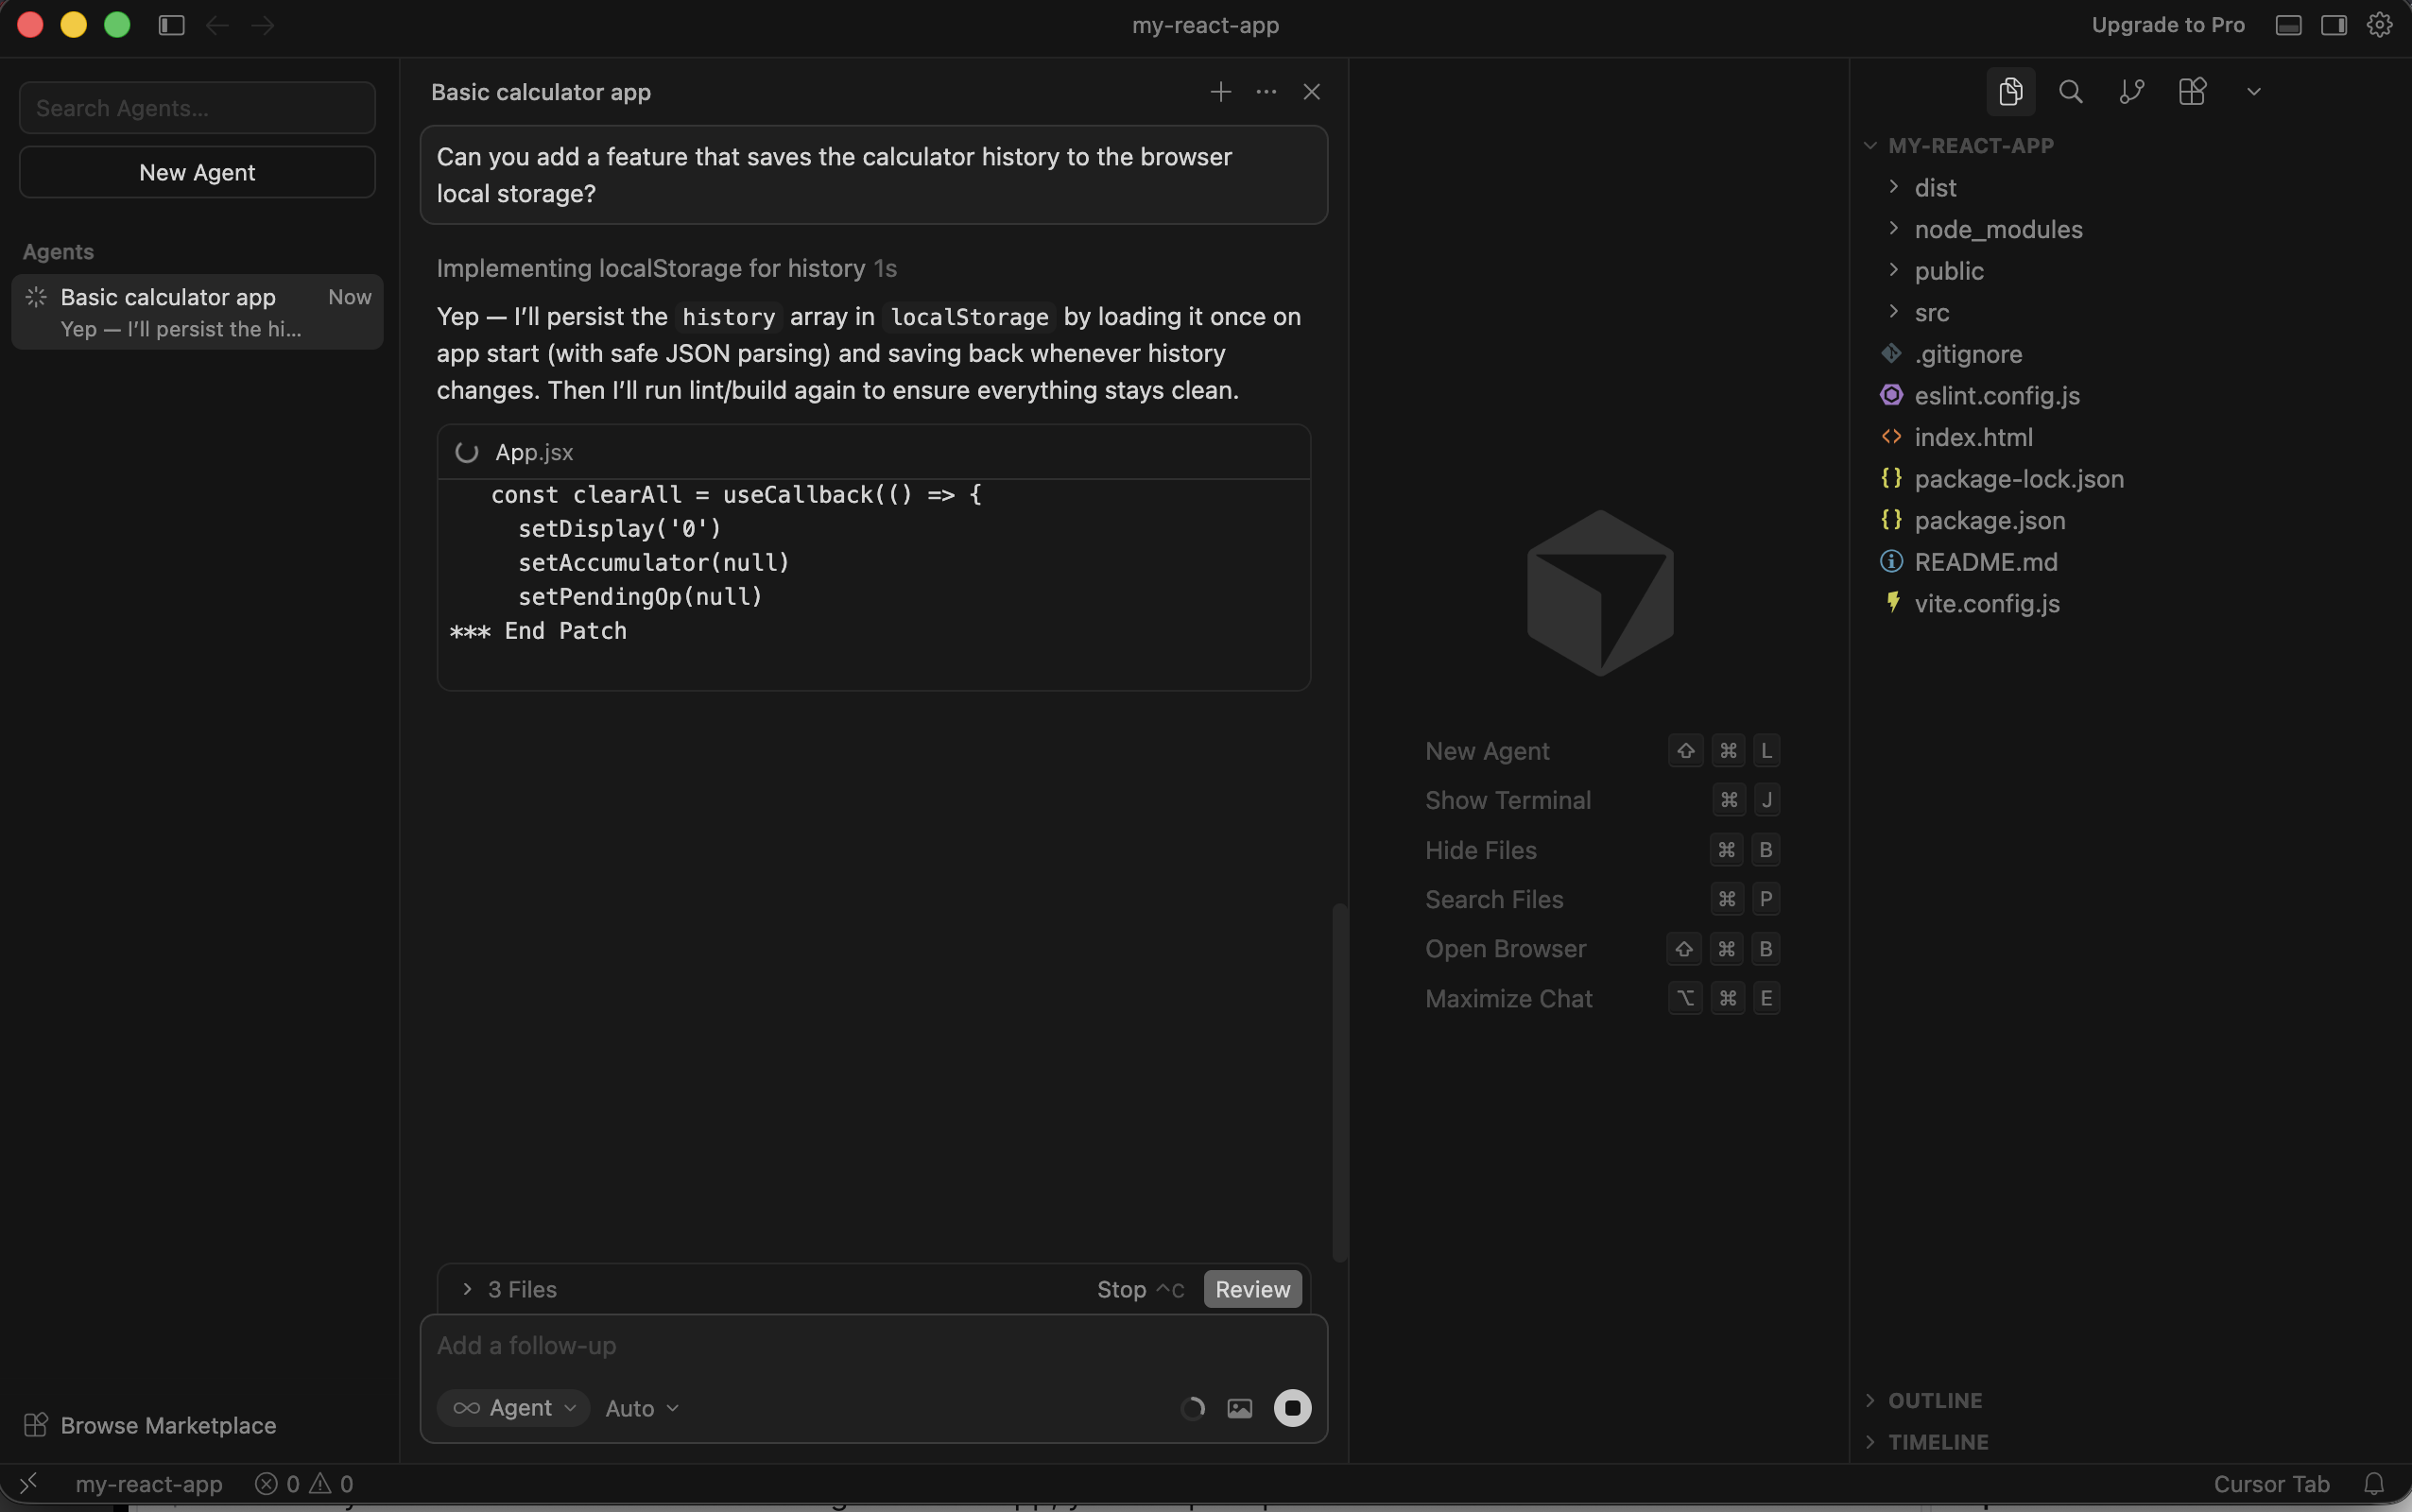
Now, you can refresh your browser as many times as you’d like and the history of the calculator will be preserved.
Step 4: Share The App with Others by Hosting it on Tiiny Host
Your app works on your local computer, but other people can’t visit it. Yet!
To make your app available to everyone, you will need to host it on a server. That sounds complicated but it’s really easy with Tiiny Host. You just have to upload your application’s files to Tiiny Host’s website.
Before we can upload your app to Tiiny Host, we need to build it first. To build your app, run the following command in your app’s folder:
npm run build
Running this command will build your application so it is ready to be hosted.
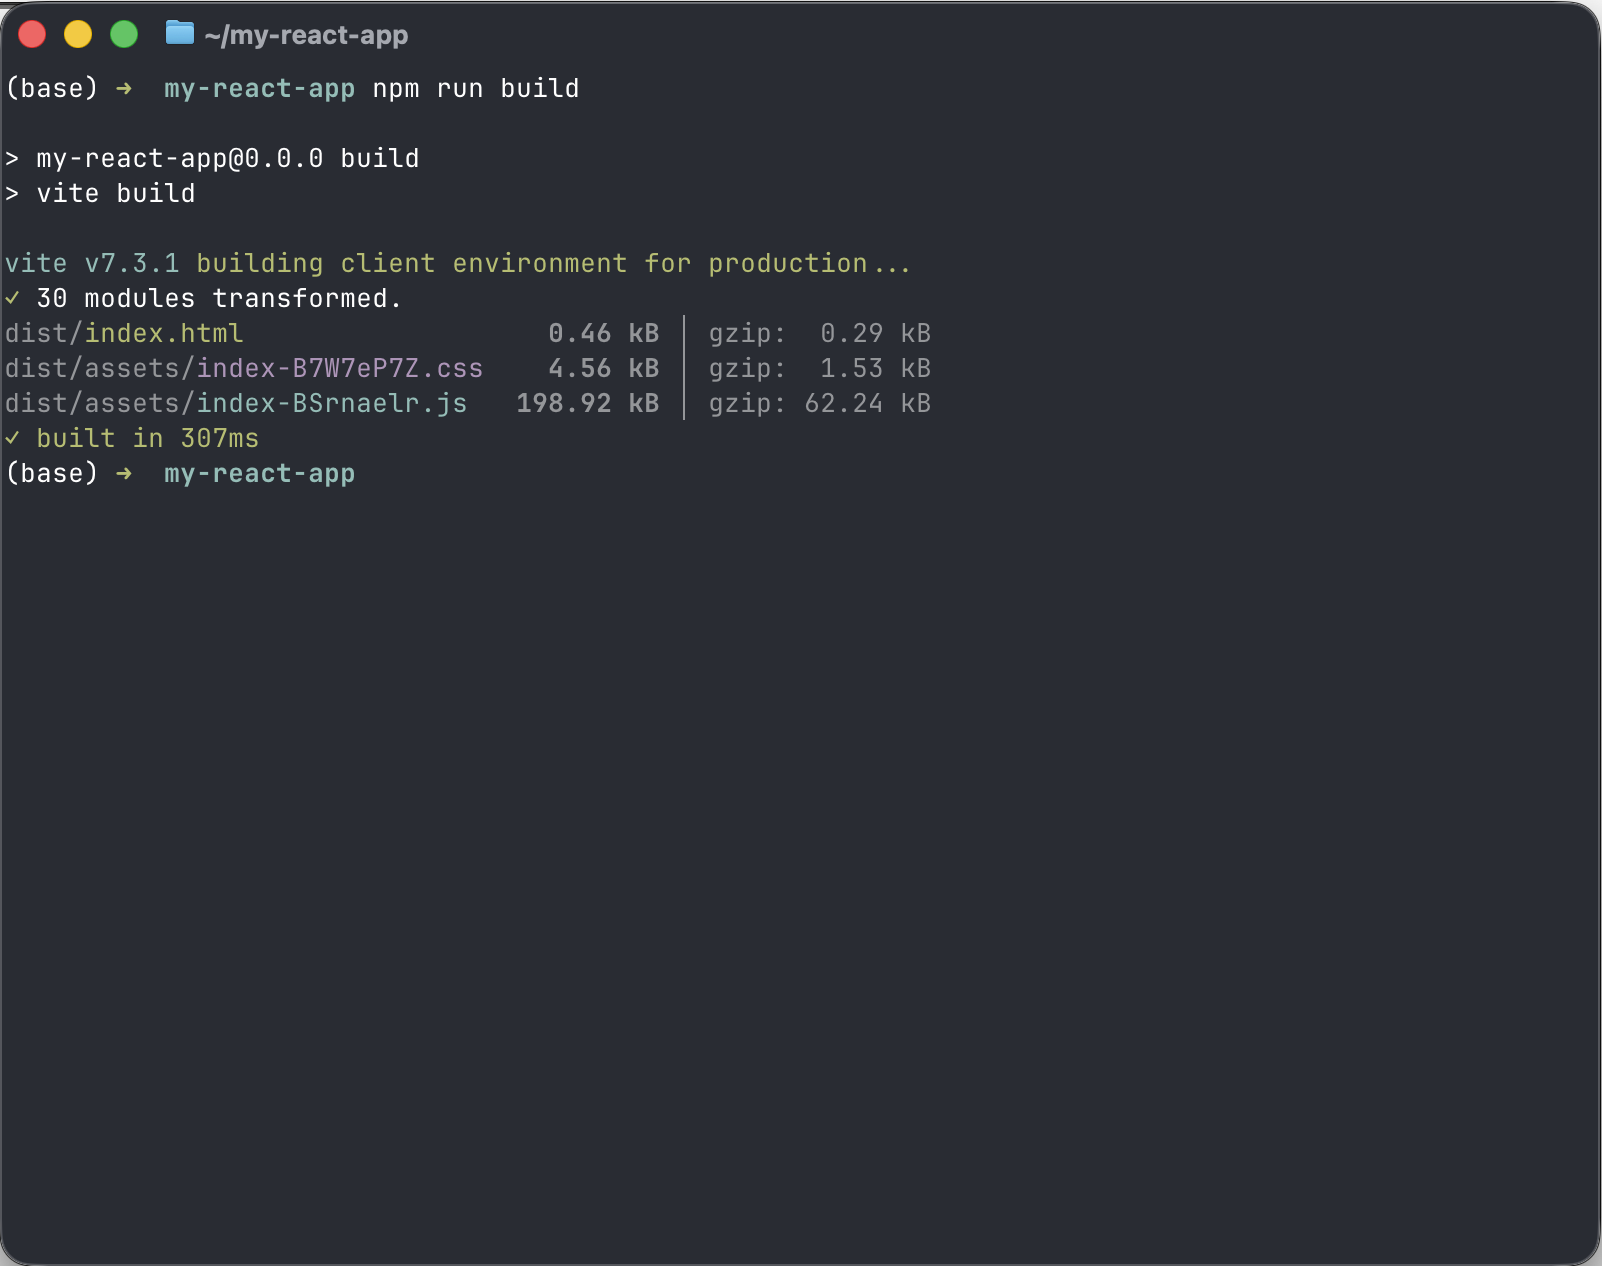
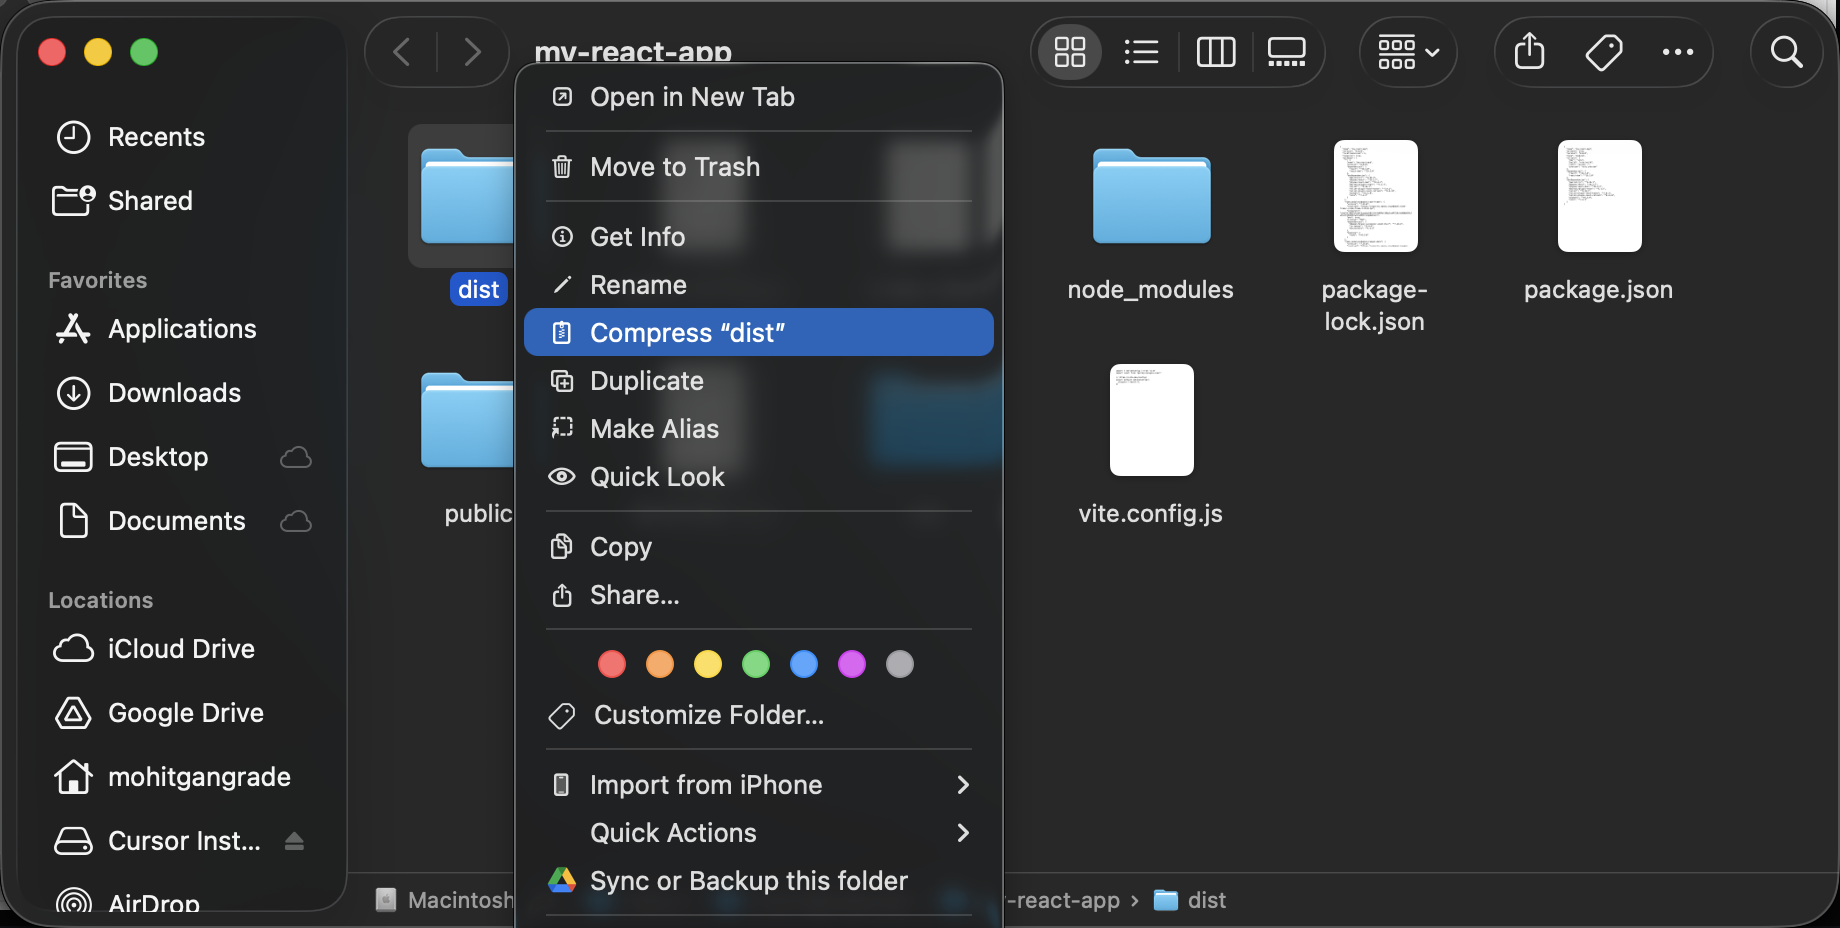
If you open your app’s folder, you will now see a new folder called dist.
You will now need to compress this folder into a ZIP file so you can upload it to Tiiny Host.
- On Mac OS, right click the dist folder and select the compress option.
- On Windows, right click the dist folder, select Send To, and click the ‘Compressed Zip Folder’ option.
- On Linux, navigate to the project directory in the terminal, and use this command: zip -r dist.zip dist
Now, open Tiiny.host and upload the ZIP file.
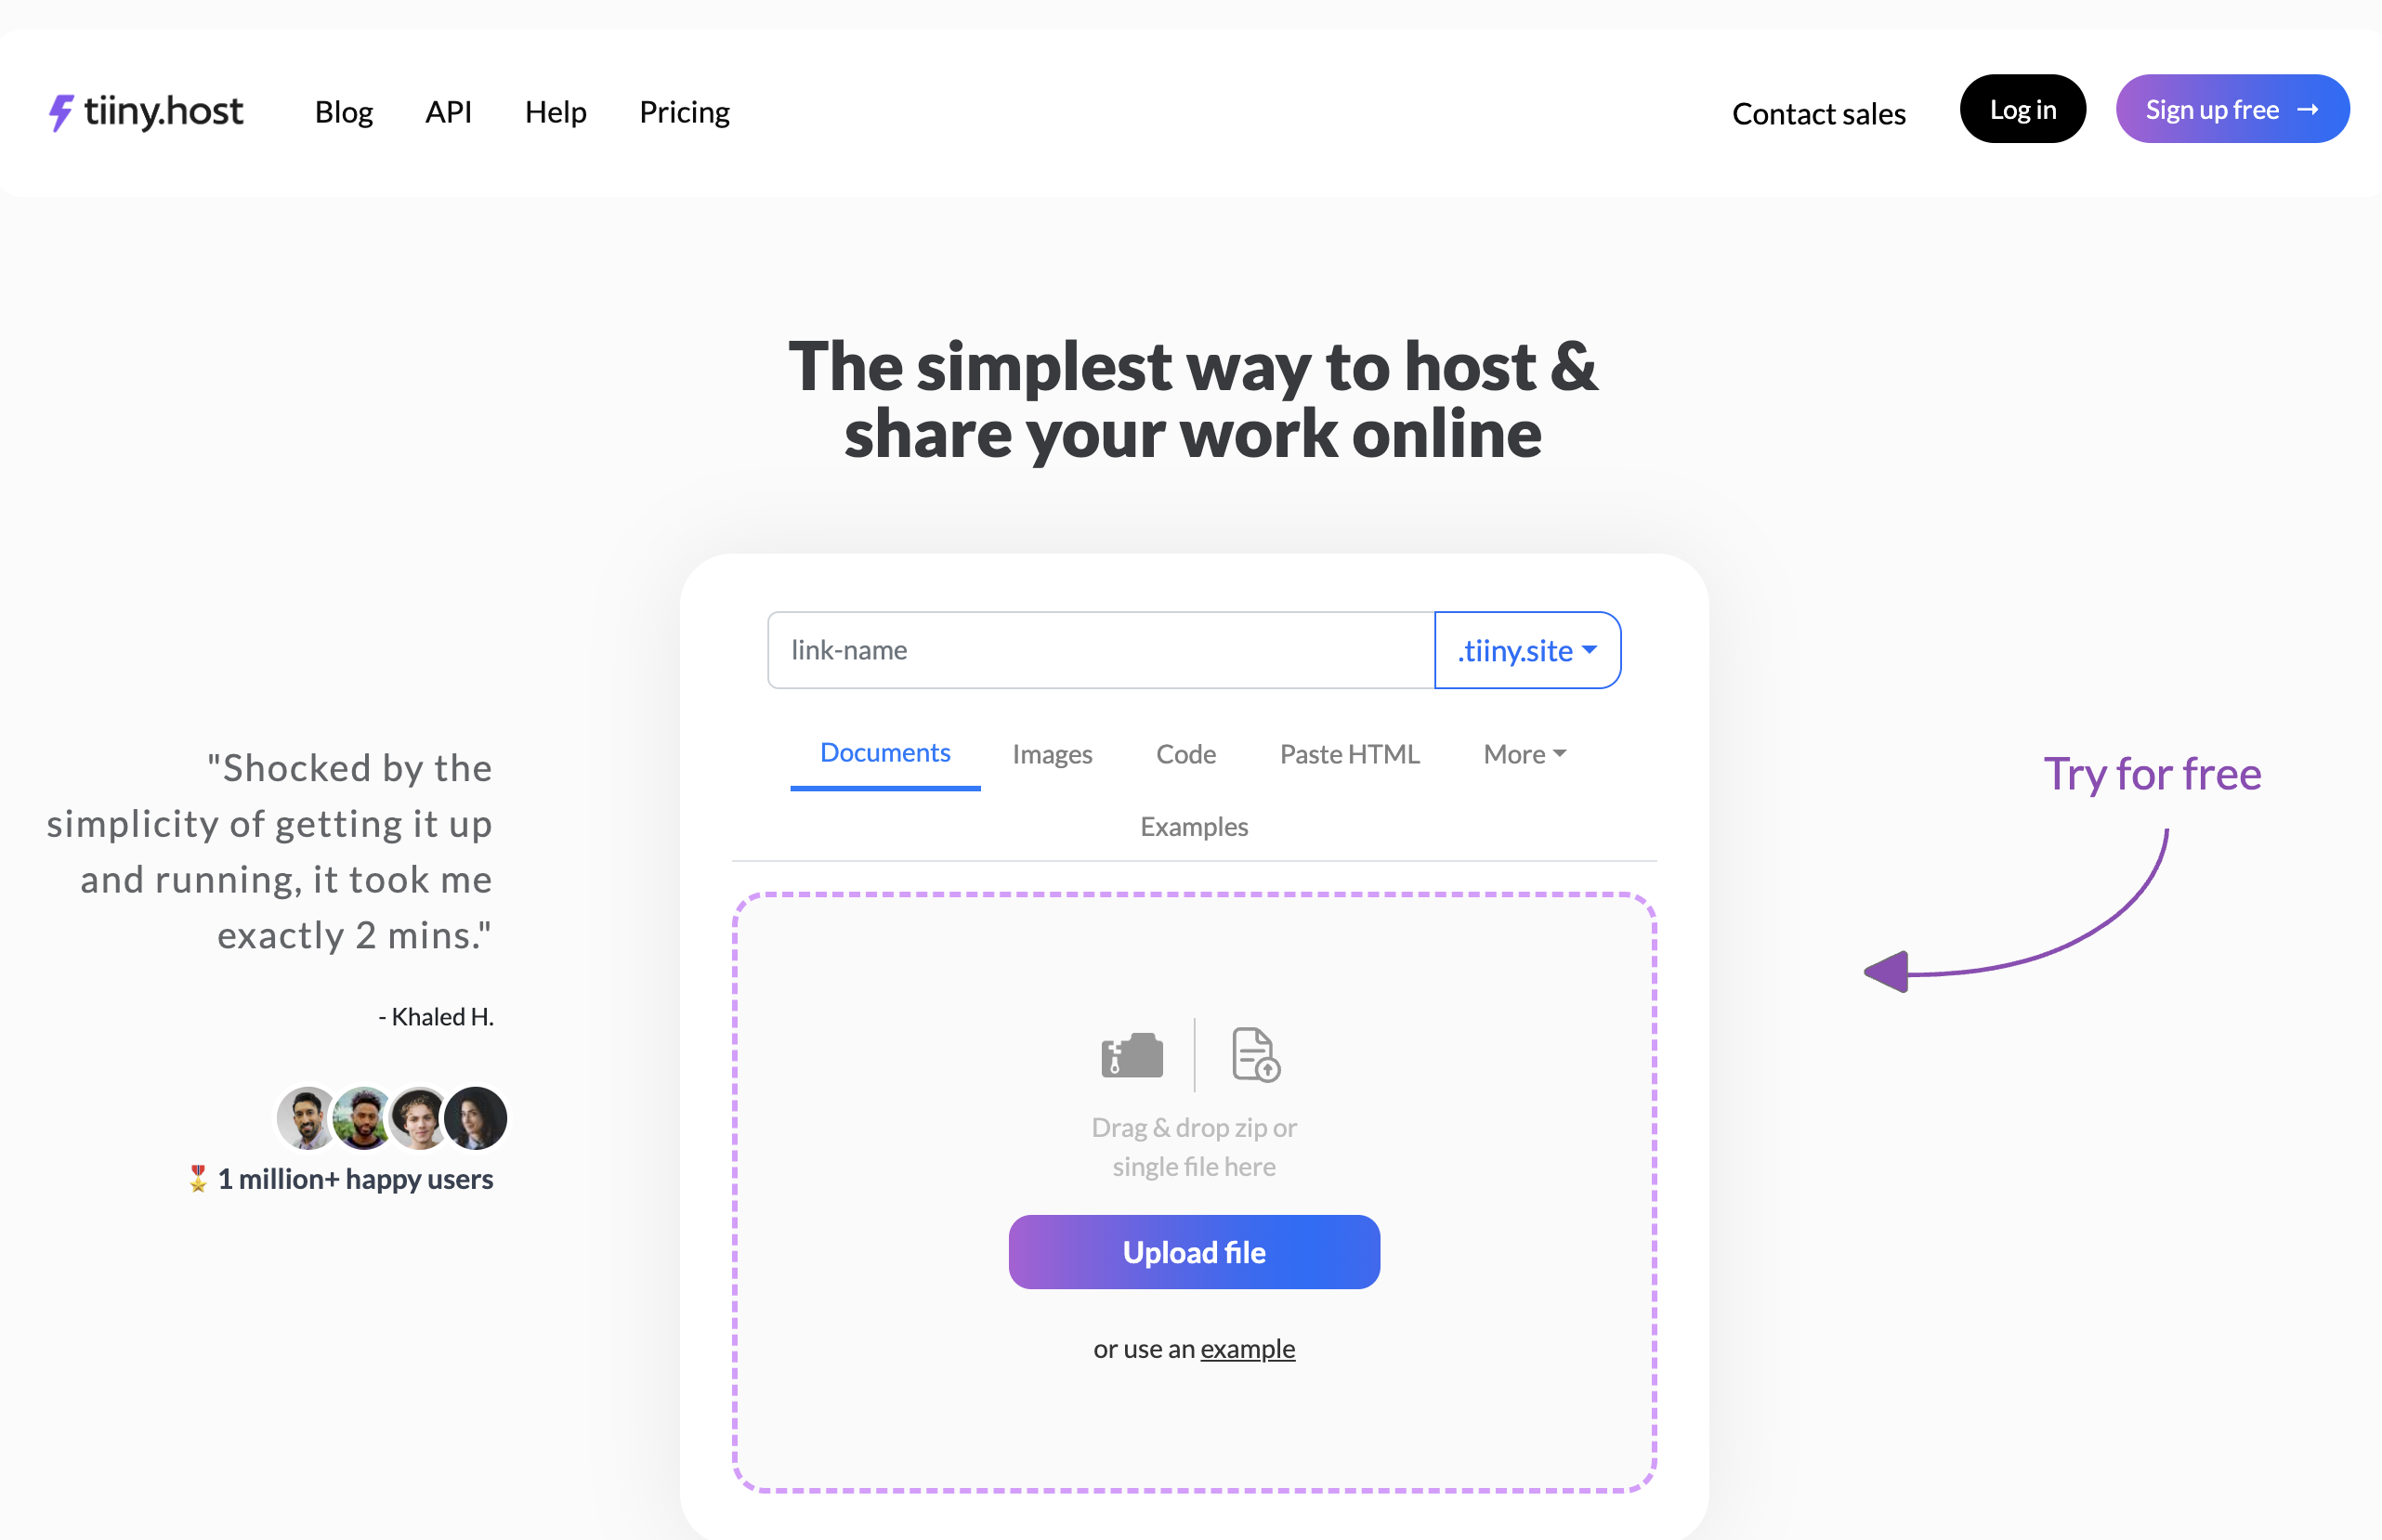
You can drag and drop the ZIP file onto the page to upload it.
You can now enter a link name for the app. I chose react-calculator-app as the name.

Next, you will need to sign up using your email address. Or you can log in using your Google account. That’s what I did!
Once you sign up, you will be able to share your app’s URL with other people.
Step 5: Install The Tiiny Host Extension (Optional)
To update your Tiiny Host project, you will need to manually create a ZIP file and re-upload it.
Or you can install the Tiiny Host extension in Cursor and update your project with just one click.
To install the extension, click the Extensions button on the top right of your editor and then search for Tiiny Host:
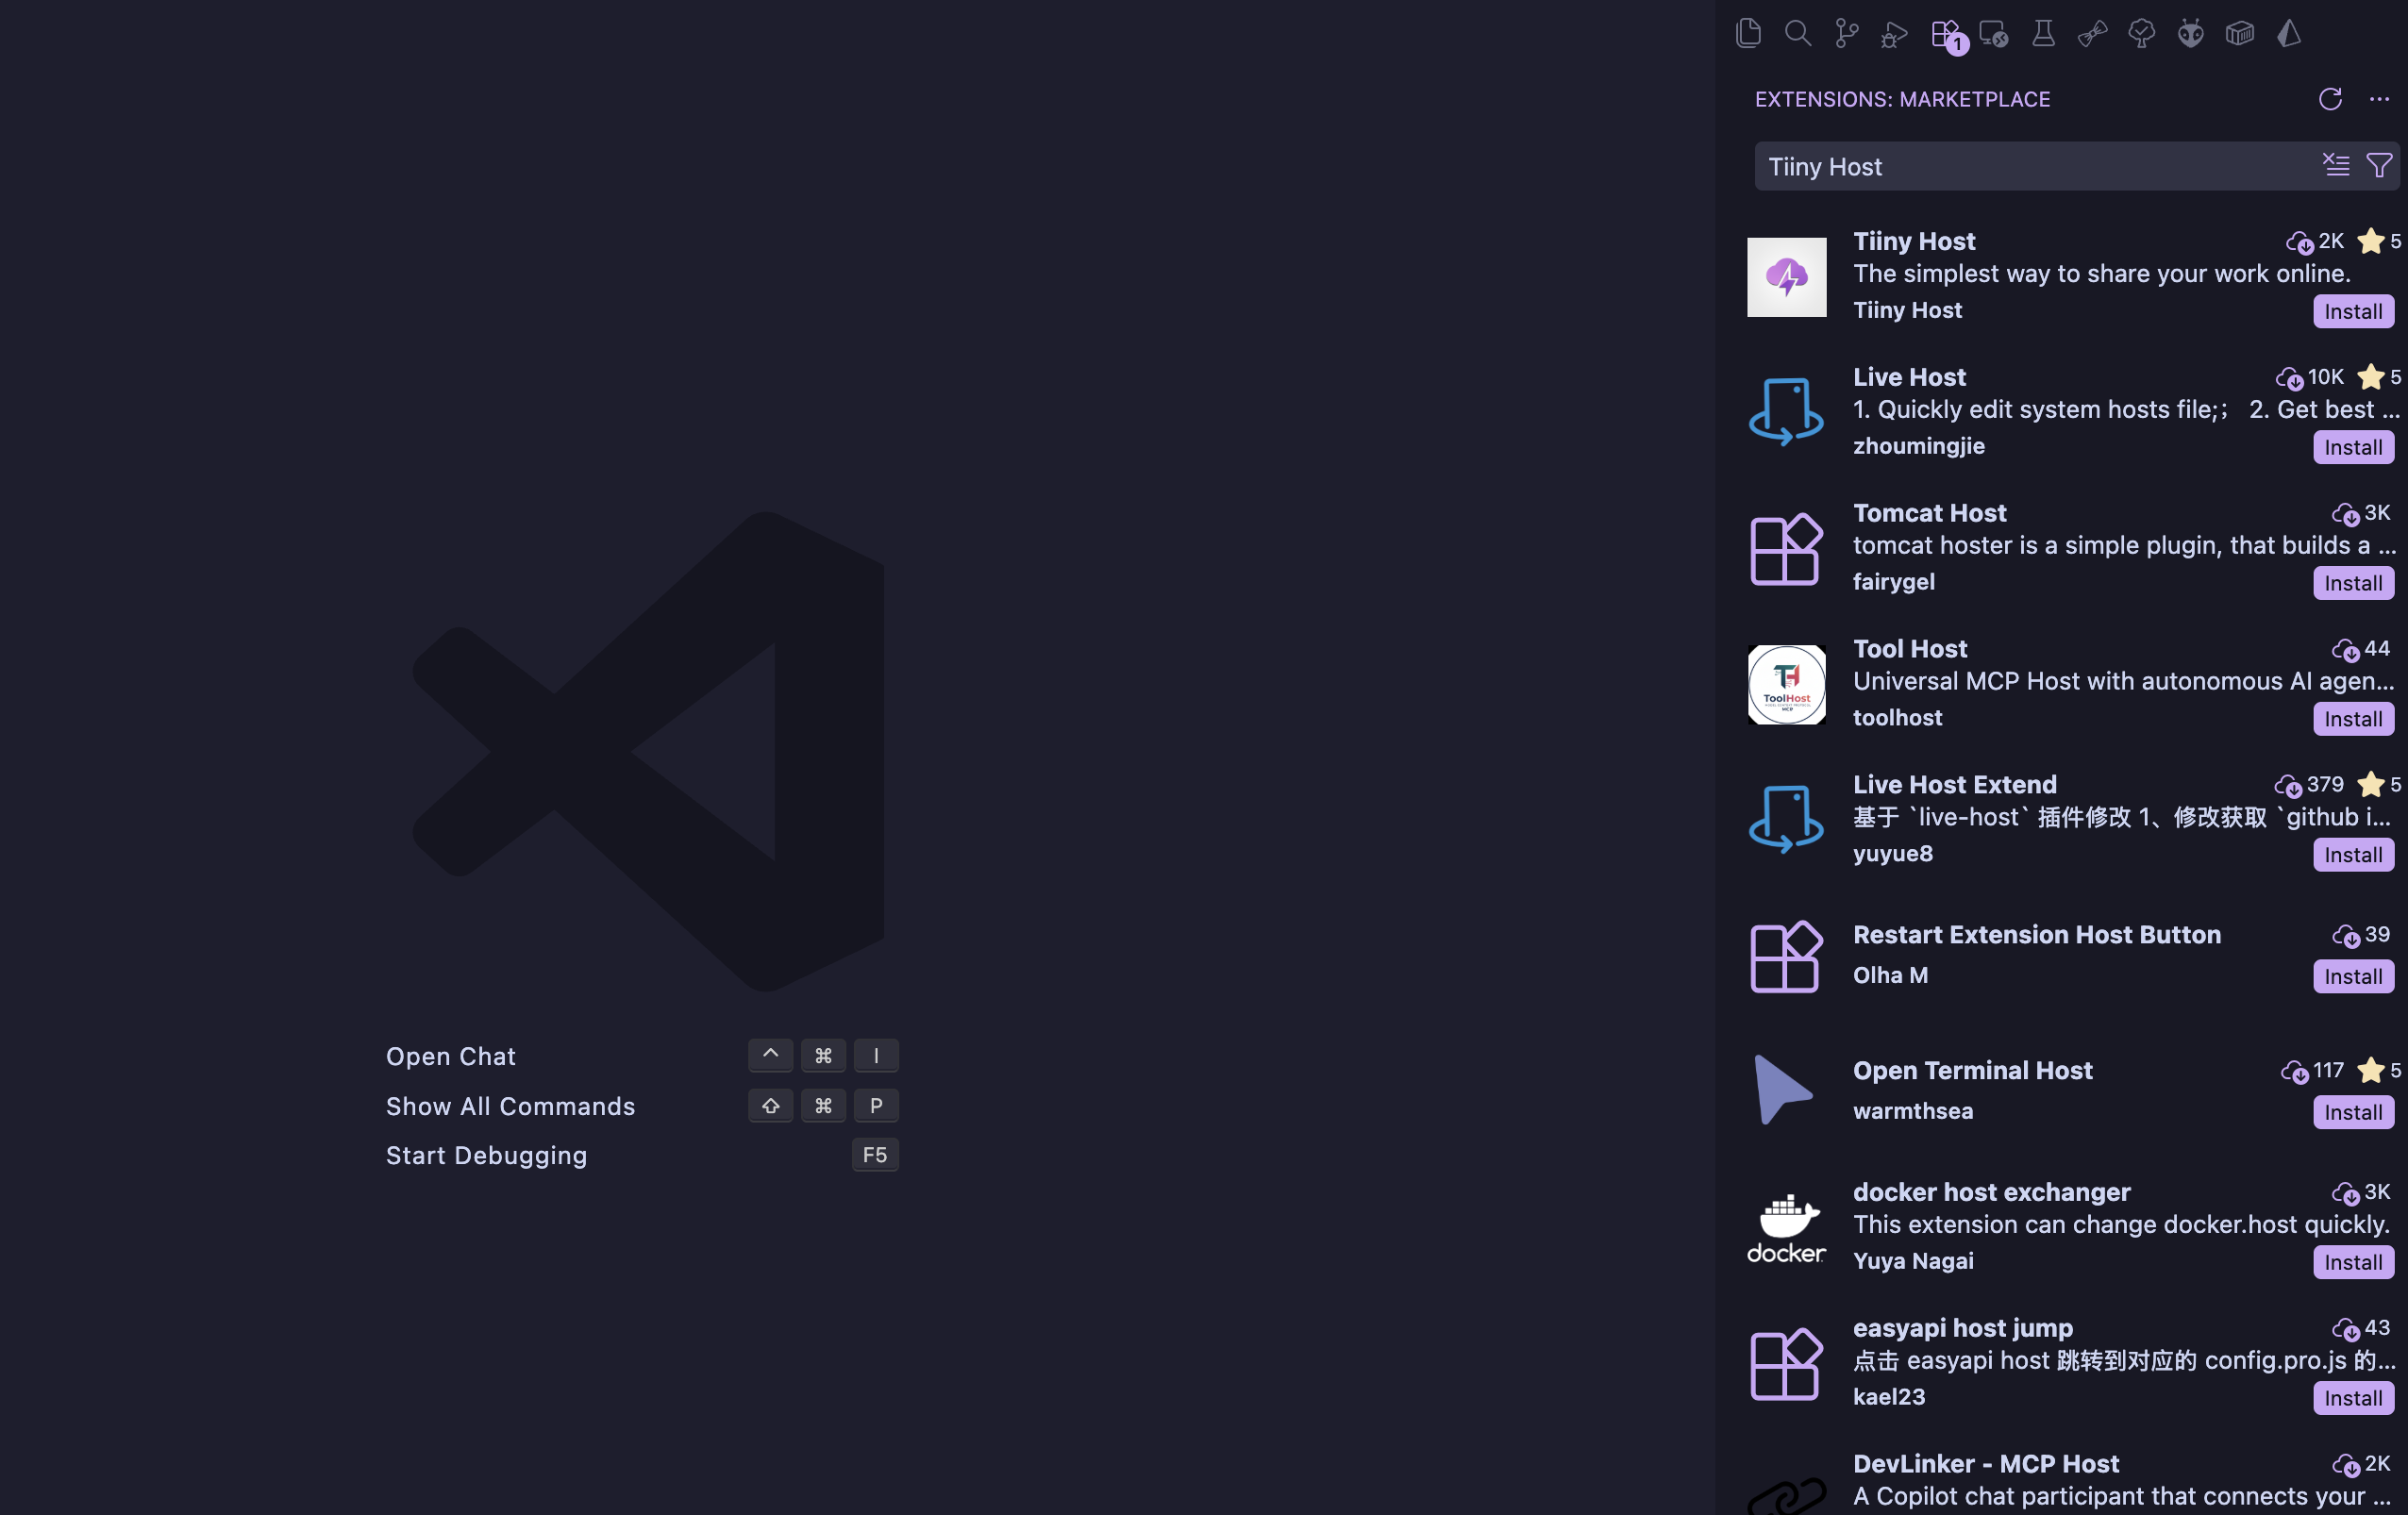
Click the Install button to get the extension.
You will now see Tiiny Host as one of the items in the top bar. Click it to set it up.
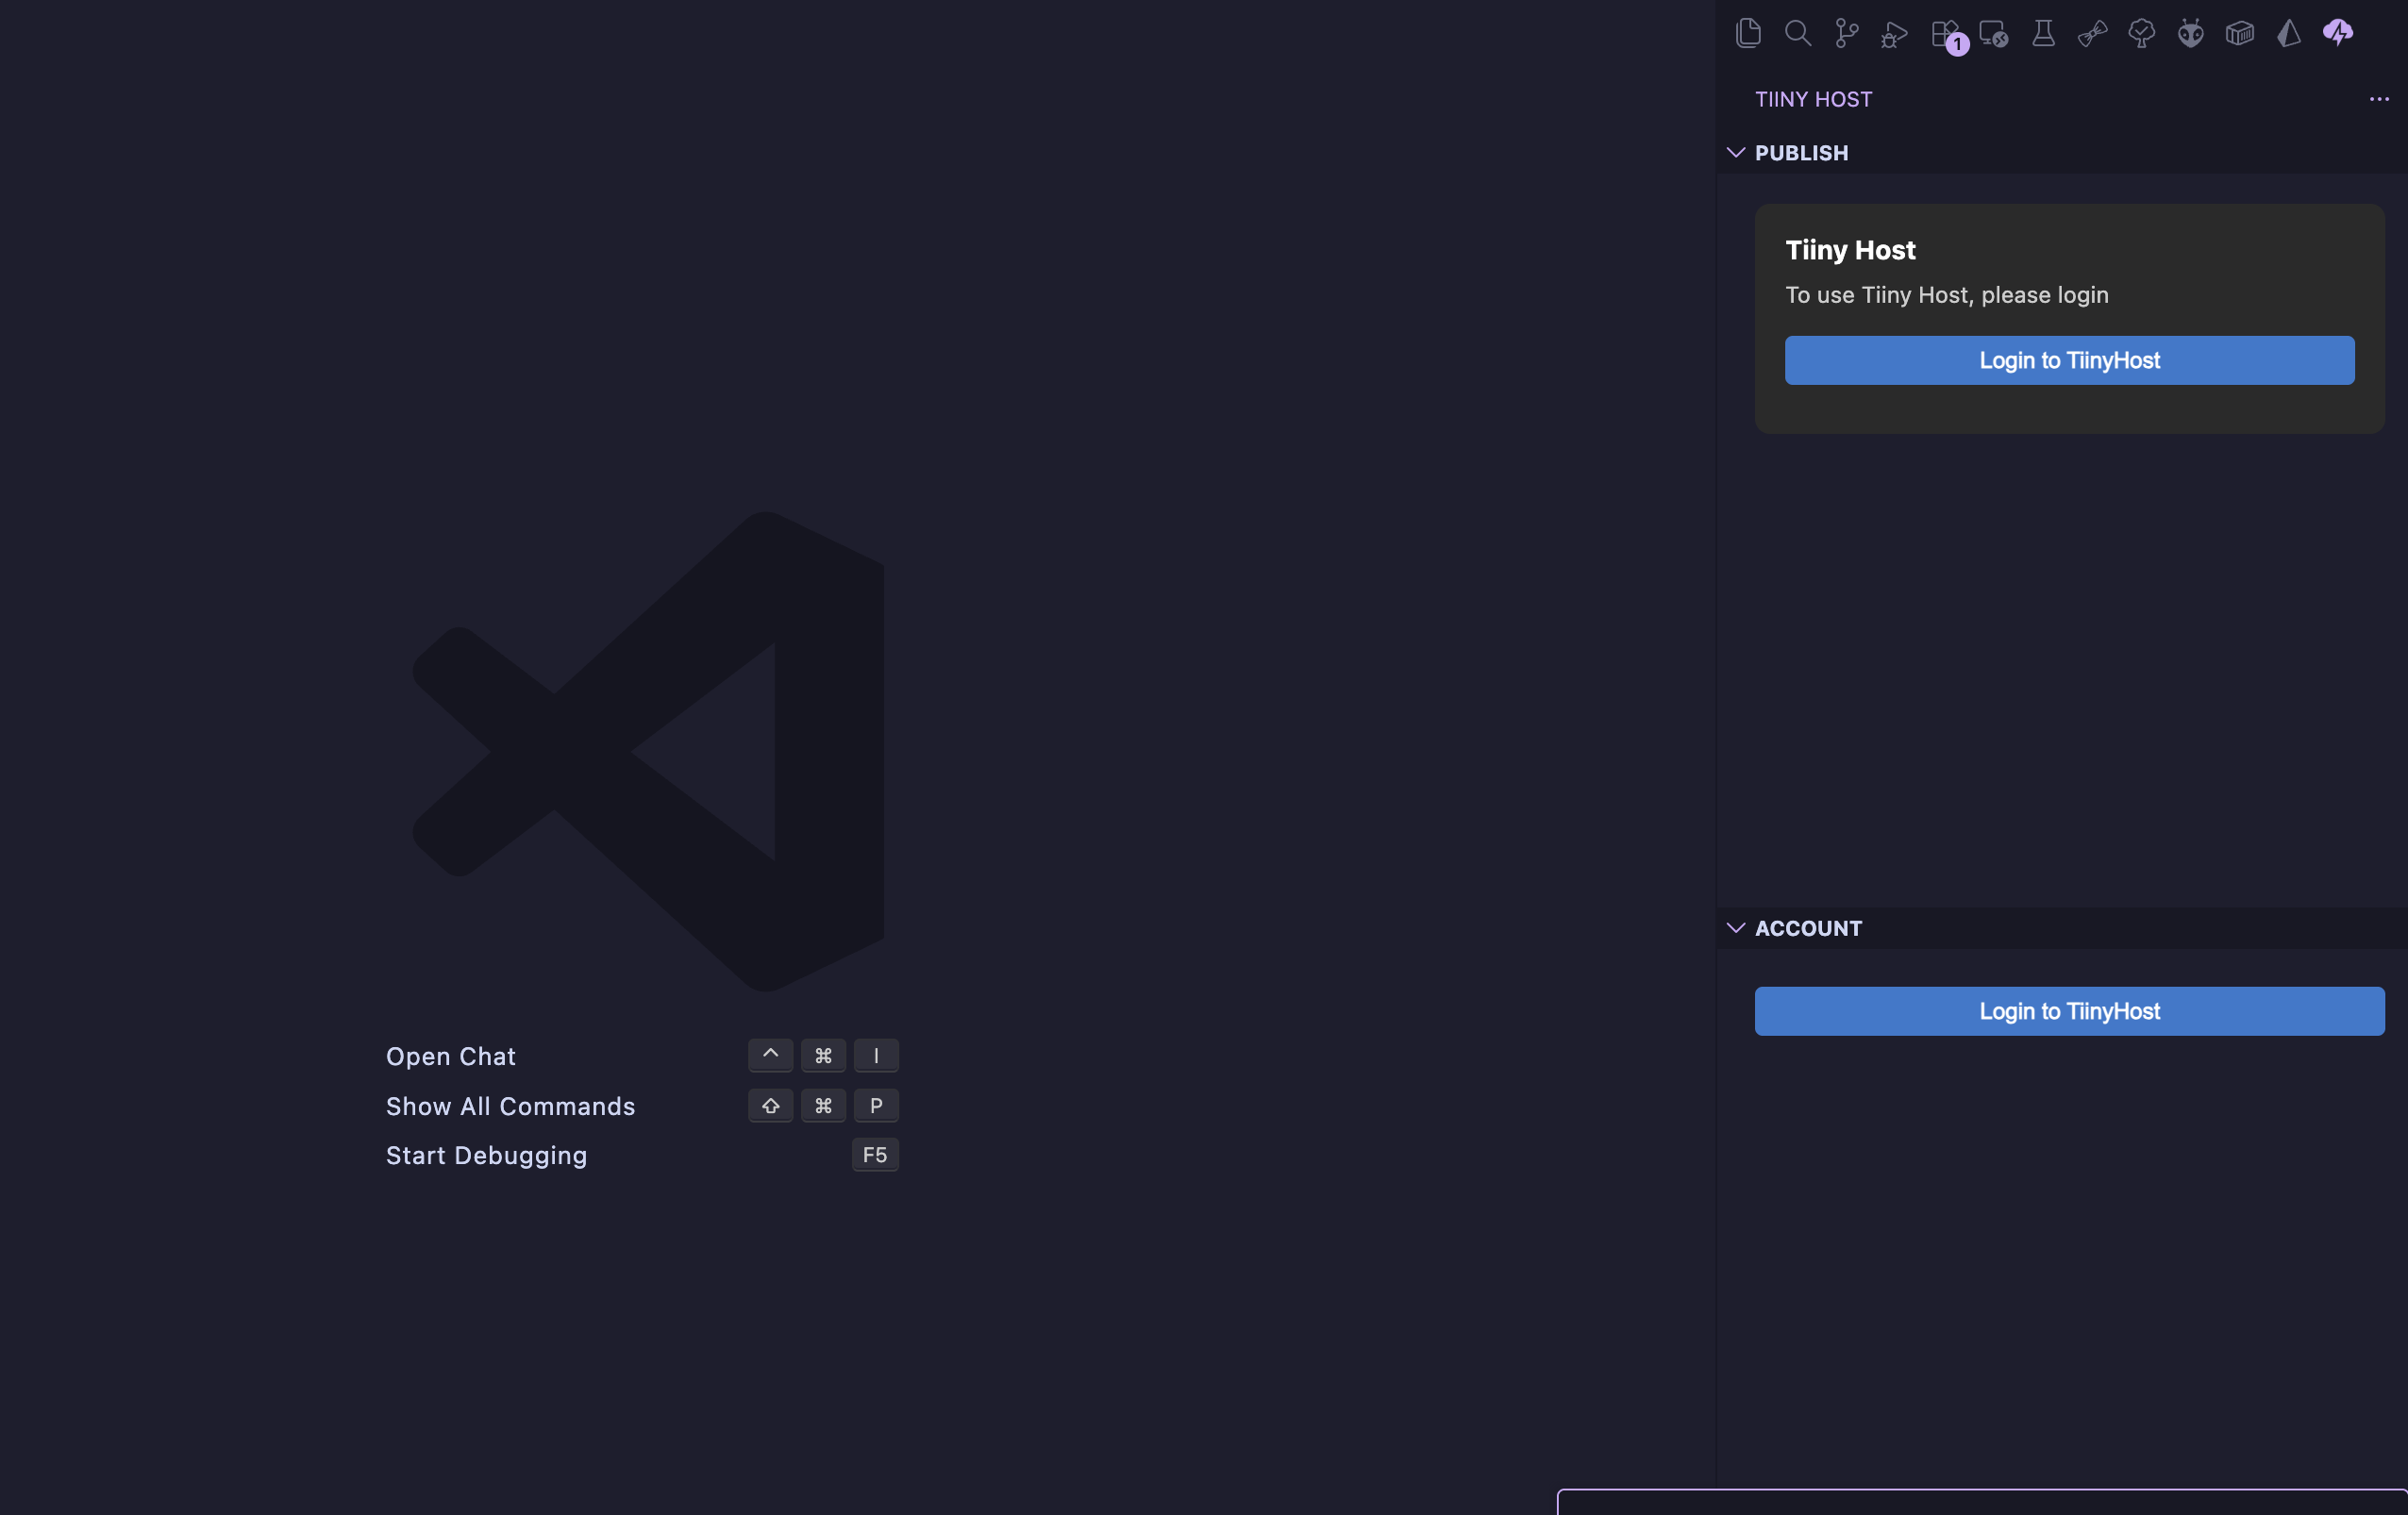
To get started, click the Login button.
It will take you to the Authorization page.
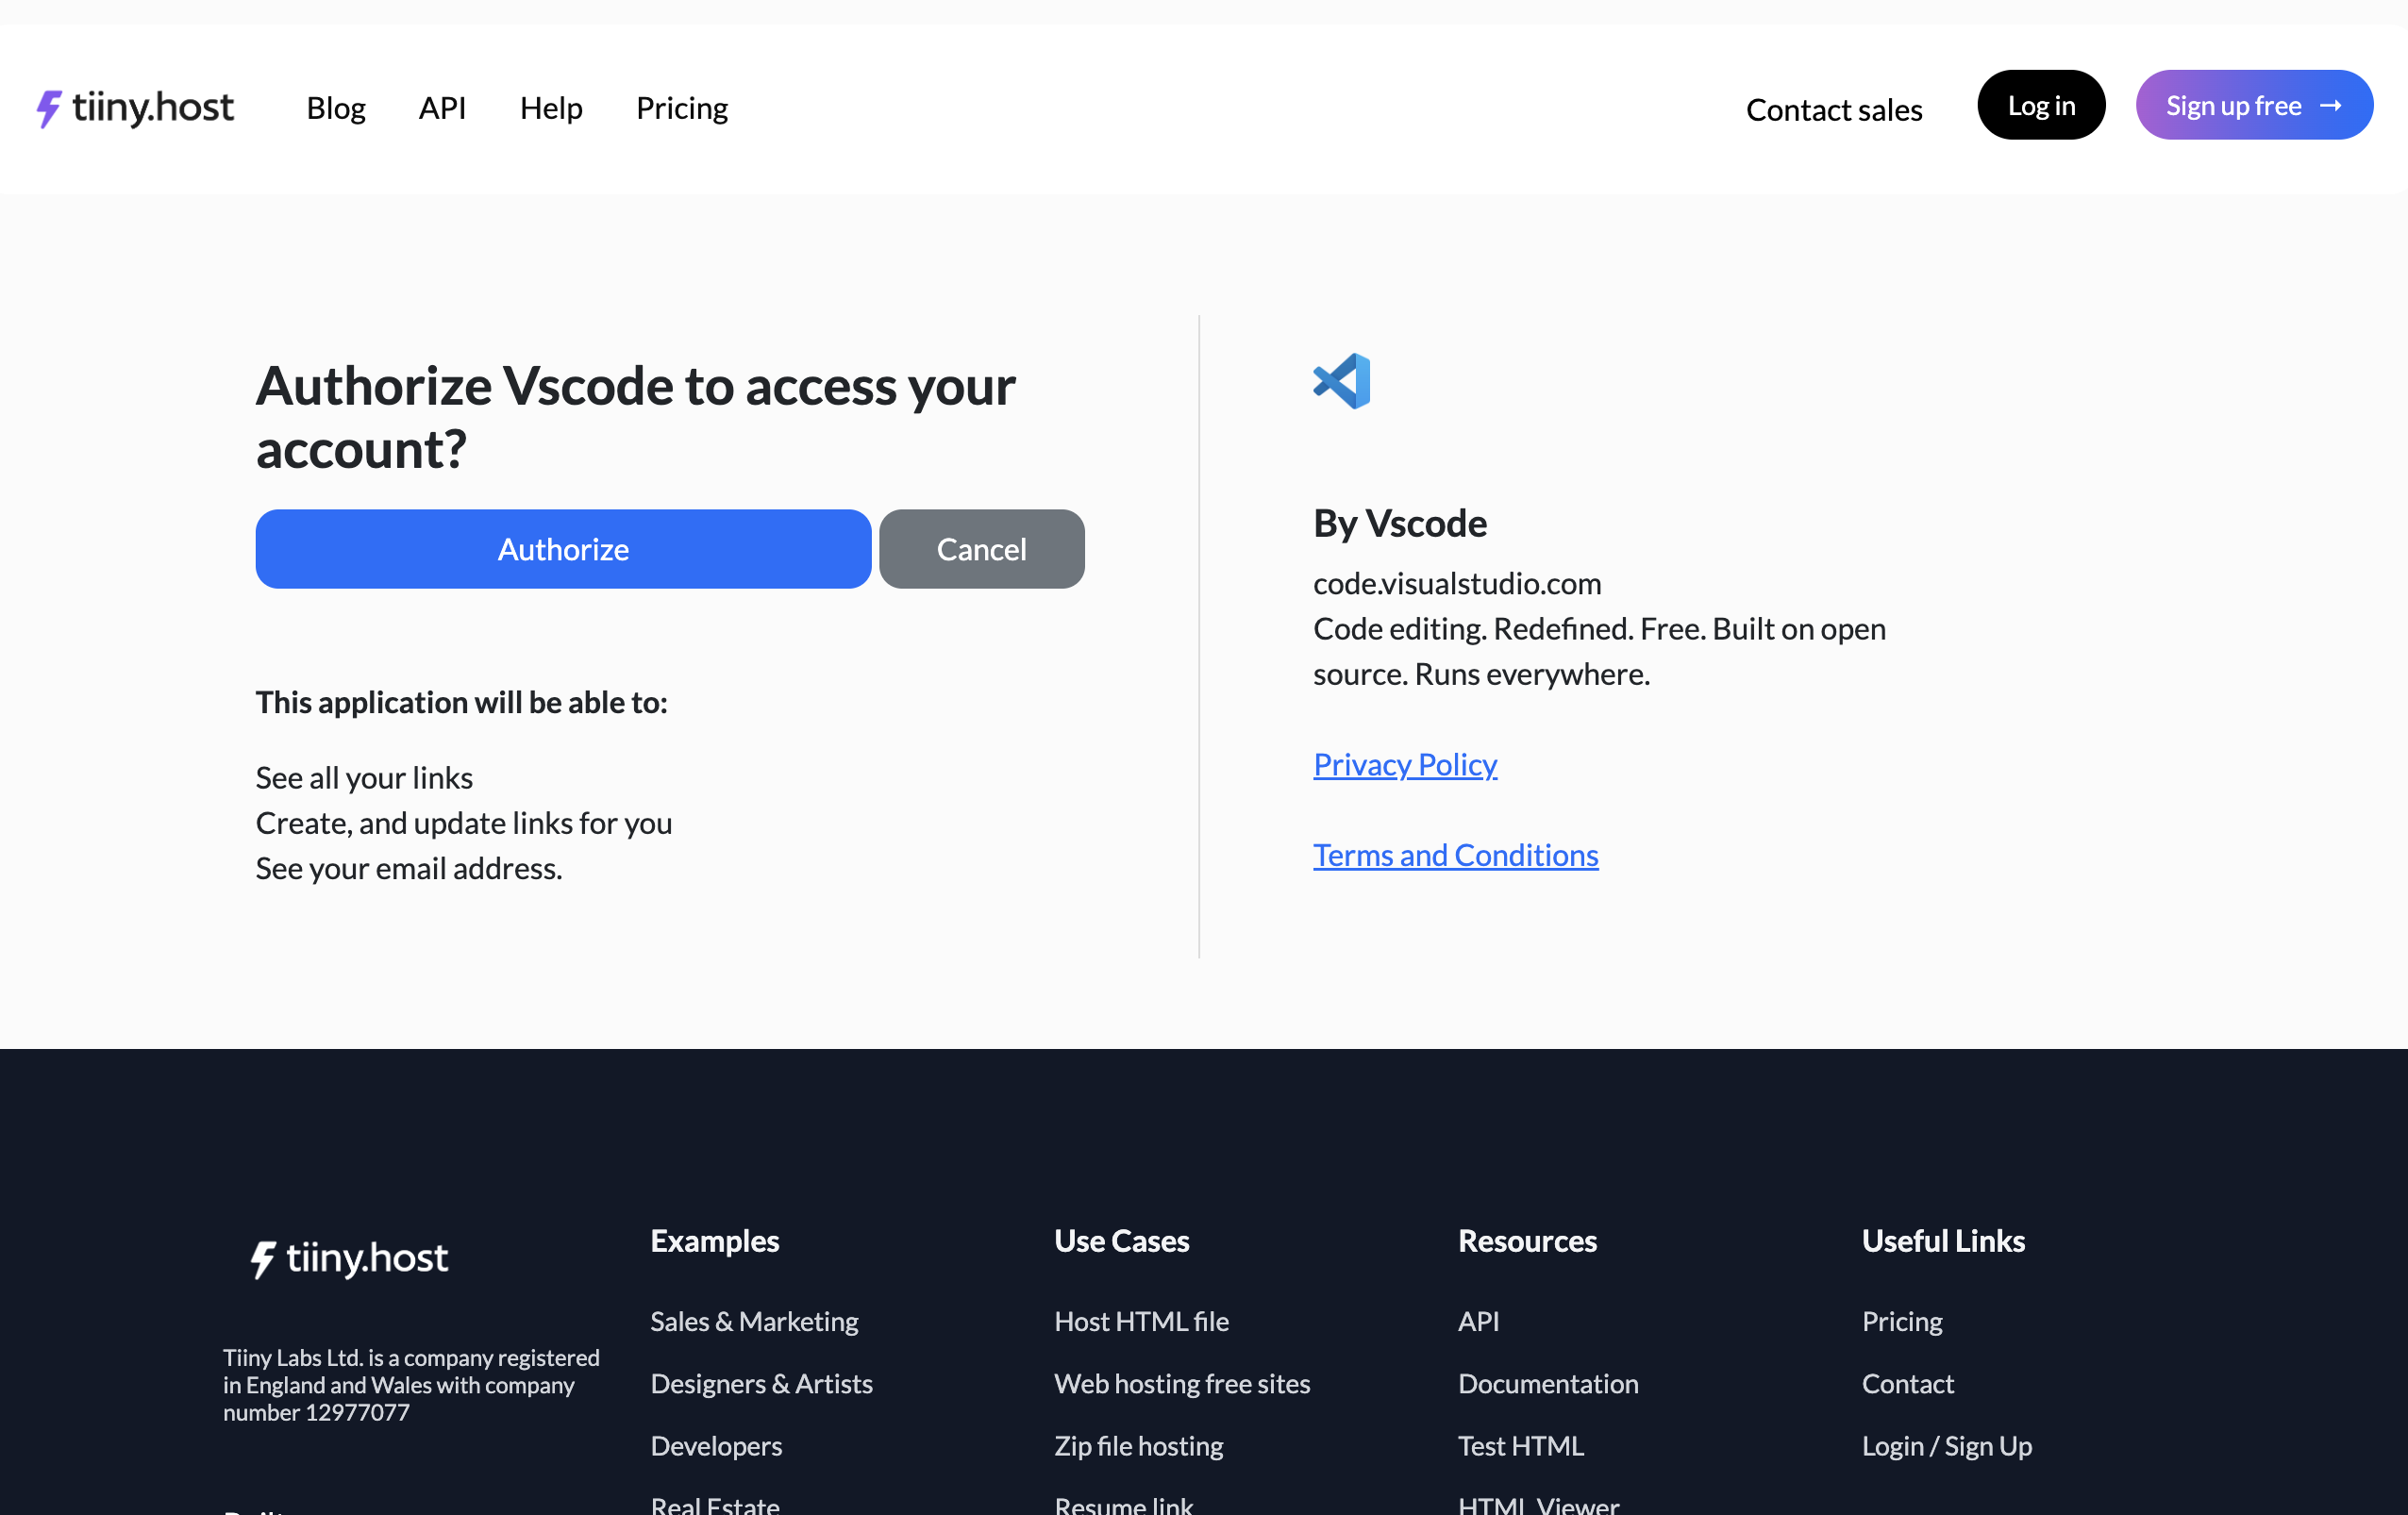
Click the Authorize button.
You can now select the build output directory for your project. In our case, it’s the dist directory.
You can now either select an existing project or create a new one.
Now, whenever you make any changes to your project, all you have to do is build it using `npm run build`, and then you can publish it again through the Tiiny Host extension.
Just select the existing project from the list and hit the Launch Project button.

Essential Keyboard Shortcuts
If you are going to work with Cursor every day, you must learn the keyboard shortcuts. Here are some essential keyboard shortcuts that will make your life easy:
Keyboard Shortcut |
Action |
Shift + Tab |
Quickly switch between the four modes Cursor offers |
Cmd + L |
Open and close the Chat window |
Cmd + N |
Undo a change made by Cursor when reviewing it in the Review panel |
Cmd + Shift + J |
Open Cursor Settings window |
Cmd + Shift + Space |
Toggle voice mode. Allows you to speak your instructions |
Cmd + Shift + P |
Opens up the command palette |
Cmd + P |
Quickly search and navigate to files, symbols and line numbers |
Tab |
When editing a file, Cursor will show autocompletions that you can accept by pressing tab key |
A Quick Guide to Cursor’s Four Modes
Cursor offers four different modes you can switch between when working on an application.
You will find the mode selector under the Chat message text area.
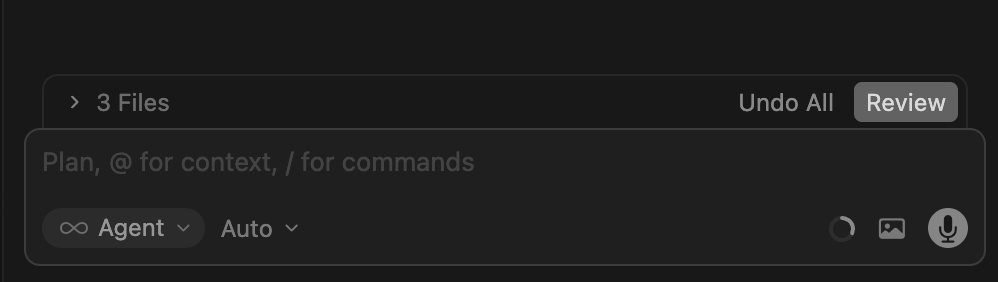
Here’s what the different modes are for…
Agent Mode
This is the default mode. This is the mode where you’ll spend most of your time in.
In Agent mode, Cursor is allowed to make use of all the tools available to it including file search, file edit, web search, run shell commands, etc. In this mode, Cursor will automatically use tools and edit code to accomplish the given task.
Plan Mode
Plan mode allows you to create a plan before making any changes to your project’s files.
When working on a complex feature, it is highly recommended that you first plan out the feature before trying to implement it. Cursor does not make any changes to your code in this mode. It will ask your permission before switching to Agent mode so it can start making the changes needed.
Debug Mode
Debug Mode allows you to work with the AI to reproduce the bug and find a solution. Unlike other AI tools, it automatically adds console log statements to the code generated and uses the attached terminal to analyze the logs.
Here’s how it works:
It first analyzes the files where it thinks the error might be originating from.
Then, it adds console log statements to the code.
It will then ask you to reproduce the bug that you’re trying to fix. Once you are able to reproduce the bug, it analyzes the generated logs to find what went wrong.
Ask Mode
Ask Mode allows you to ask questions about your code base. Cursor doesn’t edit any of the code in this mode. It is strictly for asking questions about the AI generated code and the project.
This mode comes in handy when you want an explanation for why Cursor made a change that it did.
Cursor Rules Files
When you work with Cursor, you will find yourself repeating a lot of instructions.
To save yourself time, you can create Rules Files.
These files live inside your project directory and allow Cursor to remember important details about your project such as what framework you’re using or what libraries you want the AI to use.
To create a new Rule File, all you have to do is press Cmd + Shift + P to open the command palette. Then, type ‘New Cursor Rule’ and hit enter.
It will open a new agent chat:
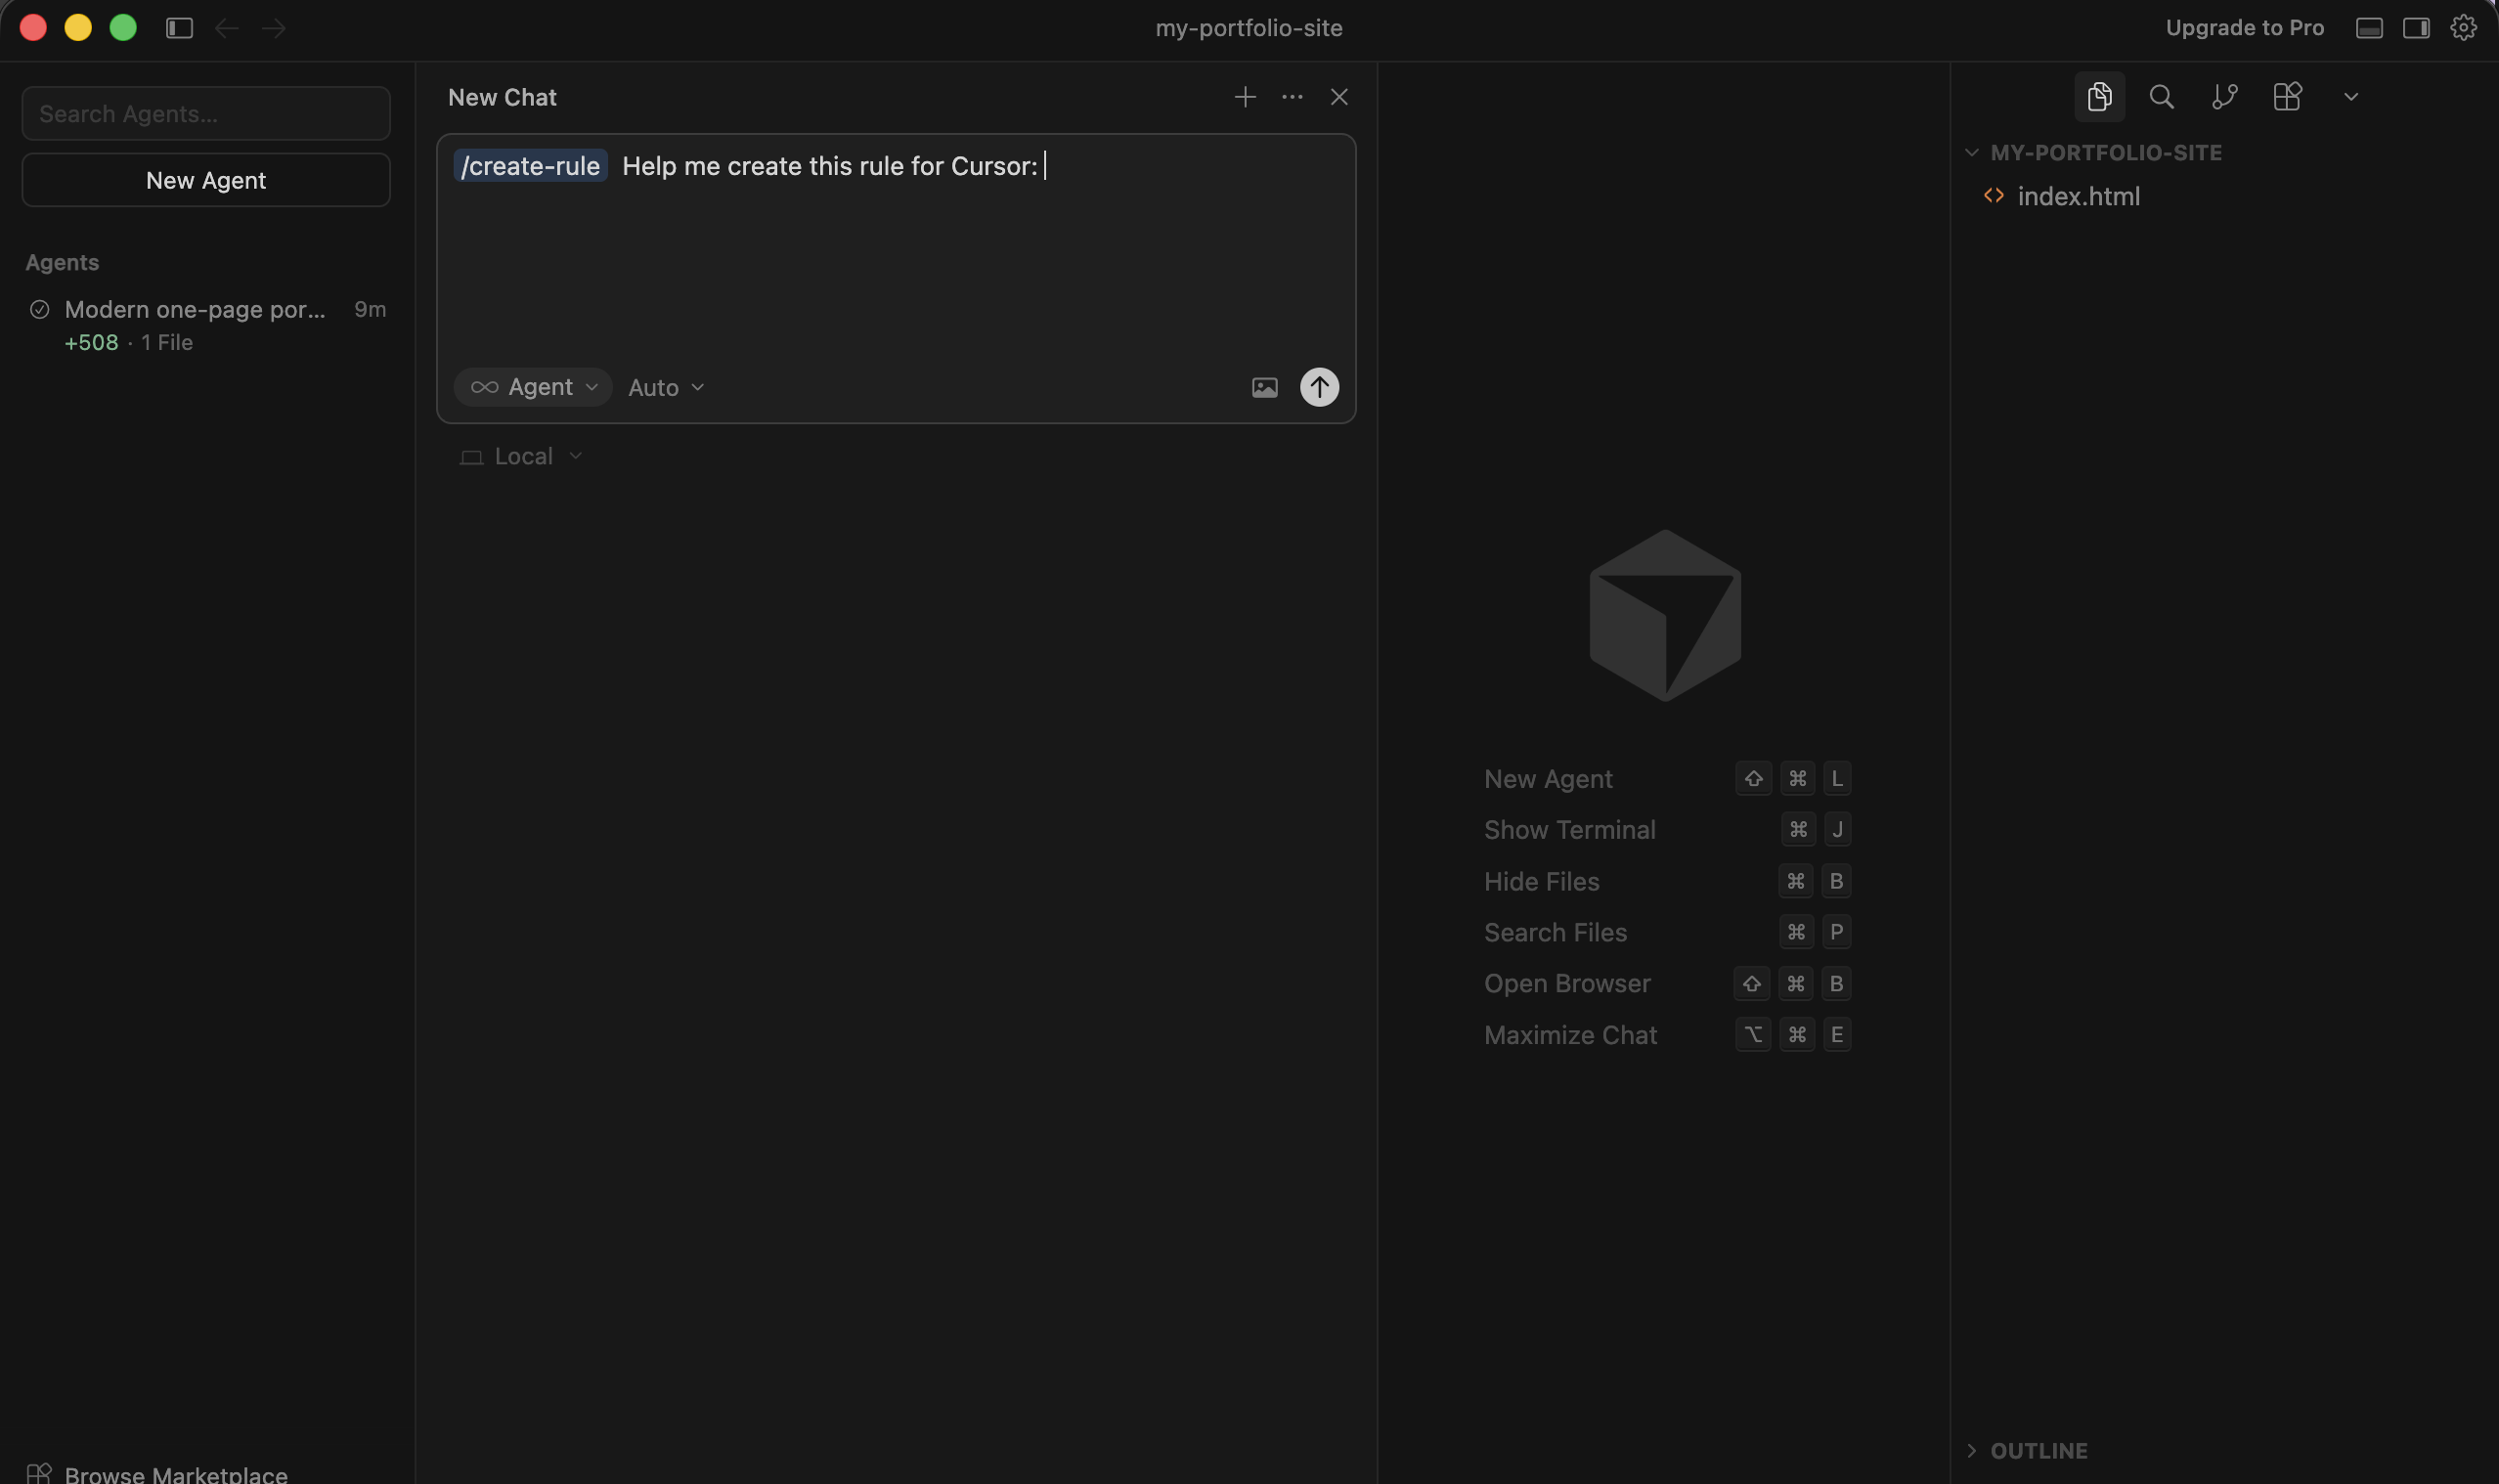
You can now ask Cursor to create a rule file with the rules you want it to remember.
For example:
I want Cursor to remember that we use Tailwind CSS. I also want it to remember that it should never install a new library without asking for my permission. Try to solve a problem without involving a new library first.
Here’s the Rule file the AI created for my project:
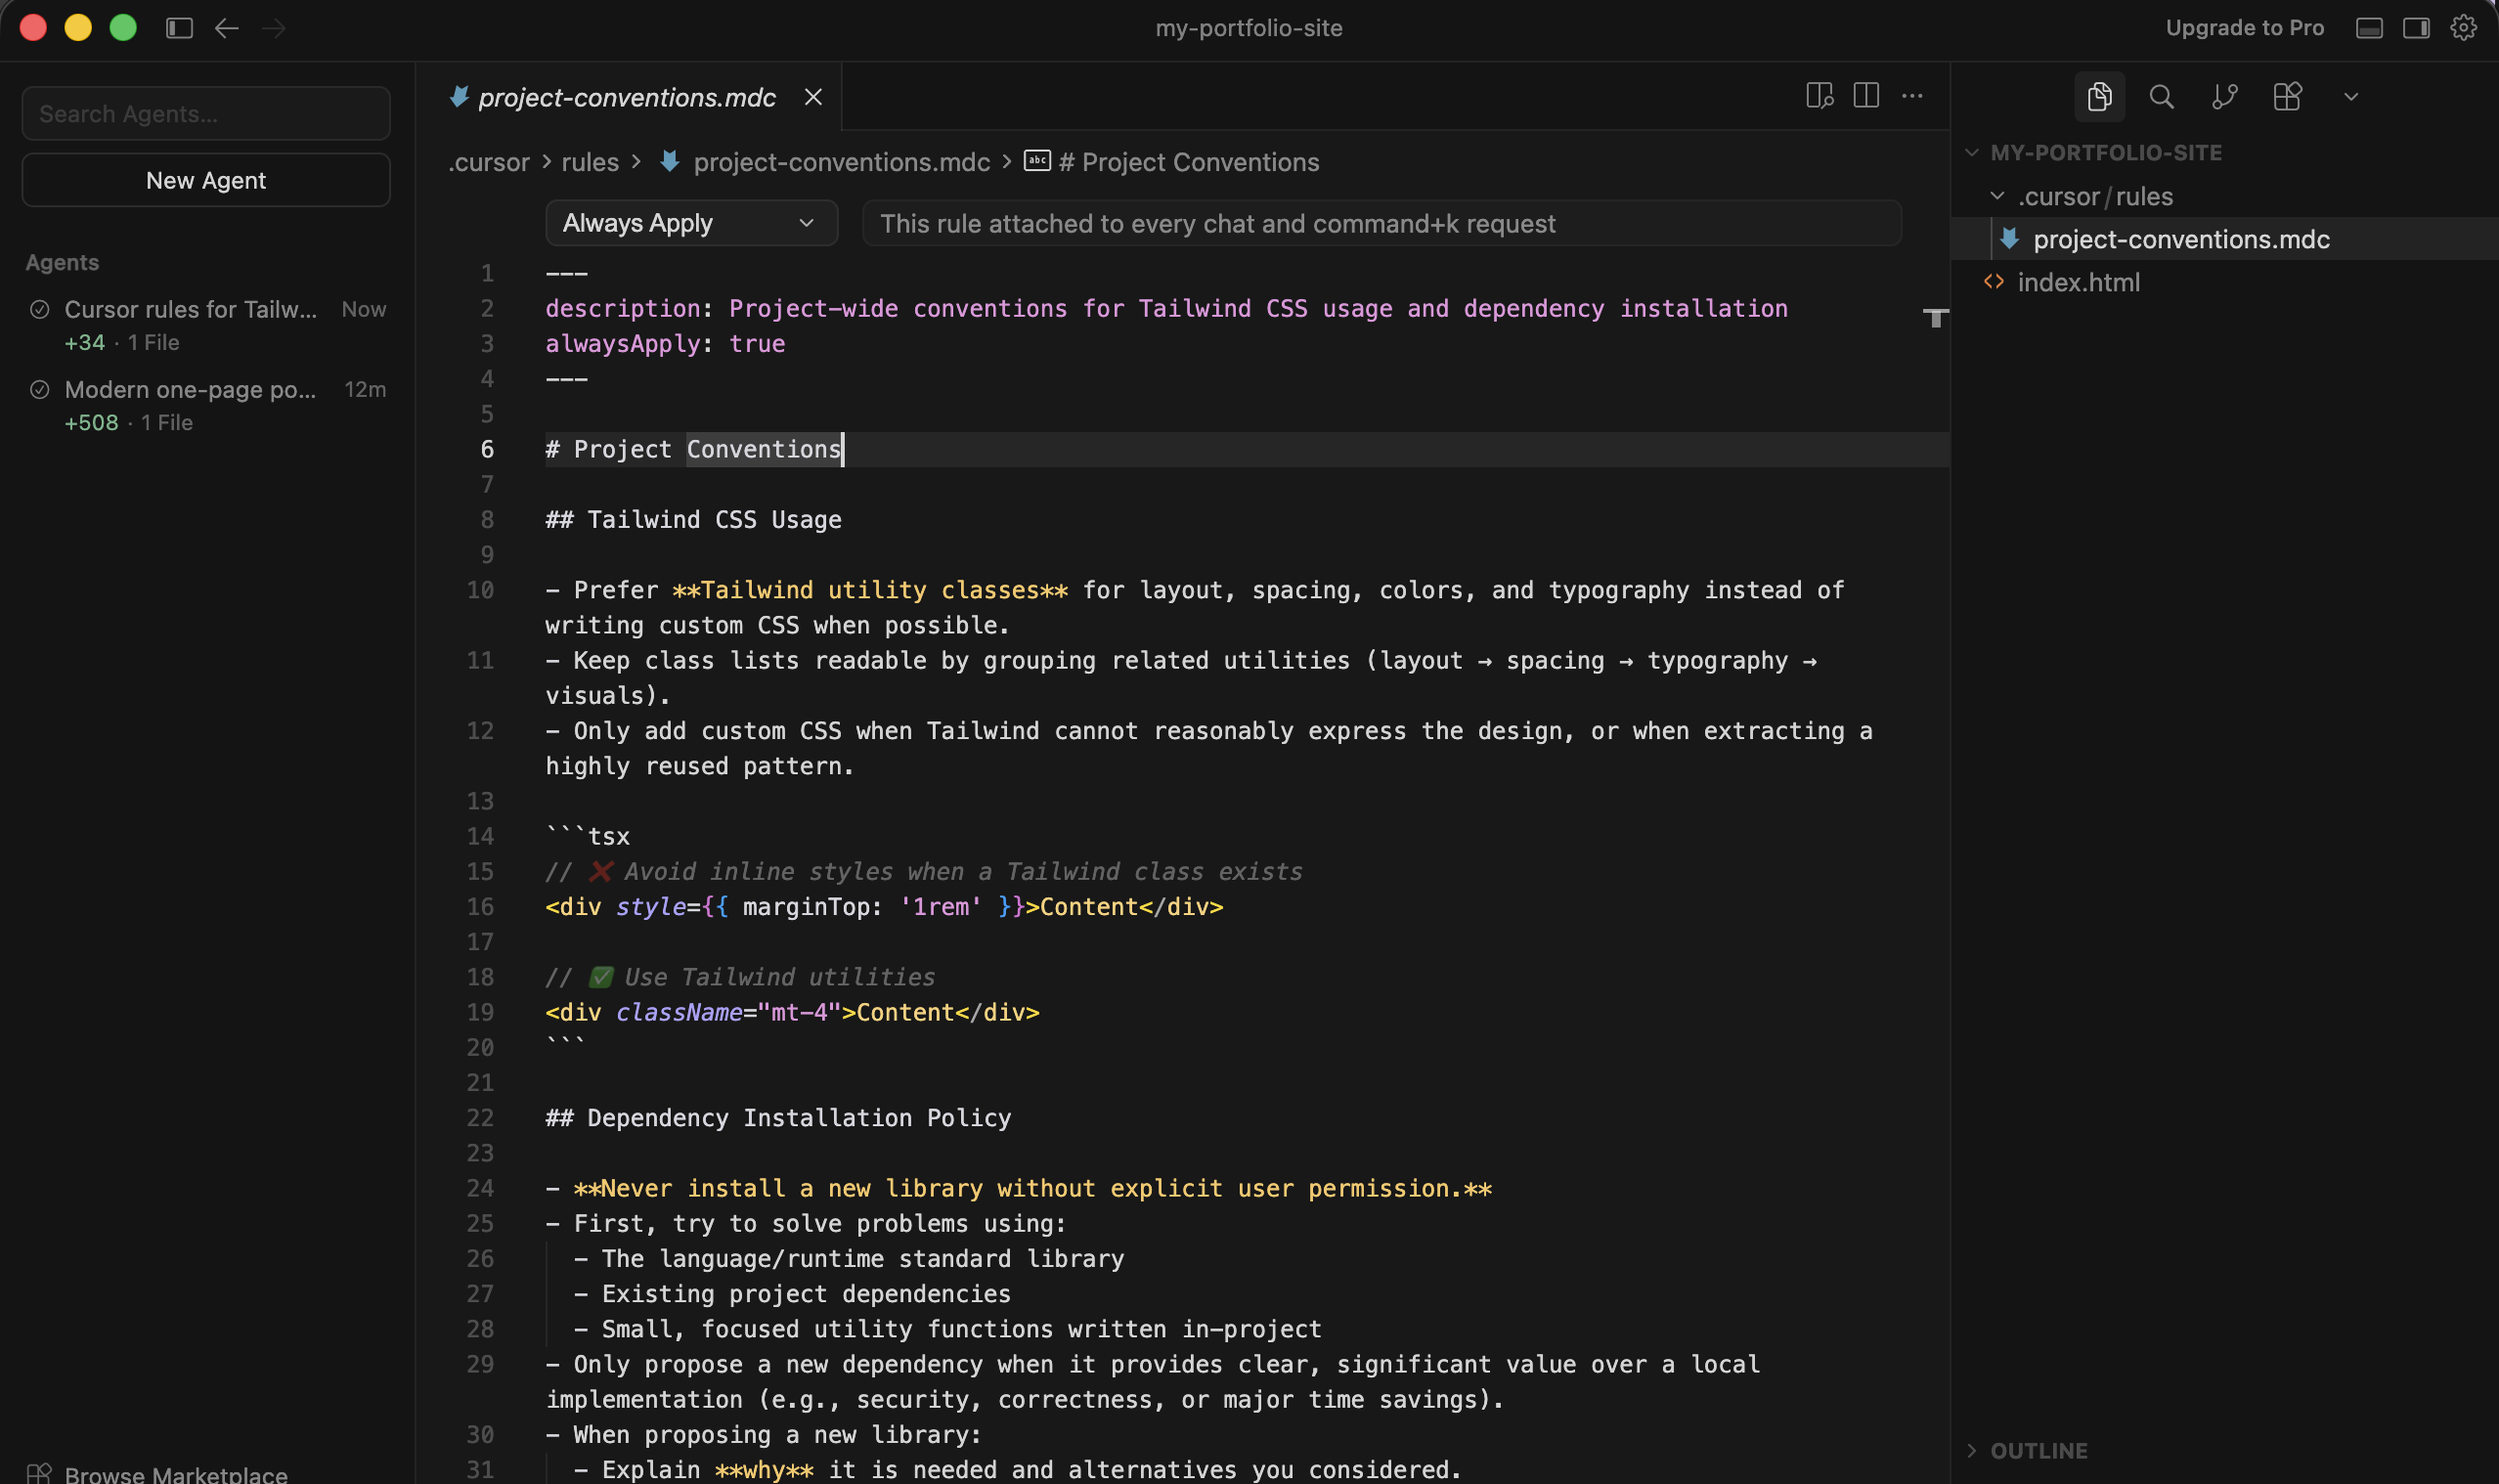
And just like that, you never have to repeat those instructions again.
Bonus: How to Build a Portfolio Site with Cursor
You’ve built a calculator. That’s a great practice project.
Let me now show you a real-world example of how to use Cursor.
First, create a new folder and open it in Cursor.
Instead of creating another React app, we will keep it dead simple this time. We are going to build a high-converting one-page portfolio using just HTML and Tailwind CSS.
Here’s an example prompt you can use:
Create a modern, one-page portfolio website in an index.html file. I want to use Tailwind CSS via CDN so I don’t have to install anything. The site should have a clean, dark-mode aesthetic with strong typography that highlights modern UI/UX principles. Include a hero section with a bold headline for my productized design service, a ‘My Work’ grid, a ‘Services & Pricing’ section, and a simple contact form at the bottom.
The more detailed your prompts, the better the code will be that Cursor generates.
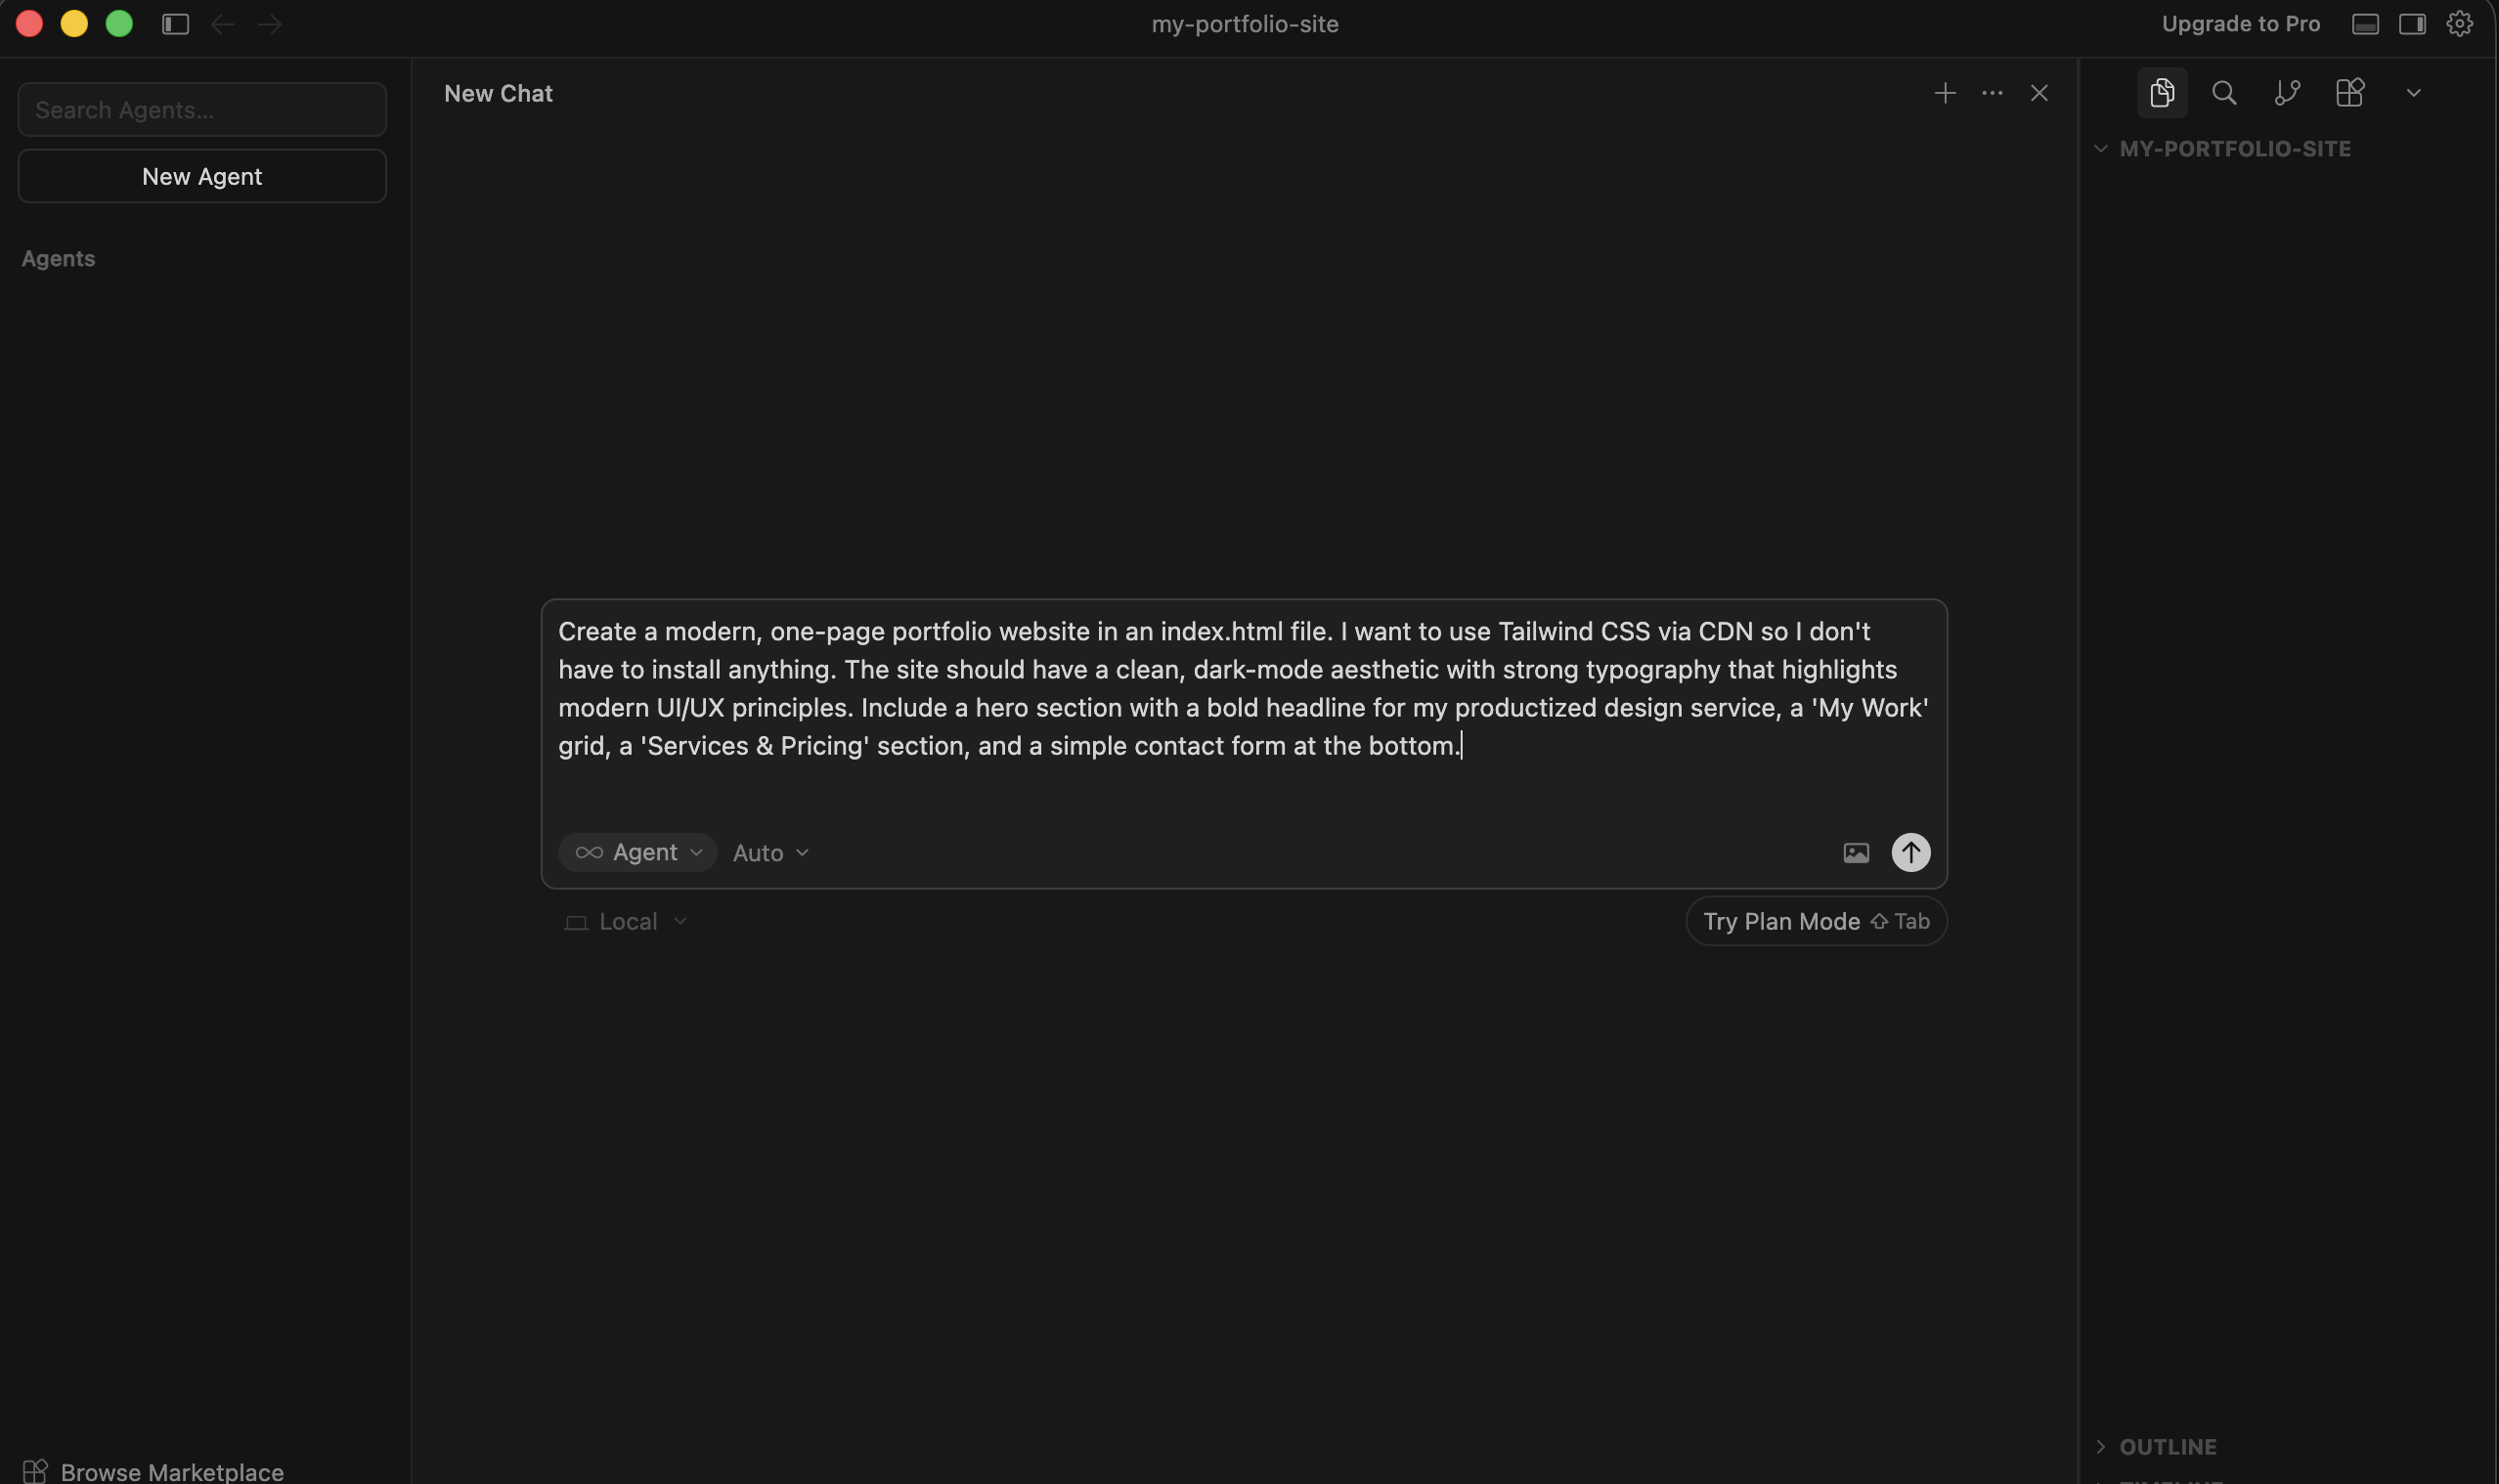
Customize the above prompt or run it as is.
Once Cursor is done building, open the index.html file in your browser. You should see something like this:
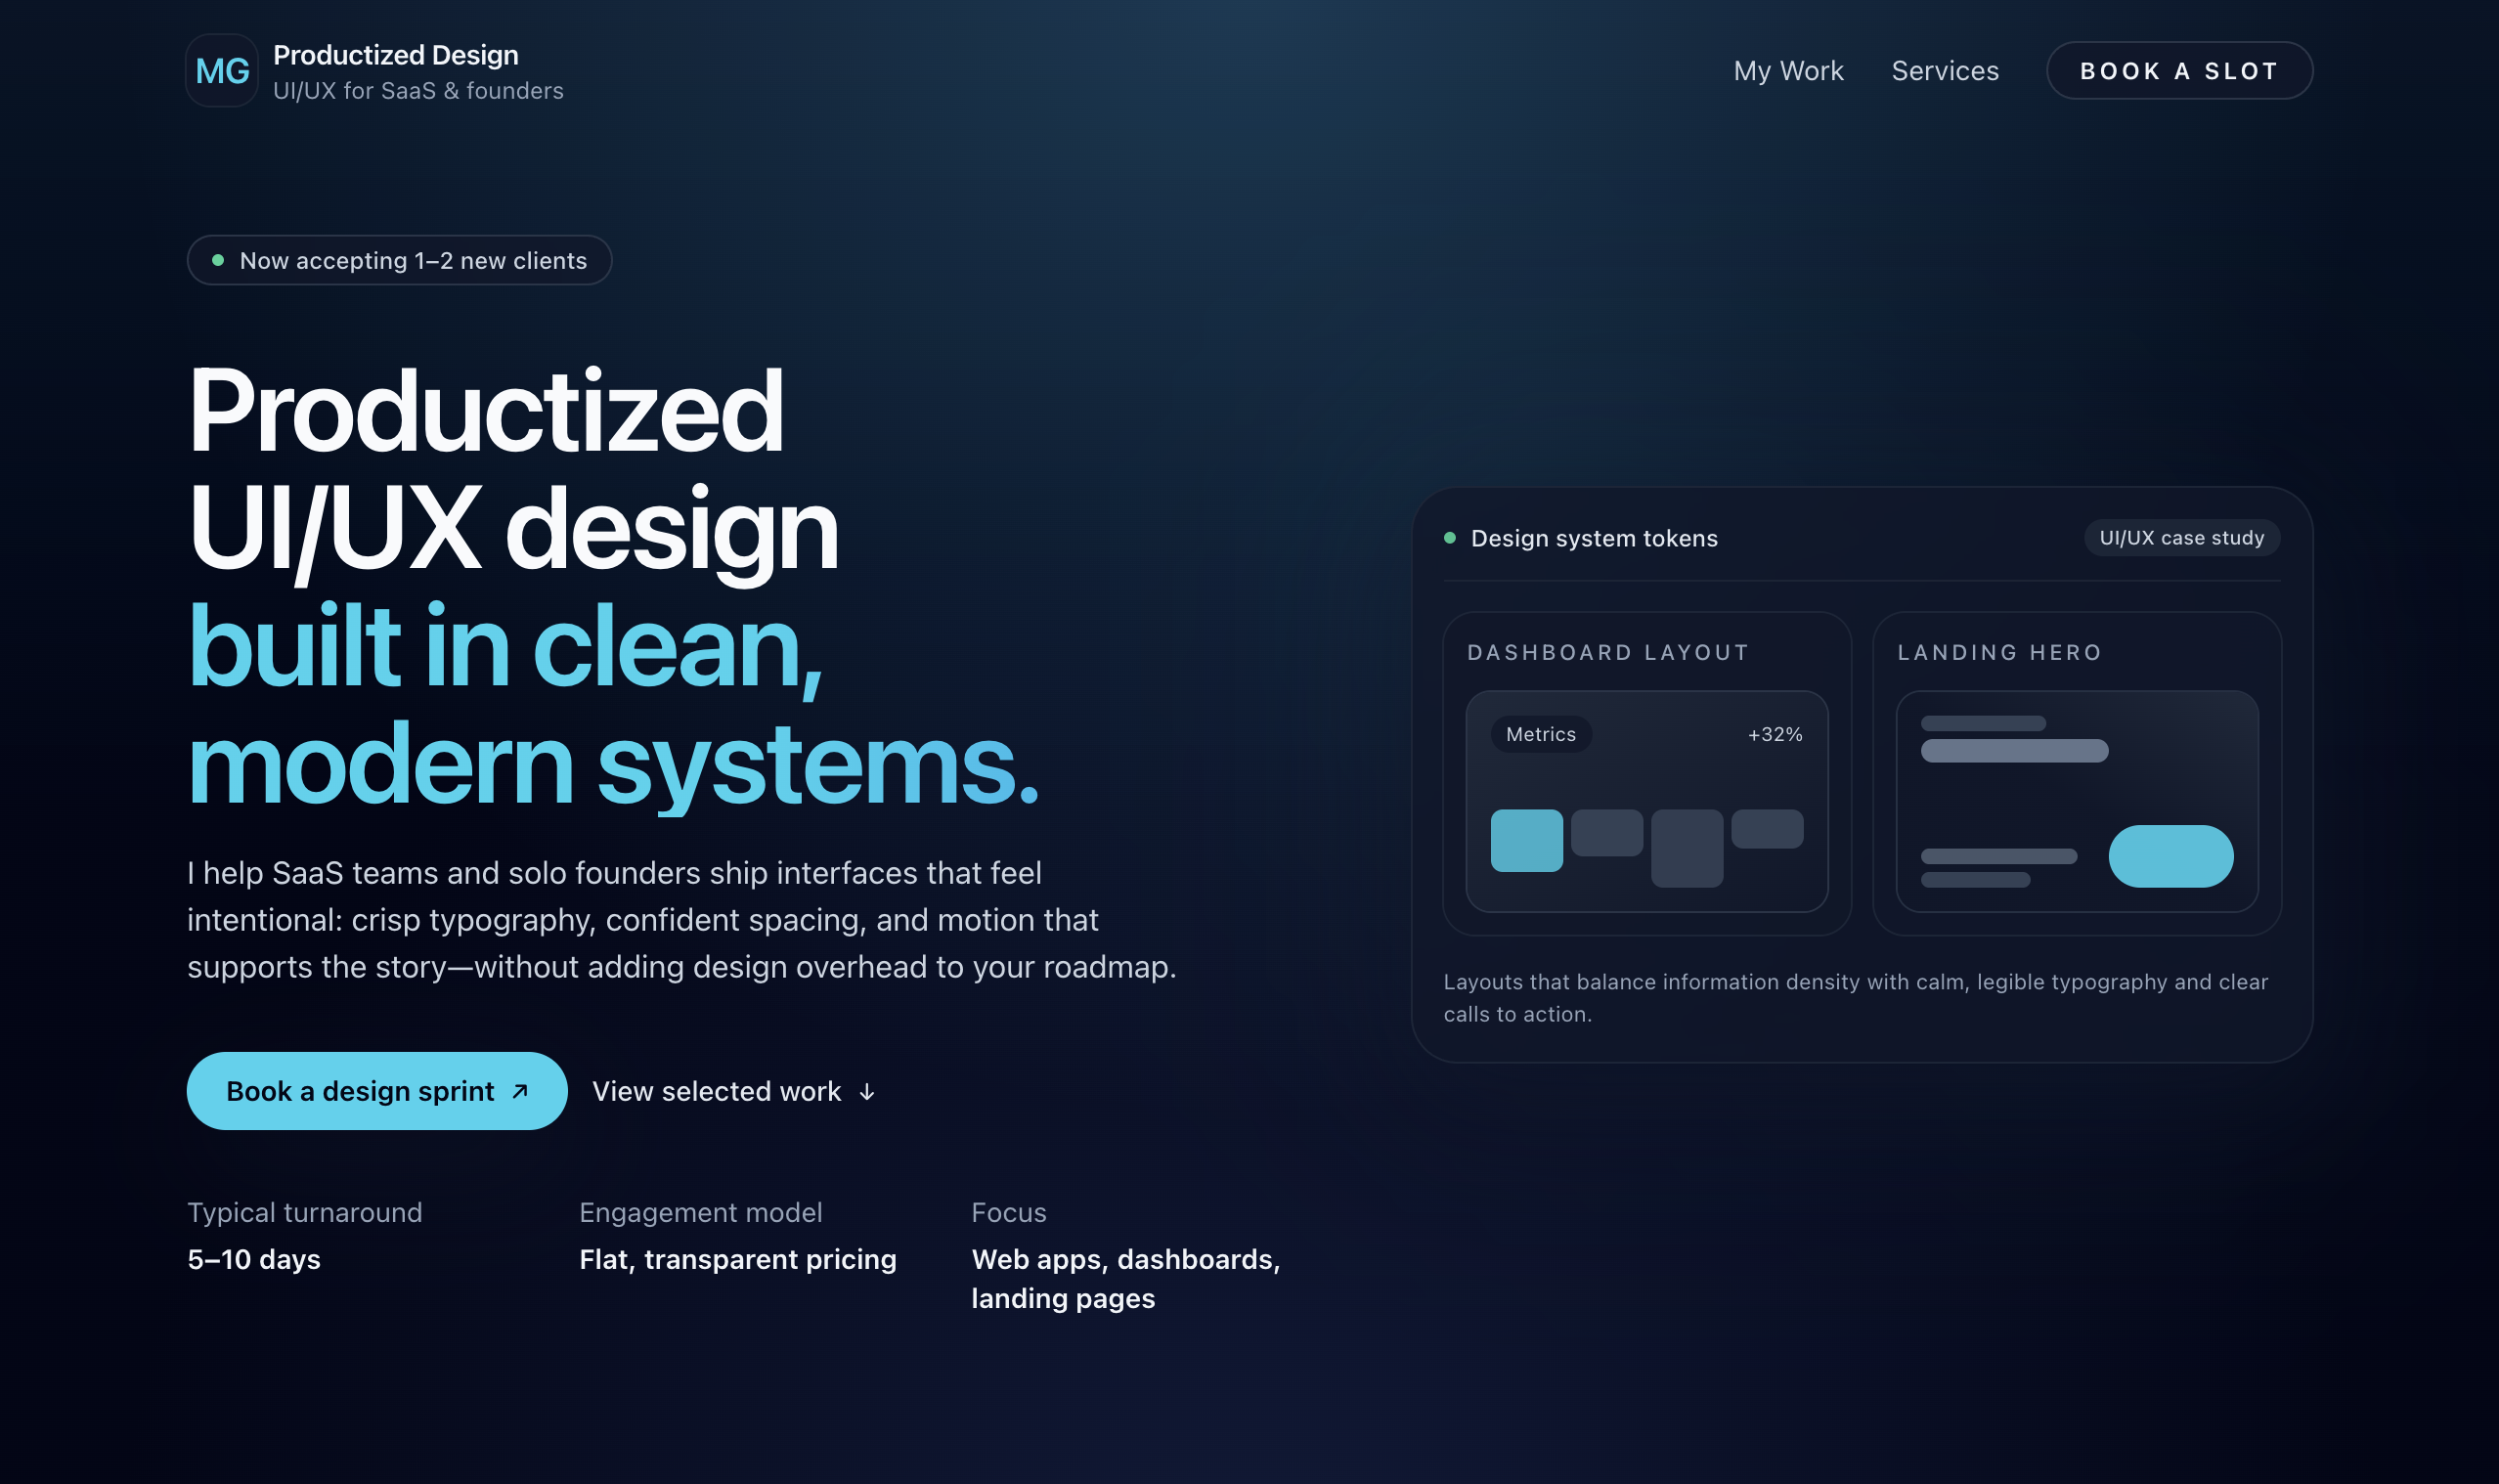
Want to customize the design? Just ask the AI.
FAQs: A Beginner’s Guide to Building & Publishing an App in 5 Minutes With Cursor AI
What is Cursor AI?
Cursor AI is an agentic Code Editor built on top of VS Code. Unlike other code editors, it focuses on Agentic Code editing rather than writing code manually. Cursor’s Agent mode can automatically explore and learn about your existing code, and make changes based on your prompts.
Is Cursor AI free to Use?
Cursor offers a generous free trier you can sign up for to try it out. It’s great for hobby projects, but if you want to work on some non-trivial, you will want to upgrade to a paid plan. Their paid plans start at $20 per month and allow access to all the latest AI models including Gemini, GPT, and Claude models.
What’s the difference between Cursor AI and GitHub Copilot?
GitHub Copilot is one of the earliest coding assistants on the market. They started well before Cursor. The main difference between the two is that Cursor focuses more on Agentic Coding while Copilot focuses more on chat-based assistance.
Cursor’s AI can act fully autonomously to finish any given task while Copilot lives up to its name by acting as an interactive pair programmer.
Can I use VS Code extensions in Cursor?
Yes, you can use any VS Code extension inside Cursor. This is because Cursor is a fork (built on top) of VS Code itself. All your favorite VS Code extensions and keyboard shortcuts will work out of the box with Cursor.
What types of apps can I build with Cursor AI?
You can build anything from a simple calculator to a complete web application. People have even used AI tools like Cursor to build entire Software-as-a-Service (SaaS) businesses.
Whether you want to create a portfolio for your services, or an eCommerce site to sell your eBooks, all it takes is a few messages with Cursor’s AI Agent. To customize the code generated by the AI, all you need to do is explain what changes you want to make in plain English.
Although Cursor is mostly used for building web applications, you can even use it to build mobile apps. It requires a bit more setup though.
What’s the difference between Cursor and Claude Code?
Claude Code is a command-line application created by Anthropic, the creators of Claude AI. It works in a similar fashion to Cursor. The biggest difference being that you have to interact with it through your terminal.
Claude Code is just as capable as Cursor when it comes to working with complex projects and building applications. You can use it to build almost any kind of applications. If you want to learn more about Claude, check out our tutorial on how to use Claude to build apps.
Do I need to know how to code to use Cursor AI?
You don’t need any prior experience with programming to use Cursor. Although programming experience helps, it’s not required at all. You can use Cursor to build applications by describing what you want to build in natural language.
Can I update my app after hosting it?
Yes, you can update your application as many times as you’d like. Just create a ZIP file of your latest built code and re-upload it again to Tiiny Host.
On your Tiiny Host dashboard, if you hover over the menu button next to your project name, you’ll see an option called ‘Replace existing file.’
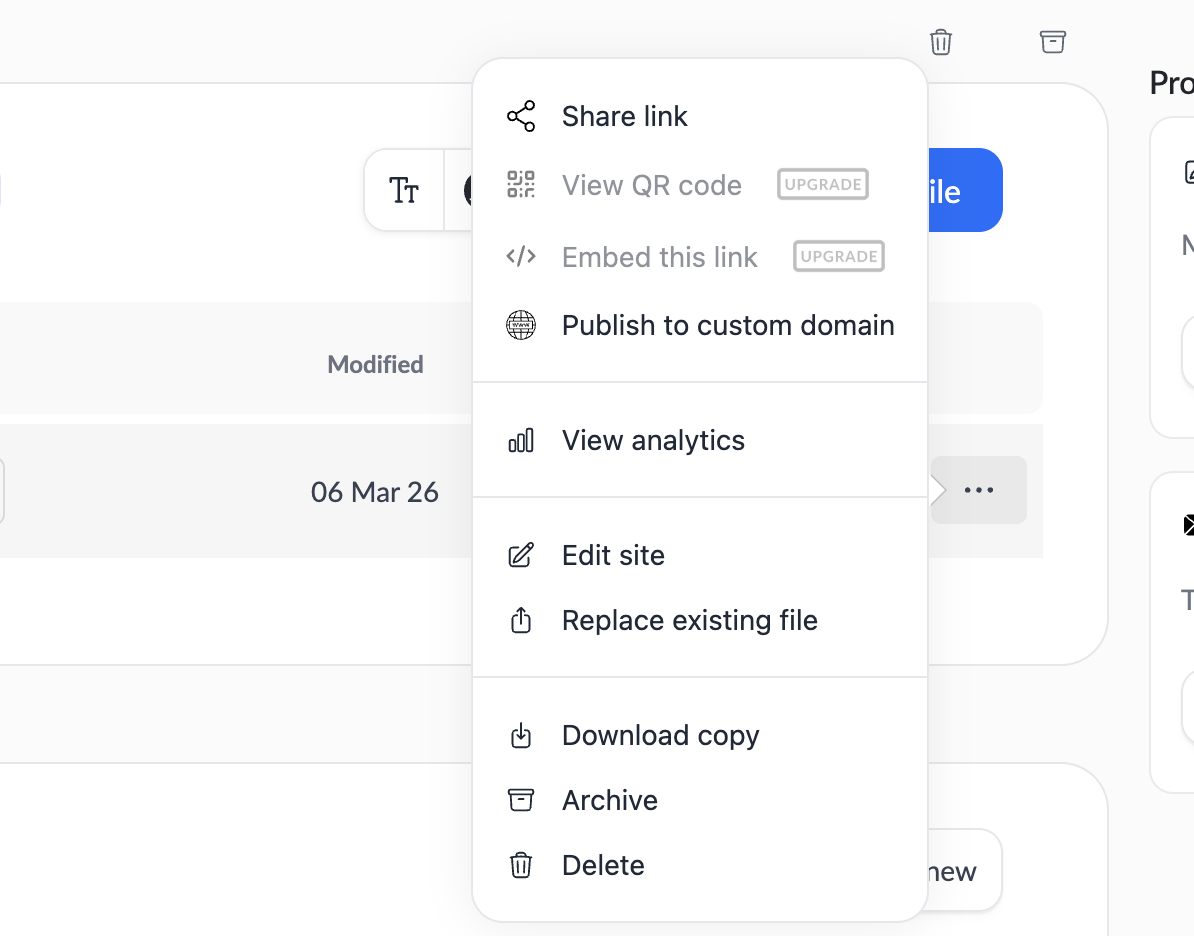
You can re-upload the latest version of your generated code to update the hosted version.
Is Tiiny Host free?
Tiiny Host offers a generous free plan. It’s great for sharing your apps with your friends. You can host all sorts of websites and files on it for free.
If, in the future, you want additional features such as analytics, higher upload limits, or more bandwidth, you can upgrade to one of the affordable premium plans.
Can I integrate external APIs into my app built with Cursor AI?
You can easily integrate any external APIs into your web applications with Cursor AI. All you need to do is ask Cursor to implement the necessary API calls. For most popular web applications, you won’t even need to look up the documentation. The AI Models Cursor uses already have the required knowledge for integrating popular APIs.
Can I monitor my app’s performance with Tiiny Host?
Tiiny Host offers simple built-in analytics that you can use to keep track of how many people have visited your site. You can also track where those visitors are coming from. There’s nothing to install or activate. These analytics come built-in with your Tiiny Host website.
Cursor vs VS Code: What’s the difference?
Cursor is a fork of the popular integrated development environment (IDE) Visual Studio Code. That means, it inherits all the features VS Code has to offer. And because it’s a fork of VS Code, you can install and use any plugins that are built for VS Code in Cursor.
Final Thoughts
Cursor AI is one of the best AI tools when it comes to building applications. It’s agent mode allows you to build and customize complex applications without touching a single line of code.
A button not working? Simply explain the issue in detail to Cursor and watch it fix the bug. Want to customize the color scheme to match your branding? Just supply Cursor with your brand colors and watch it do its magic.
With Cursor, you can build anything from a simple portfolio to a complex web application. All you have to do is explain your vision in plain English!

)